Building an IVR
An IVR or Interactive Voice Response is a menu of options presented to a caller, they then navigate that menu using the buttons on their keypad to send DTMF (Dual Tone Multi Frequency) signals. IVRs are the fundamental navigation method of Voice Call applications.
Each option on the IVR can direct the call to a different path, for example forwarding the call to a specific destination, playing a recorded piece of information or even triggering another service such as an SMS.
An IVR can have multiple levels to it, where selection of one option presents the user with more options, this can go on to an infinite depth! For this activity we will just create a single level IVR.
Initial Call Handling
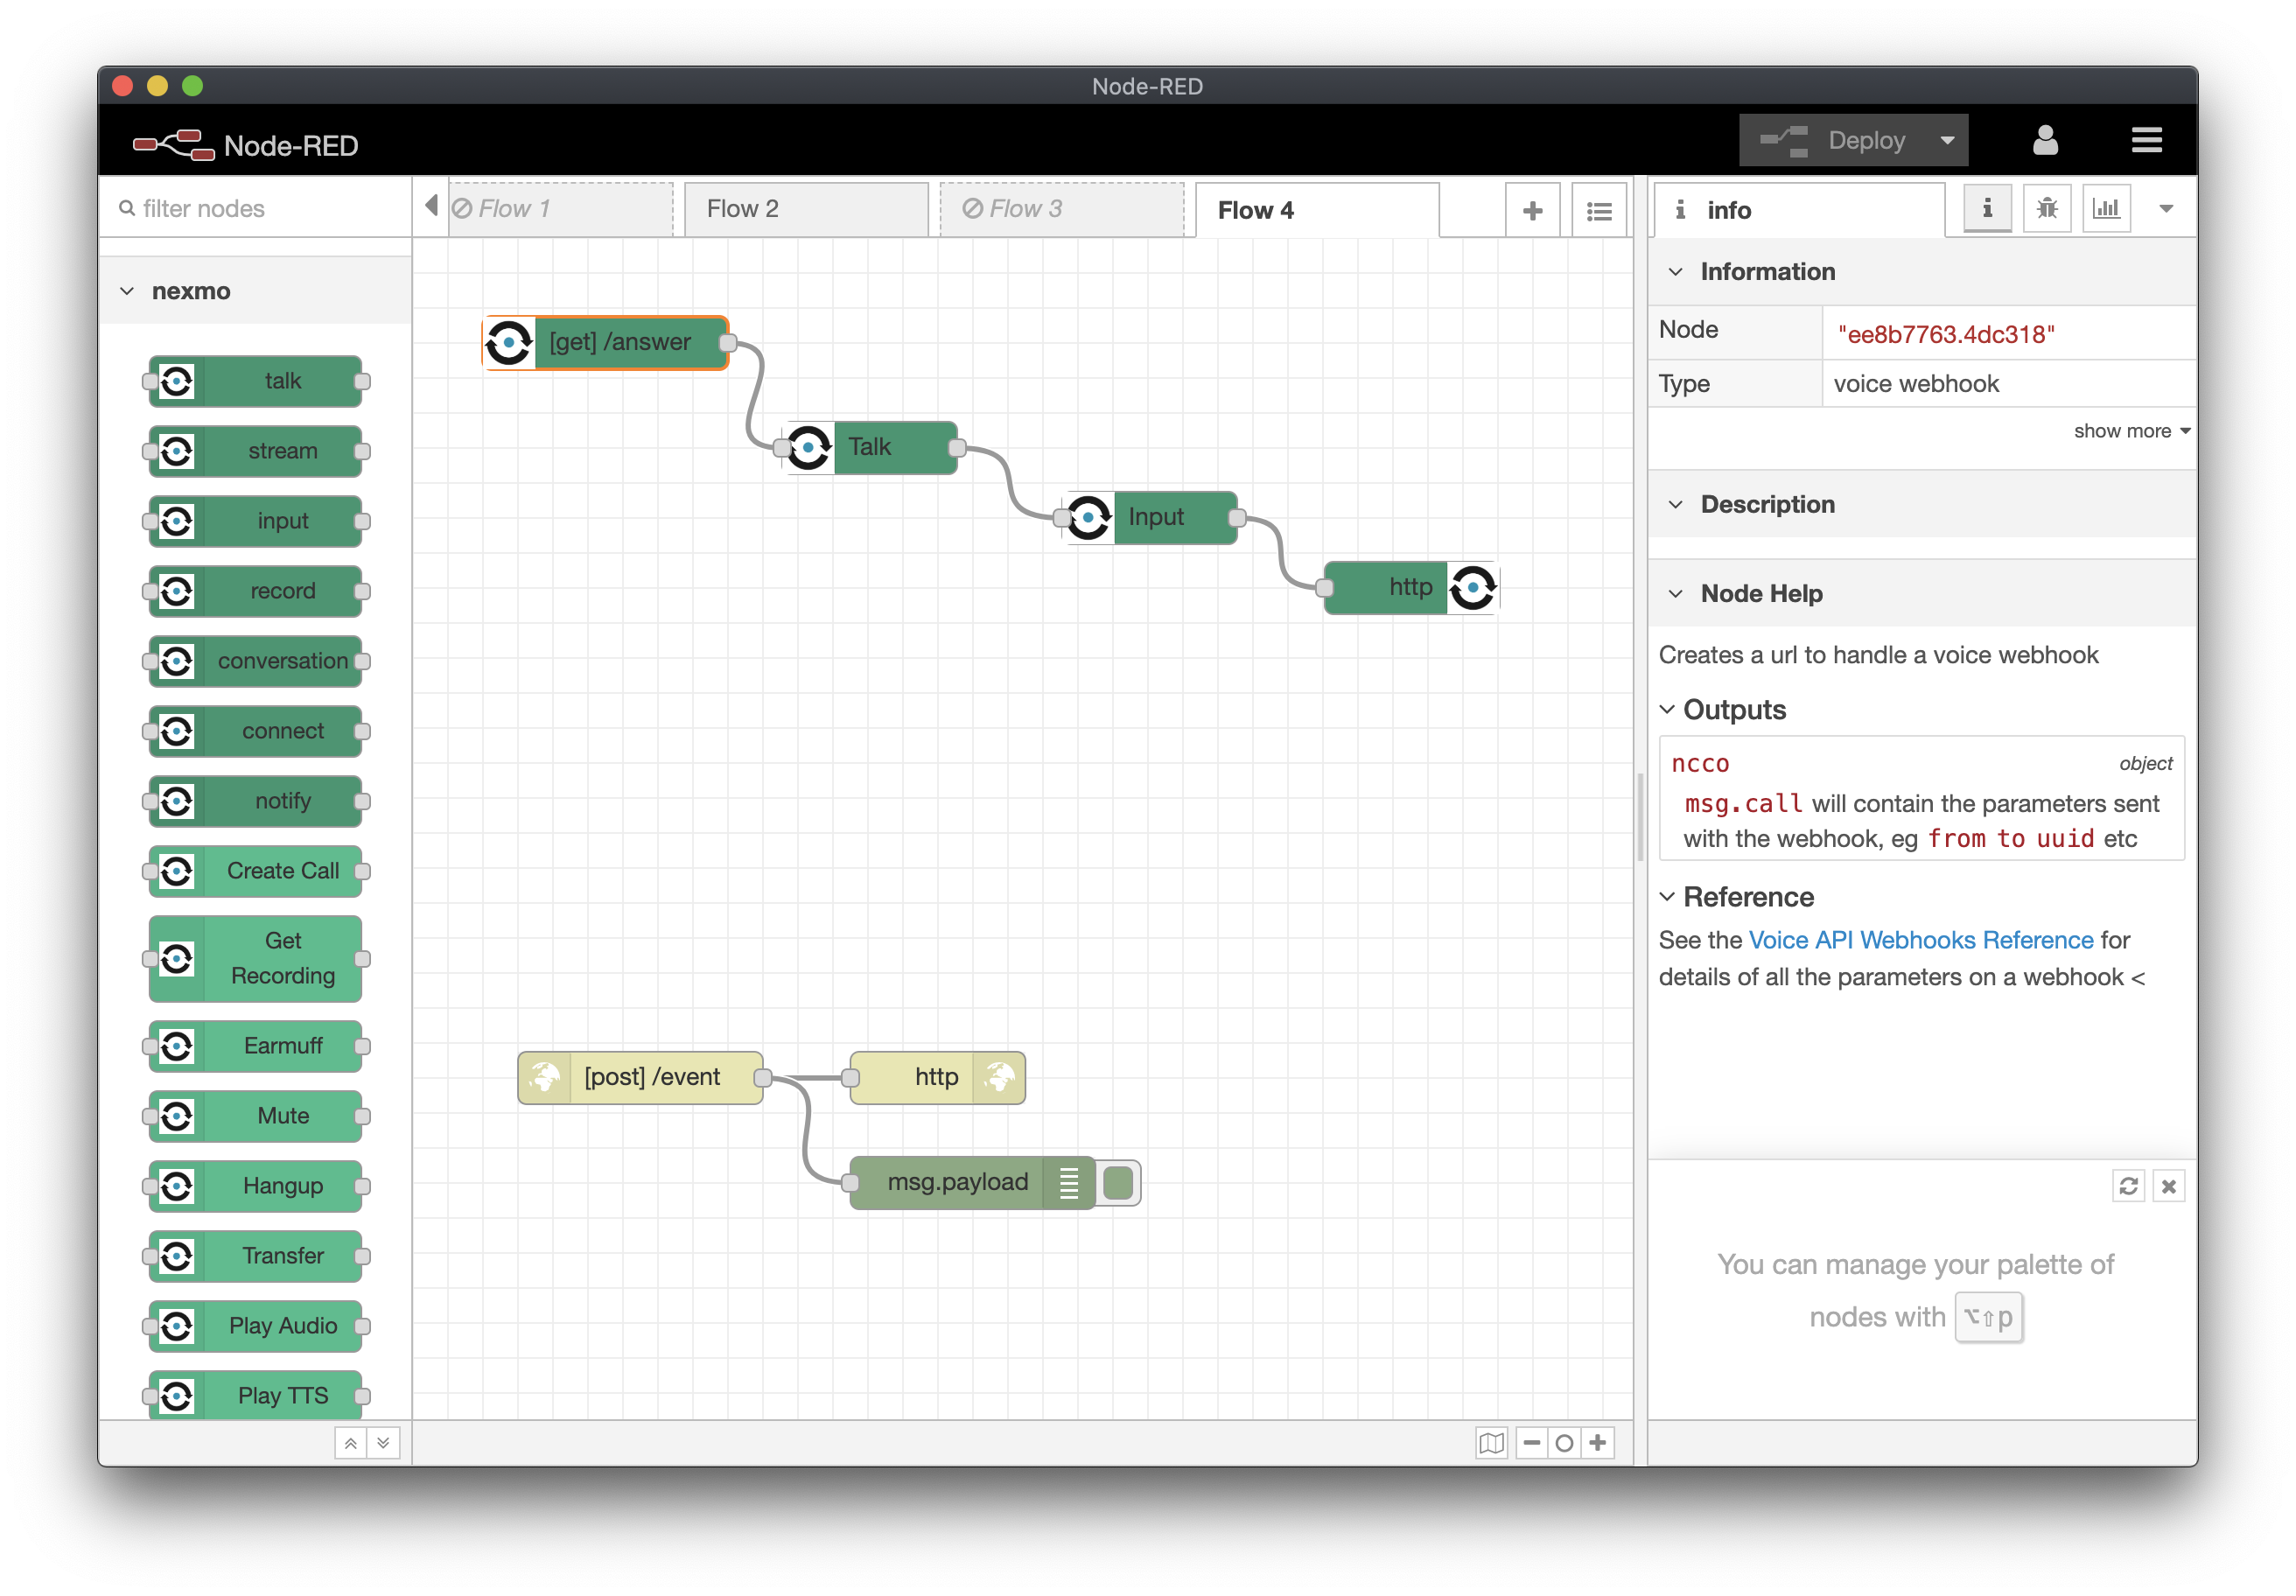
Re-use your flow from the earlier Incoming call example (probably Flow 2). We want to keep the /event webhook from our previous flow so we can see the events and errors.
We need to handle the incoming call. As before we will start with a “voice webhook” listening on
/answer.In response to the webhook we will return an NCCO made up of a talk node that tells the user the options, followed an input node to collect the user’s choice.
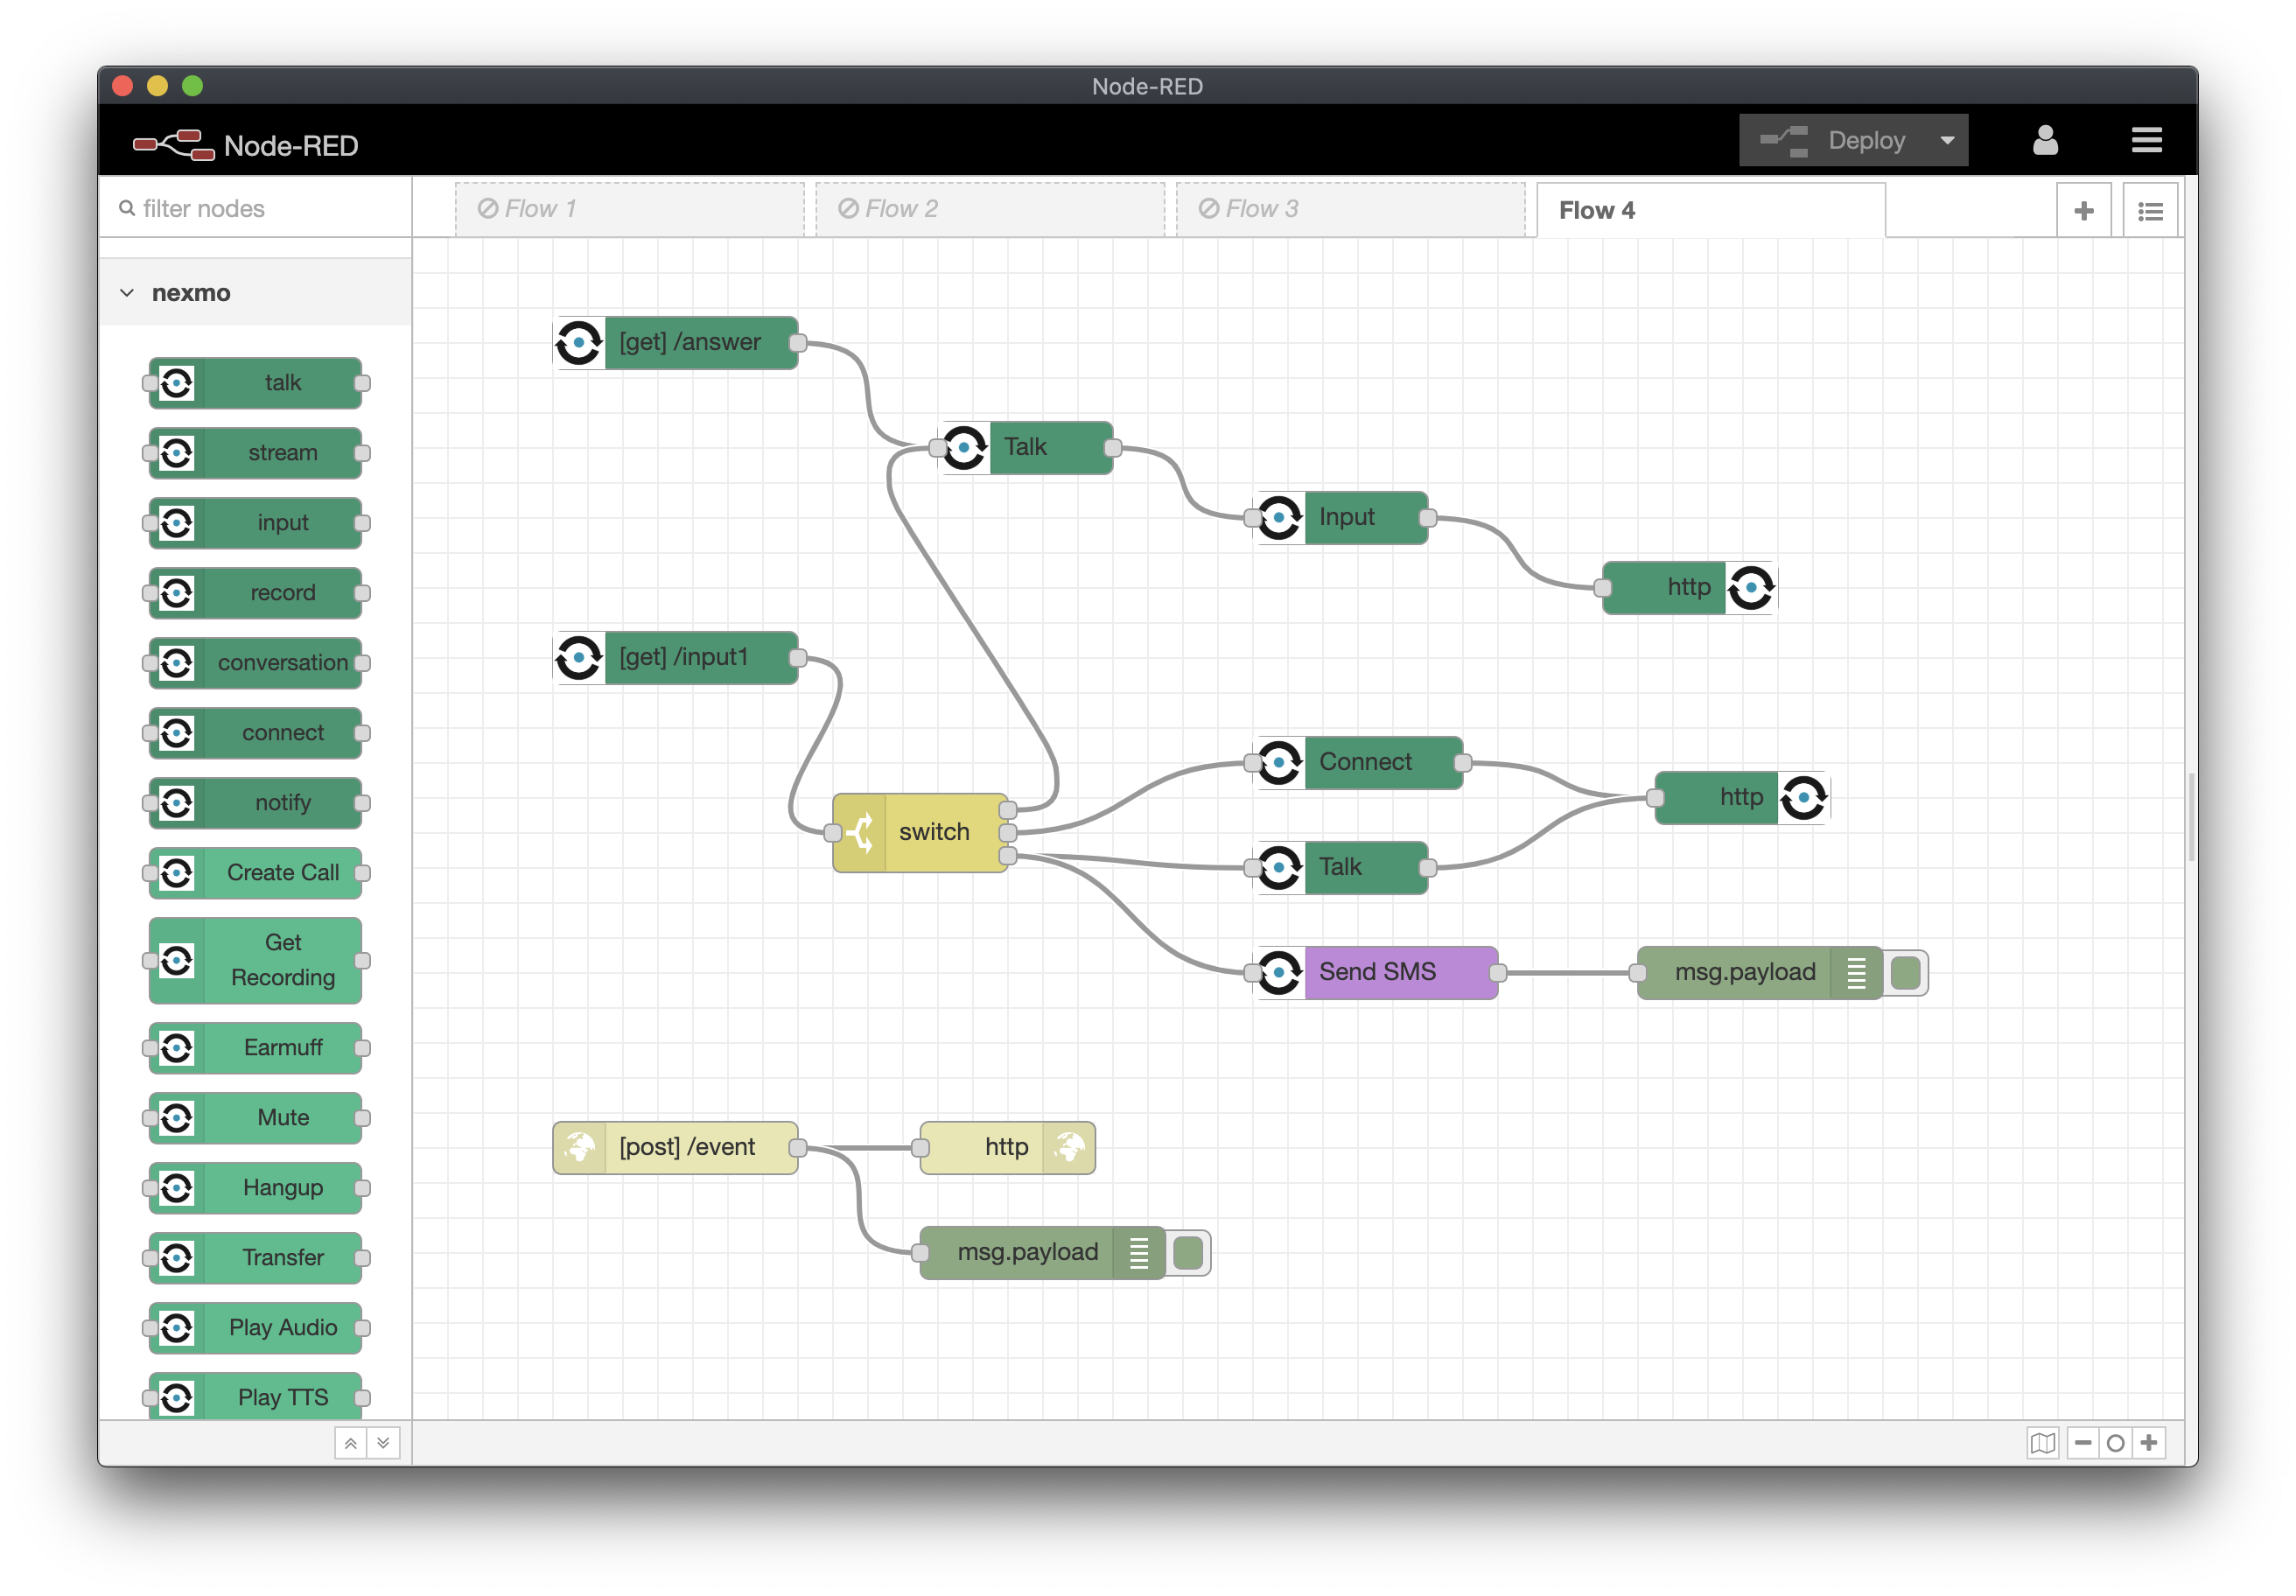
Your Flow should look like this:
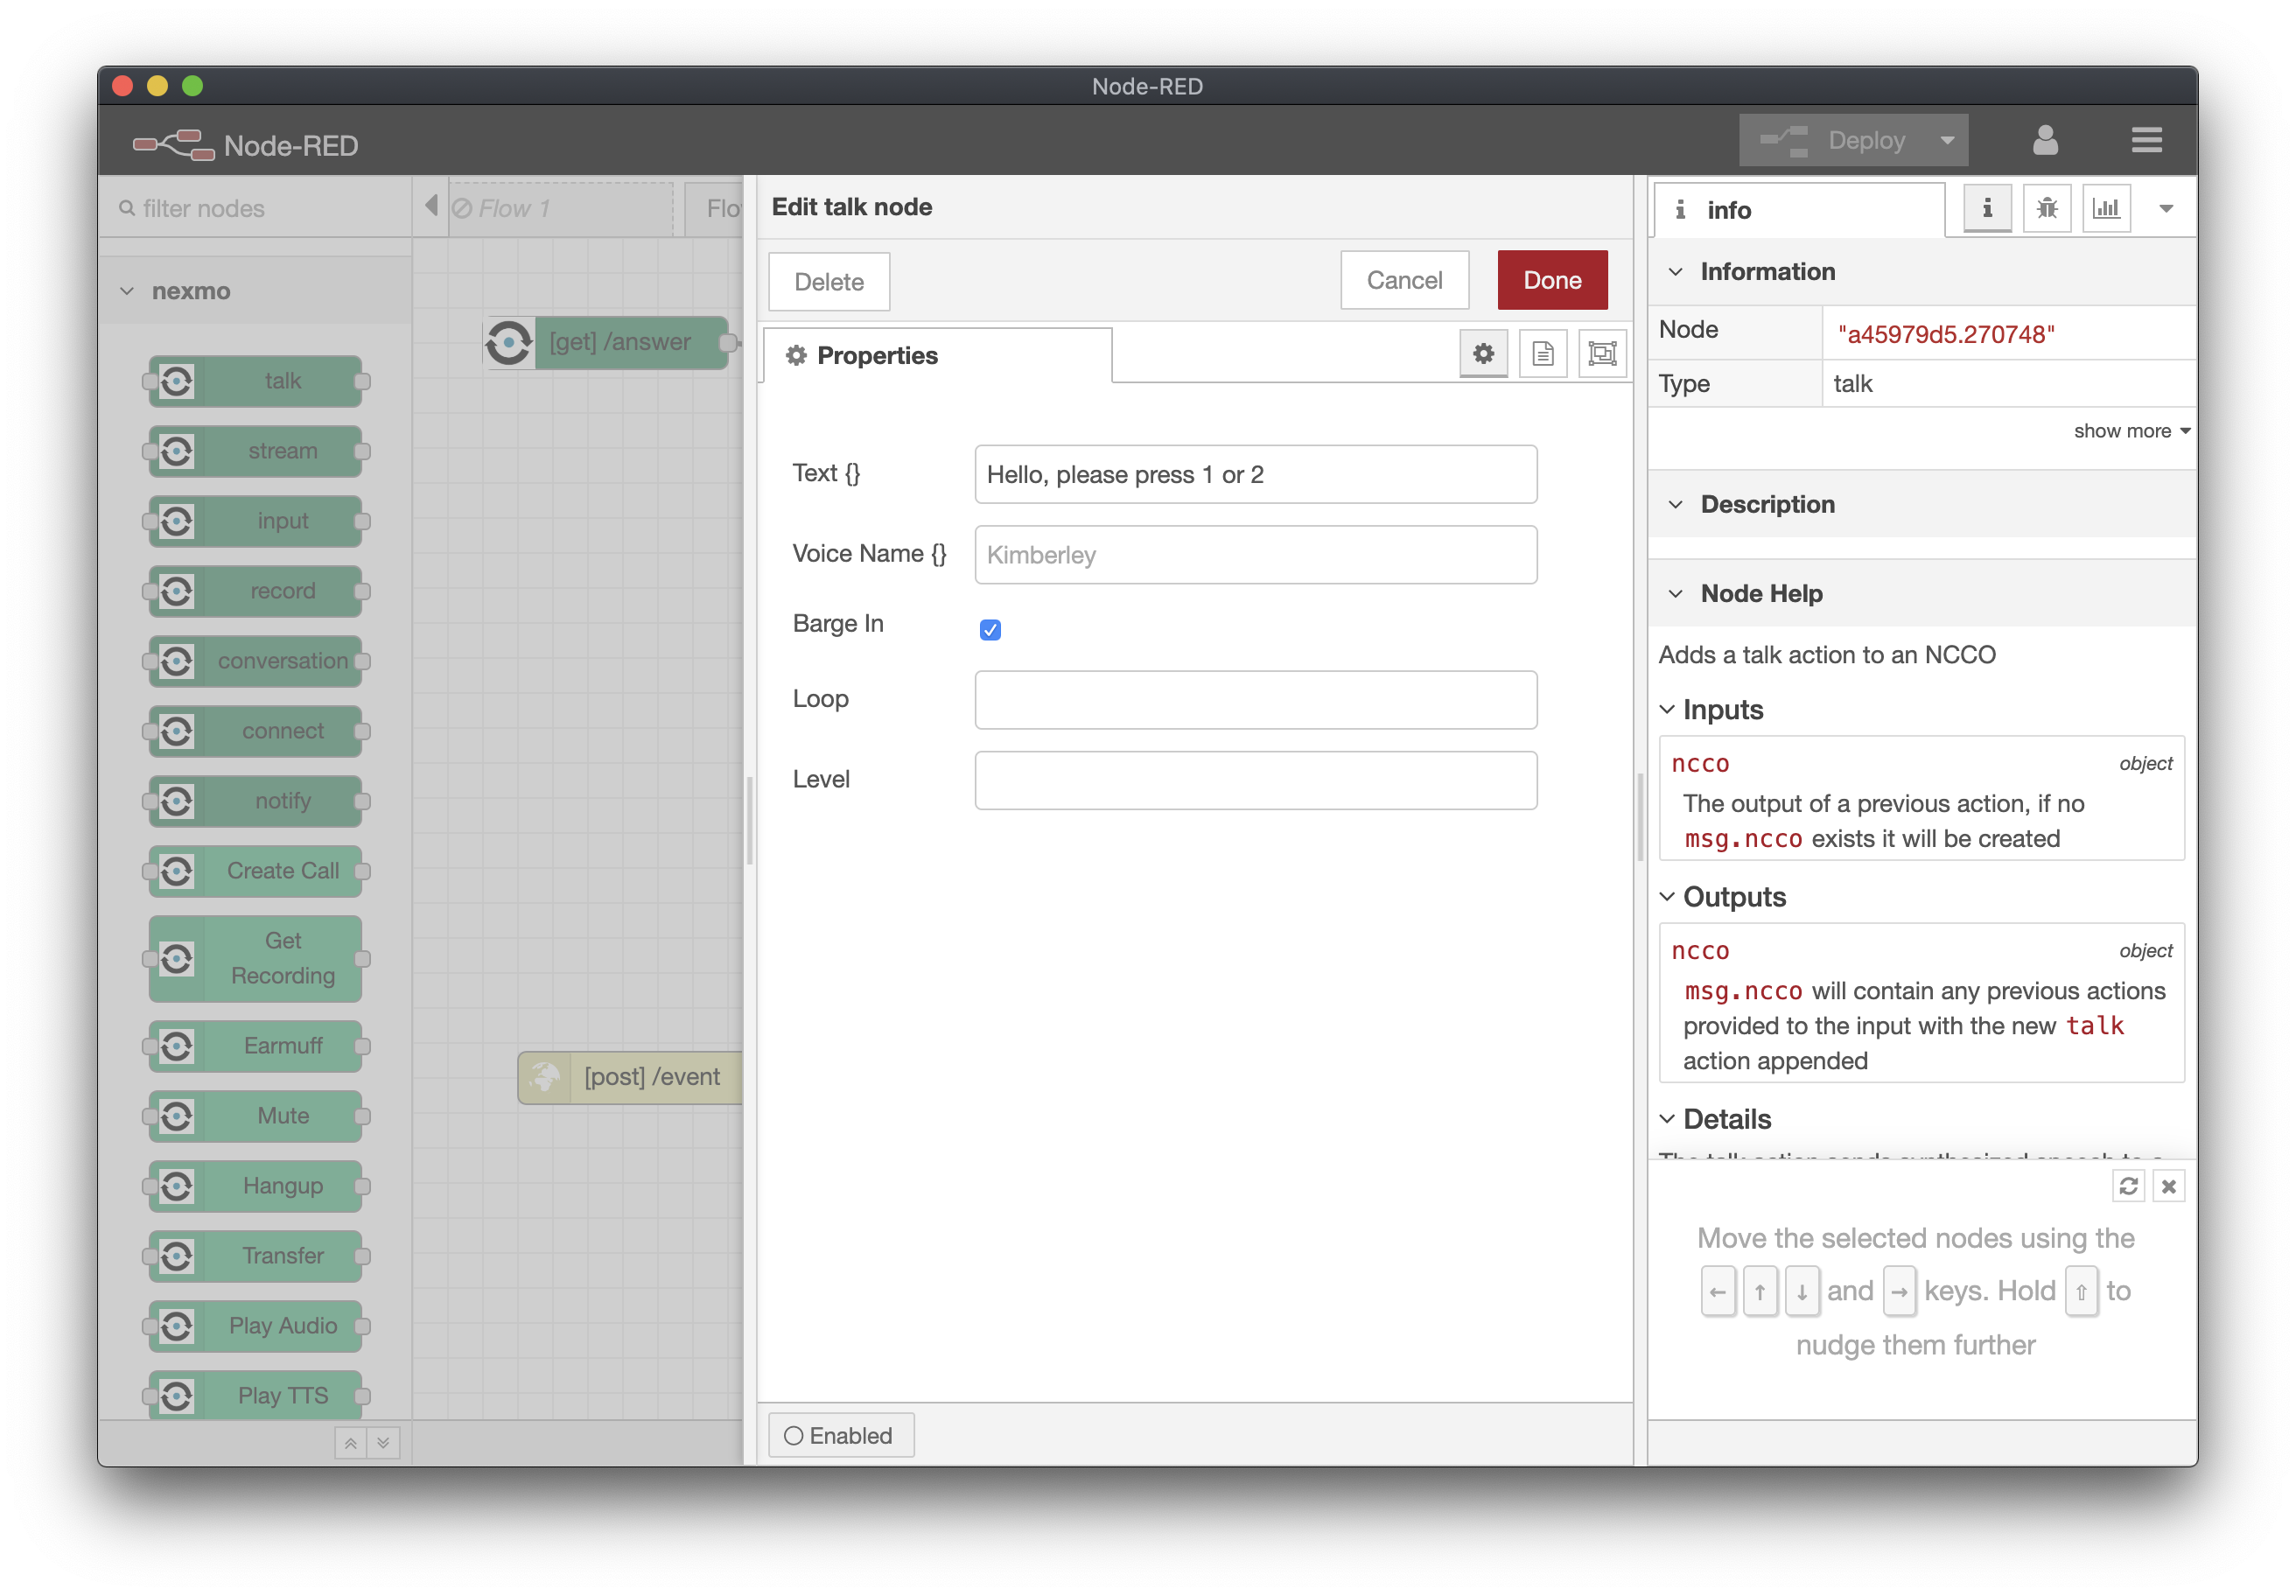
Next we need to configure the nodes we added, starting with the talk node.
- We will use the “Text” field to greet the caller and then offer them our options, something like “Hello please press 1 or 2” will suffice for now. We can go back and edit the greeting once we have all our options.
- Choose a voice name or just leave this as the default.
- This time we are also going to tick the Barge In option, what this does is it allows the caller to send their input before the text has finished being read, its very useful in an IVR and prevents people from having to listen to a long list of options.
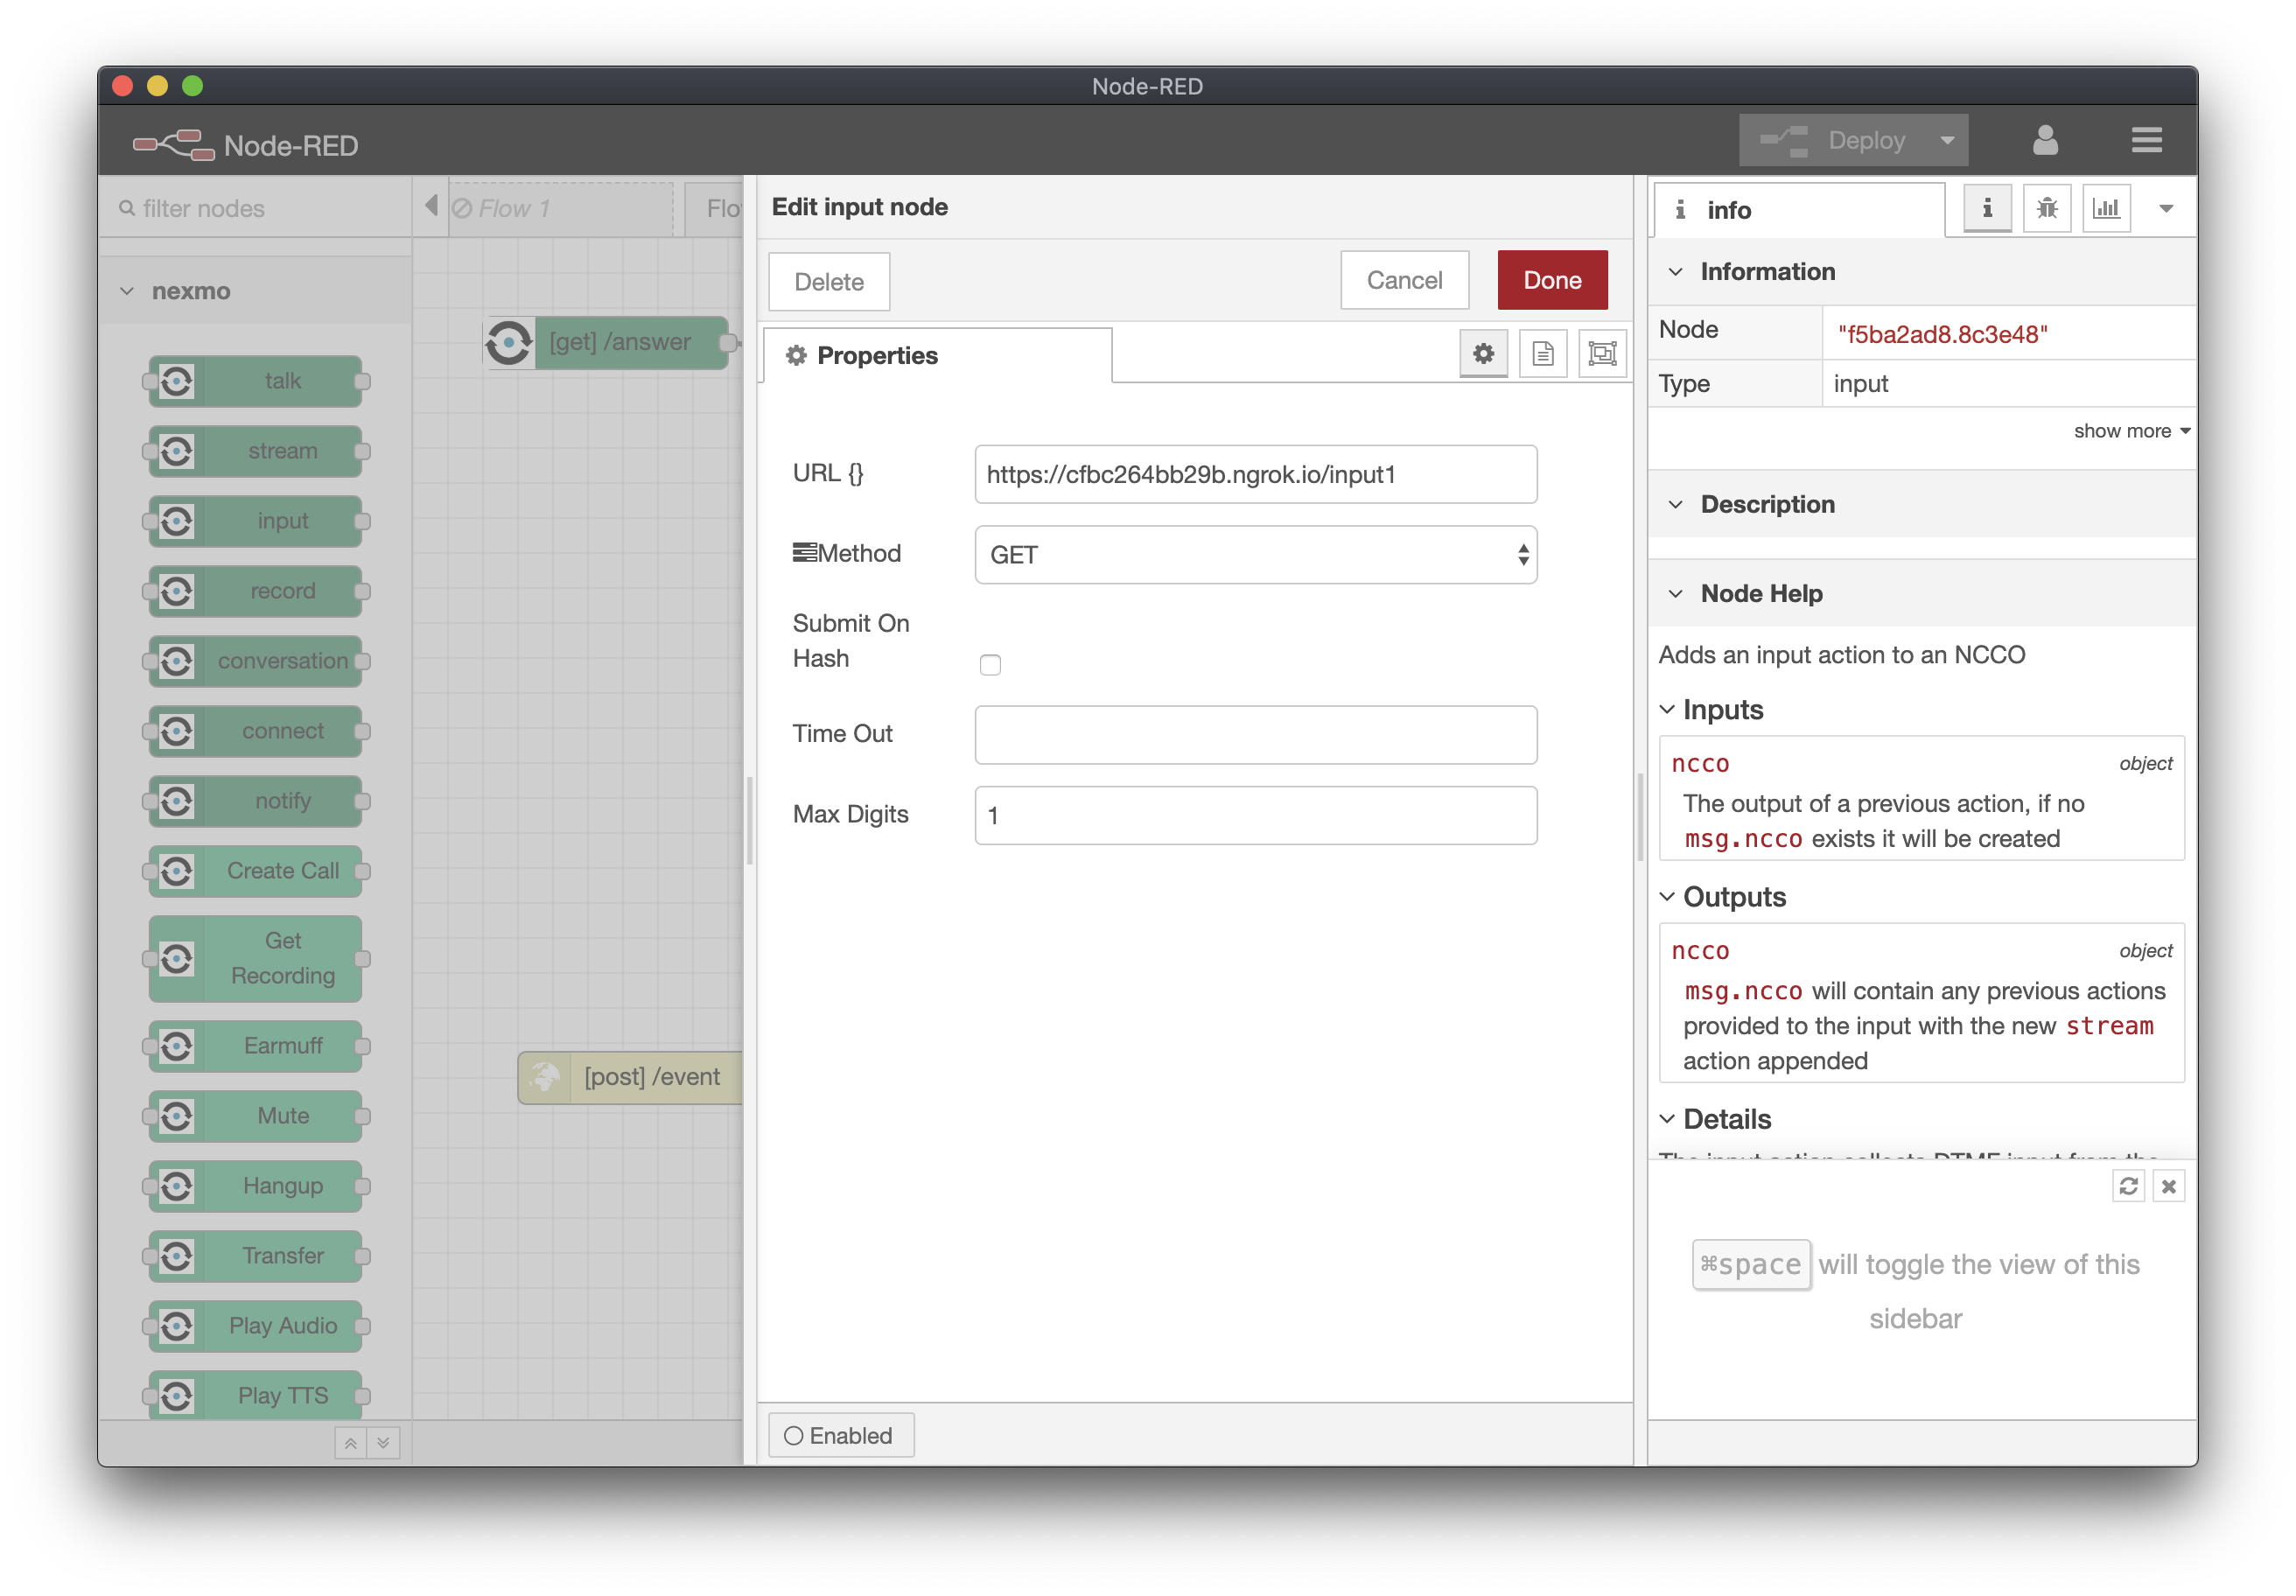
Next we configure the input node, Once the user has entered the required number of digits those will be sent as a new webhook, so we need to configure where that webhook should be sent.
In the URL field, enter the full address of your NodeRED instance followed by
/input1(e.g.https://cfbc264bb29b.ngrok.io/input1). We use/input1because if we were to later create a second level to our IVR we would need to send that input to a different address, e.g./input2.Set the method to GET. We can leave Submit on Hash unchecked; this option causes the input to be sent when the user presses the # key e.g. for collecting something like an account number.
Again we will leave the timeout as the default, but we will set Max Digits to 1, this means that we only need the user to press a single key for the input to be sent, which means we can have a maximum of 9 options in our menu.
Handling the Input
Set up another voice webhook to handle the user input arriving from Vonage. It should be configured to listen for a GET on
/input1which corresponds to our setting in the input node above.The first thing we will do with this flow is to check what number the caller pressed and then branch our flow accordingly. We can do this using one of NodeRED’s built in nodes, the switch node. You’ll find switch in the “function” section of the palette.
To configure the switch node, the first thing we will do is set which property we want to switch on, in this case the digit(s) that the user pressed are sent in
msg.call.dtmf.We then need to set up routes for each option
- on the first option, use the dropdown to choose “is empty” so we can handle the case where we don’t get any user input. In this scenario Vonage will send the webhook with the timedout param set to true and
msg.call.dtmfwill be an empty string. - click the + add button at the bottom to add two additional options
- we will set up handlers for
== 1and== 2so that we can detect what number the user pressed. These become the second and third output points on the switch node.
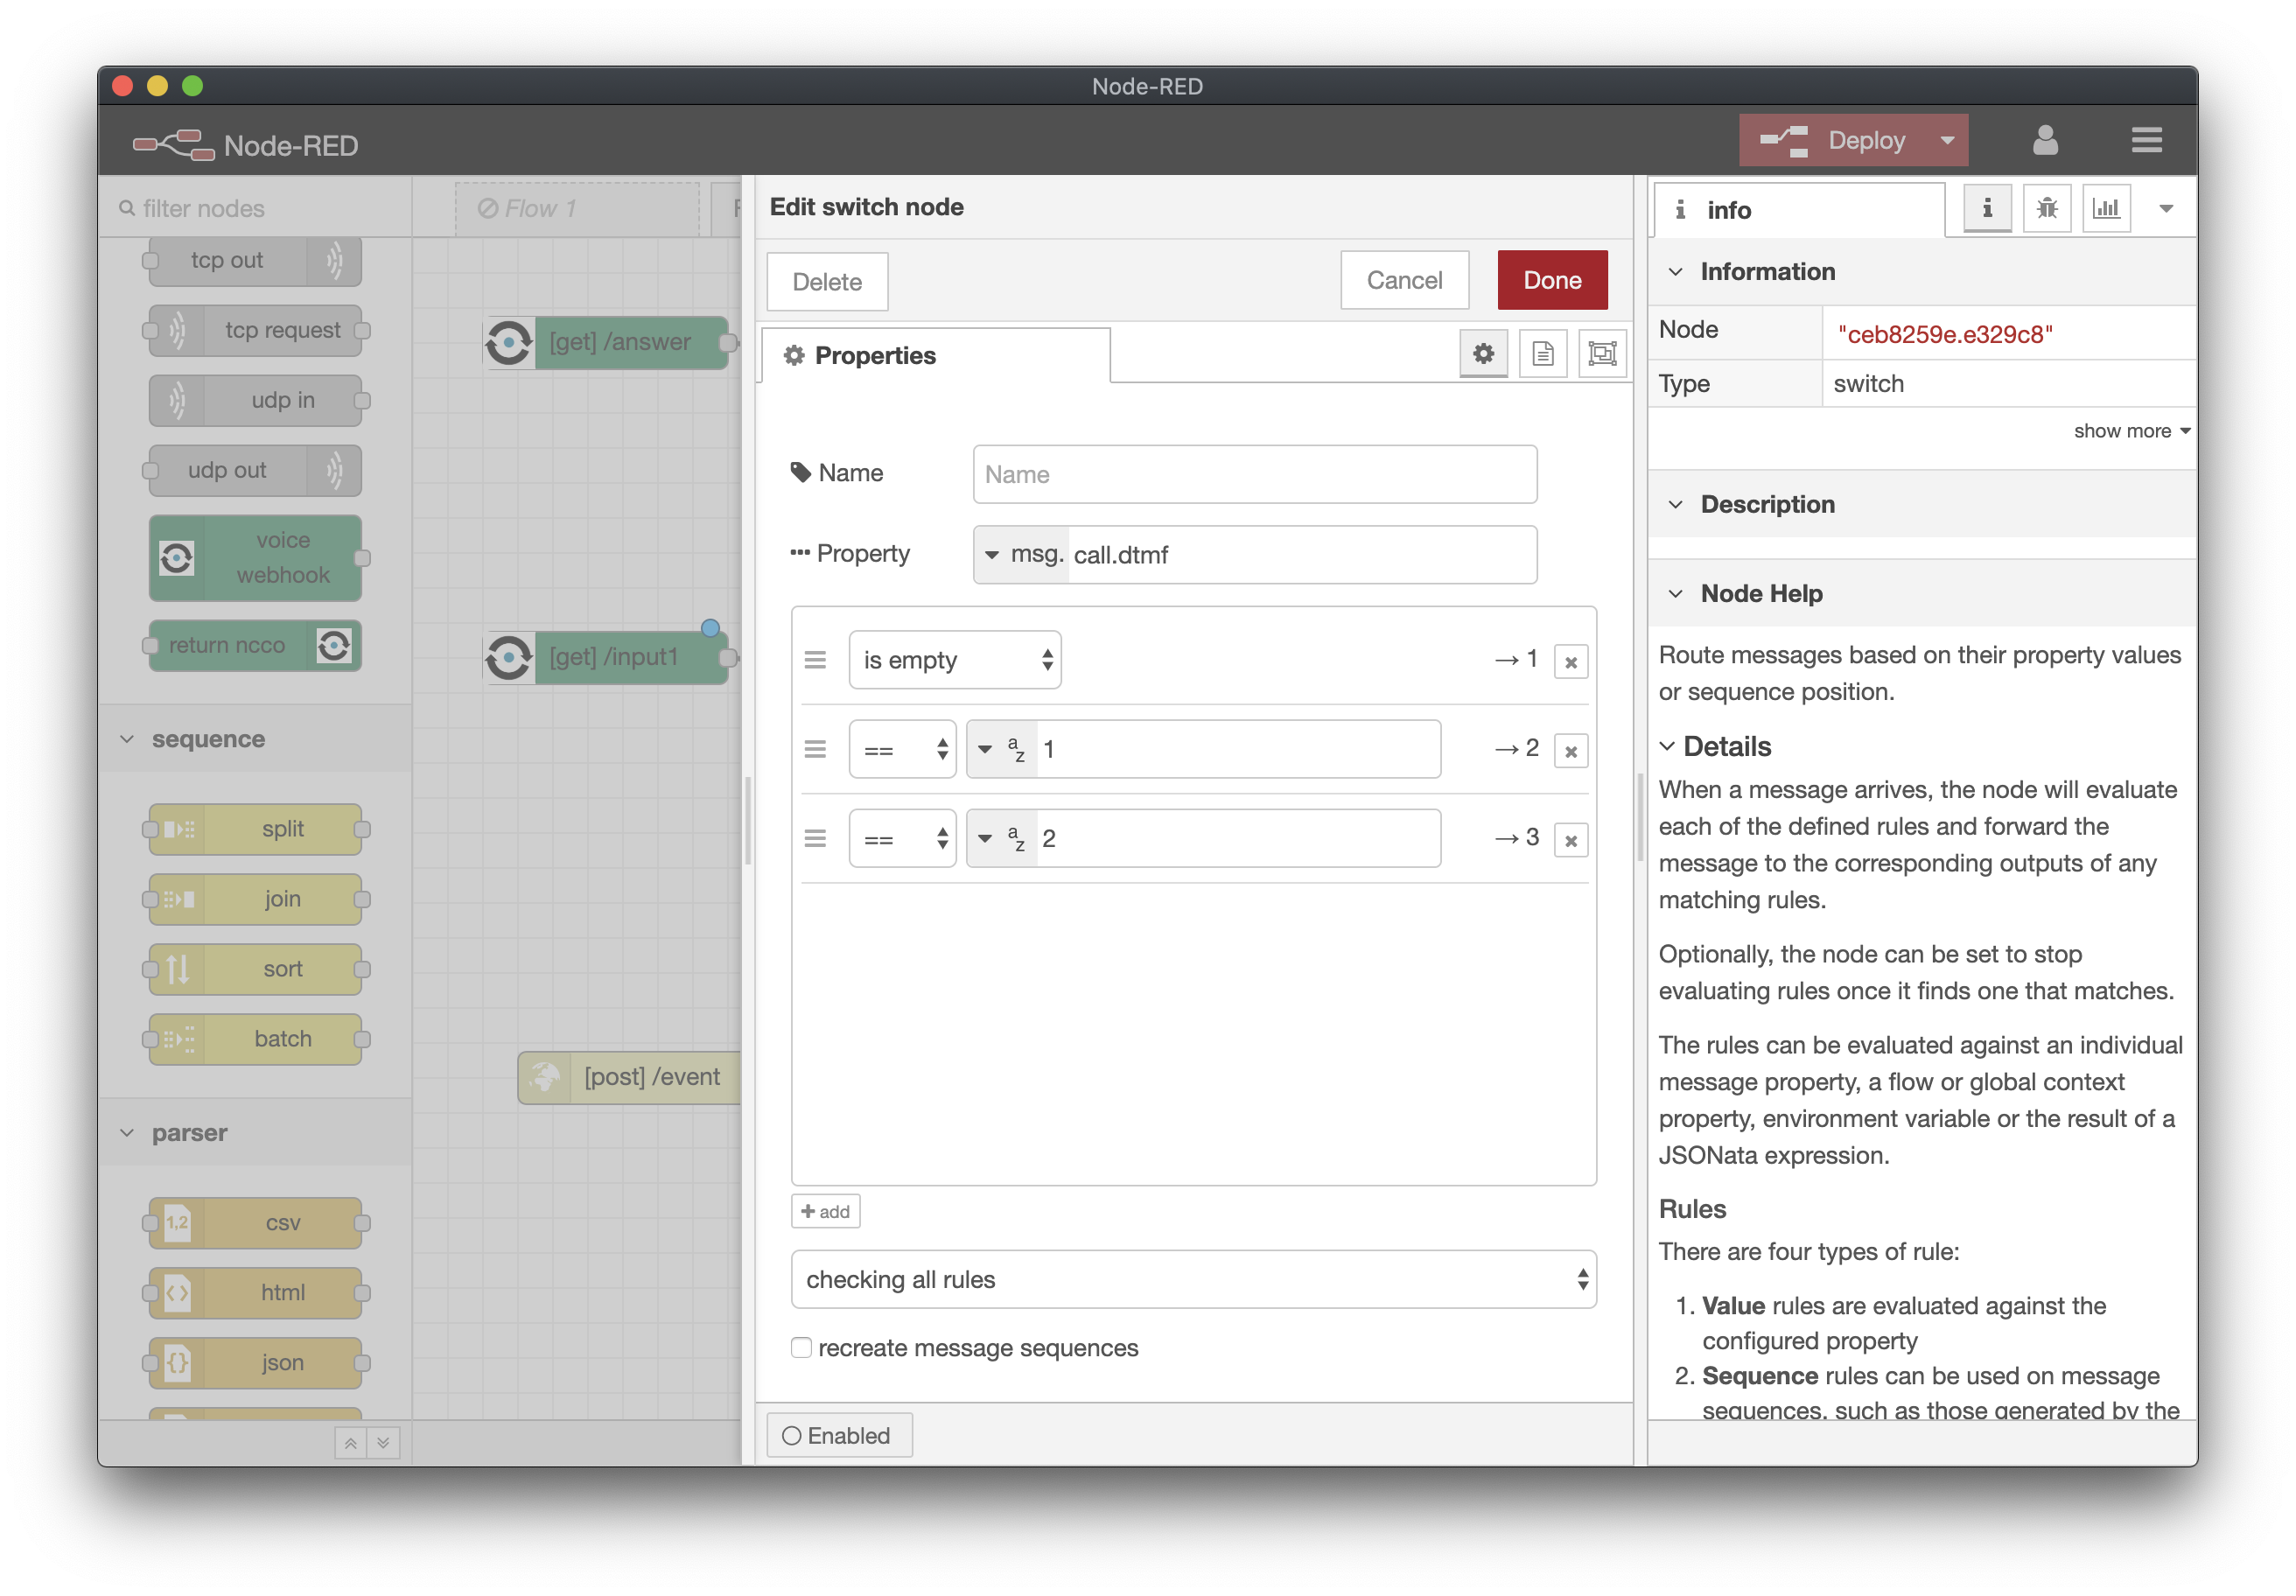
- on the first option, use the dropdown to choose “is empty” so we can handle the case where we don’t get any user input. In this scenario Vonage will send the webhook with the timedout param set to true and
Call Paths
You will notice that your switch node now has three output links, each one of these represents a different option that you configured. You can hover over them with the mouse to check what each one is. We’ll link them up to the actions we want each one to take.
Firstly we will deal with the is empty path, the simplest thing to do here is to re-present the user with the menu options, so we can simply connect this back to our initial talk node to read the options and then collect input.
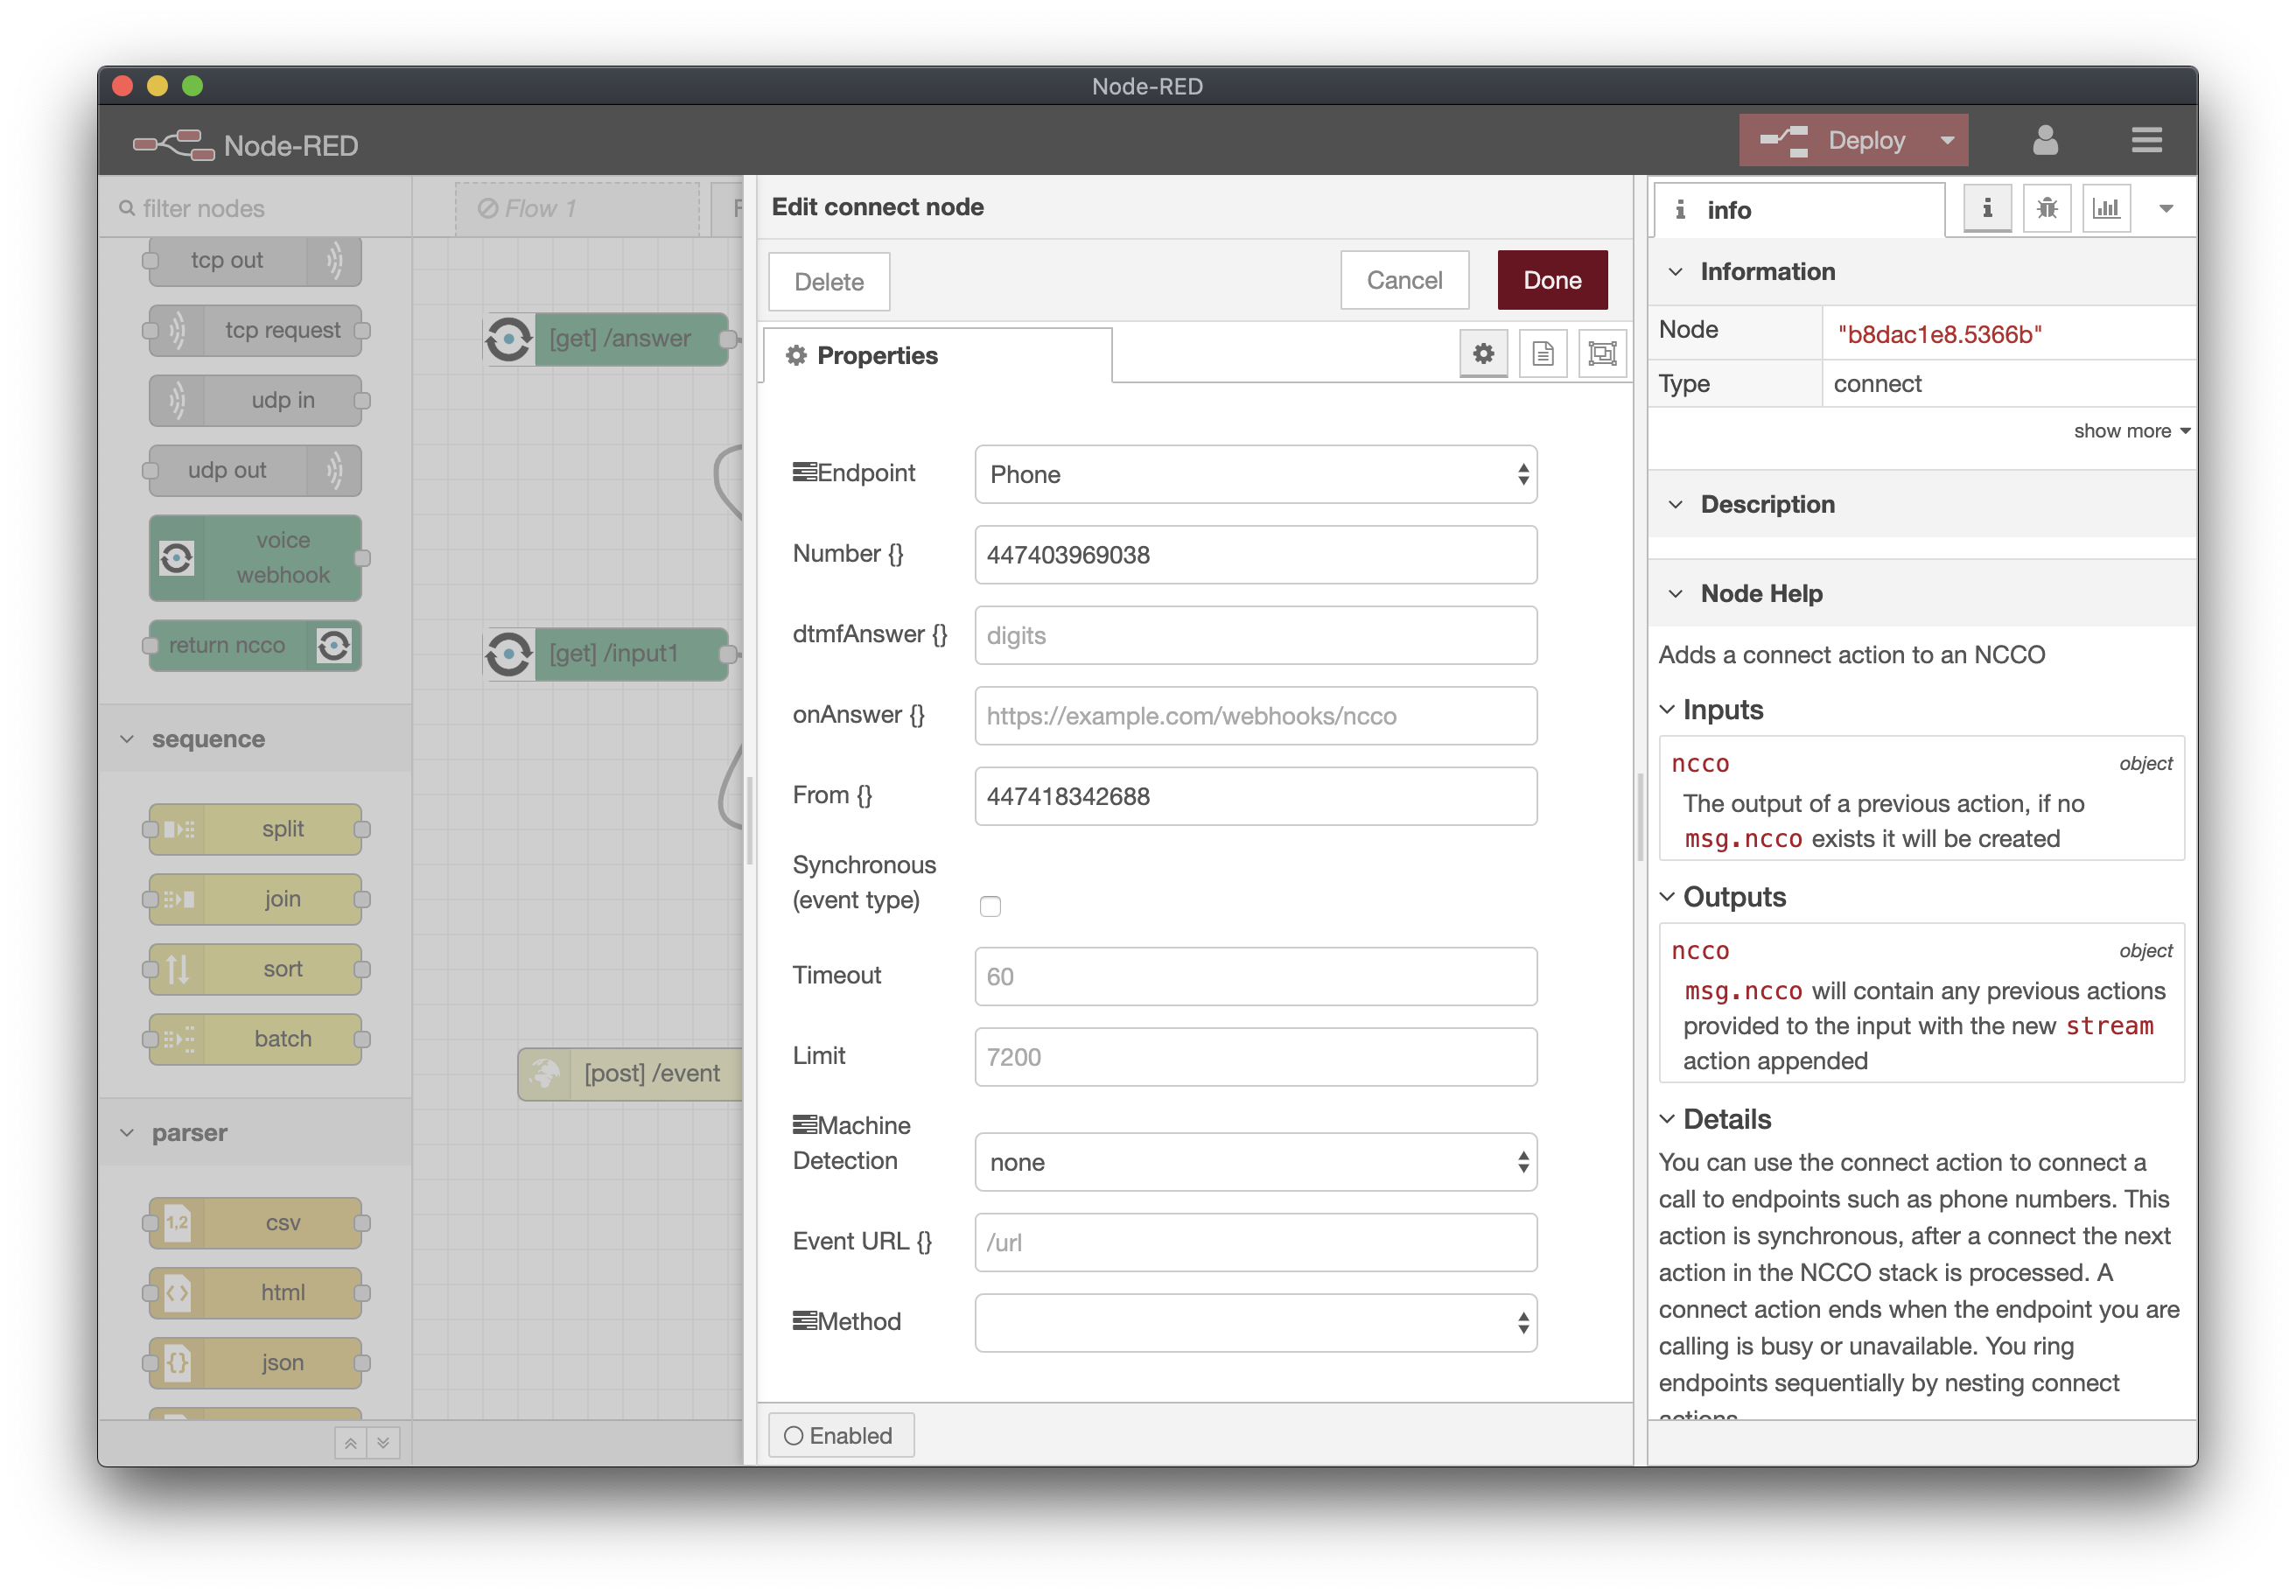
Next we need to do something if the caller presses 1. For this we will connect the caller to another number using a “connect” node from the palette. To configure this node to connect the call to another phone number:
- The Endpoint should be Phone.
- The Number should be another phone number you might have (ask the person next to you if you can use their cellphone number)
- The From should be your Vonage number.
For the 2nd option in our IVR we are going to play a short message to let the user know we will send them a link by SMS - and then actually send the SMS. Connect a talk node to the third output of the switch and configure this to say “I have sent you the link by SMS”.
Next we are also going to use the “send SMS” node, we can wire this up in parallel to the talk node so that the SMS is sent as soon as the user has pressed their input.
However we need to do some additional work, the
/input1webhook won’t get the caller ID of the person that is calling by default, so we need to go back to our input node and configure the URL to send that along with the user’s DTMF input.In the input node edit the URL from
/input1to be/input1?from={{msg.call.from}}this will then send the value of “from” as a new value also called “from” to our/input1handler.Now we can add our Send SMS node, select your Vonage credentials, set the To as
{{msg.call.from}}and the From as your Vonage number. In the text field you can enter a URL of your choice e.g. https://onehack-nodered.netlify.app/building-an-ivr, this will be the link we send to the user.We need to make sure that the last two paths from the Switch Node are both closed off with a “Return NCCO” node, you can use separate ones or they can both share the same node.
Finally we will add a debug node to the end of the Send SMS to log the response from Vonage.
Your Flow should look like this:
Click Deploy and then go ahead and call your virtual number a few times to try all the different options.
Expanding your IVR
Here are some suggestions for additional things to add to your IVR:
- Try adding a second layer of options to the menu, e.g. a choice of which link to send by SMS
- Add an option to connect the caller into a conversation node, this will give you a conference call. Test by having someone else call the same number
- Try recording a message from the caller
- If you are feeling very adventurous, set up the Email node to email you when someone chooses a particular option