Voice Calls
Voice calls are more complex than text messages because there are far more possibilities to control the call. The Voice API makes use of instruction sets known as Nexmo Call Control Objects (NCCOs) that enable you to tell the platform how to handle a call. An NCCO is either served up in response to a webhook for an incoming call, or it is passed on with the request to make a new call.
Voice Application Auth
Next, we will create a Voice Application from within NodeRED. The Voice Application contains a bundle of config for routing incoming calls to your NodeRED instance and also holds the authentication credentials to make outbound calls and other Voice API calls.
To configure auth for Voice API, we will select a CreateCall node from the palette, and open up its properties, click the pencil icon next to the Add new nexmovoiceapp menu.
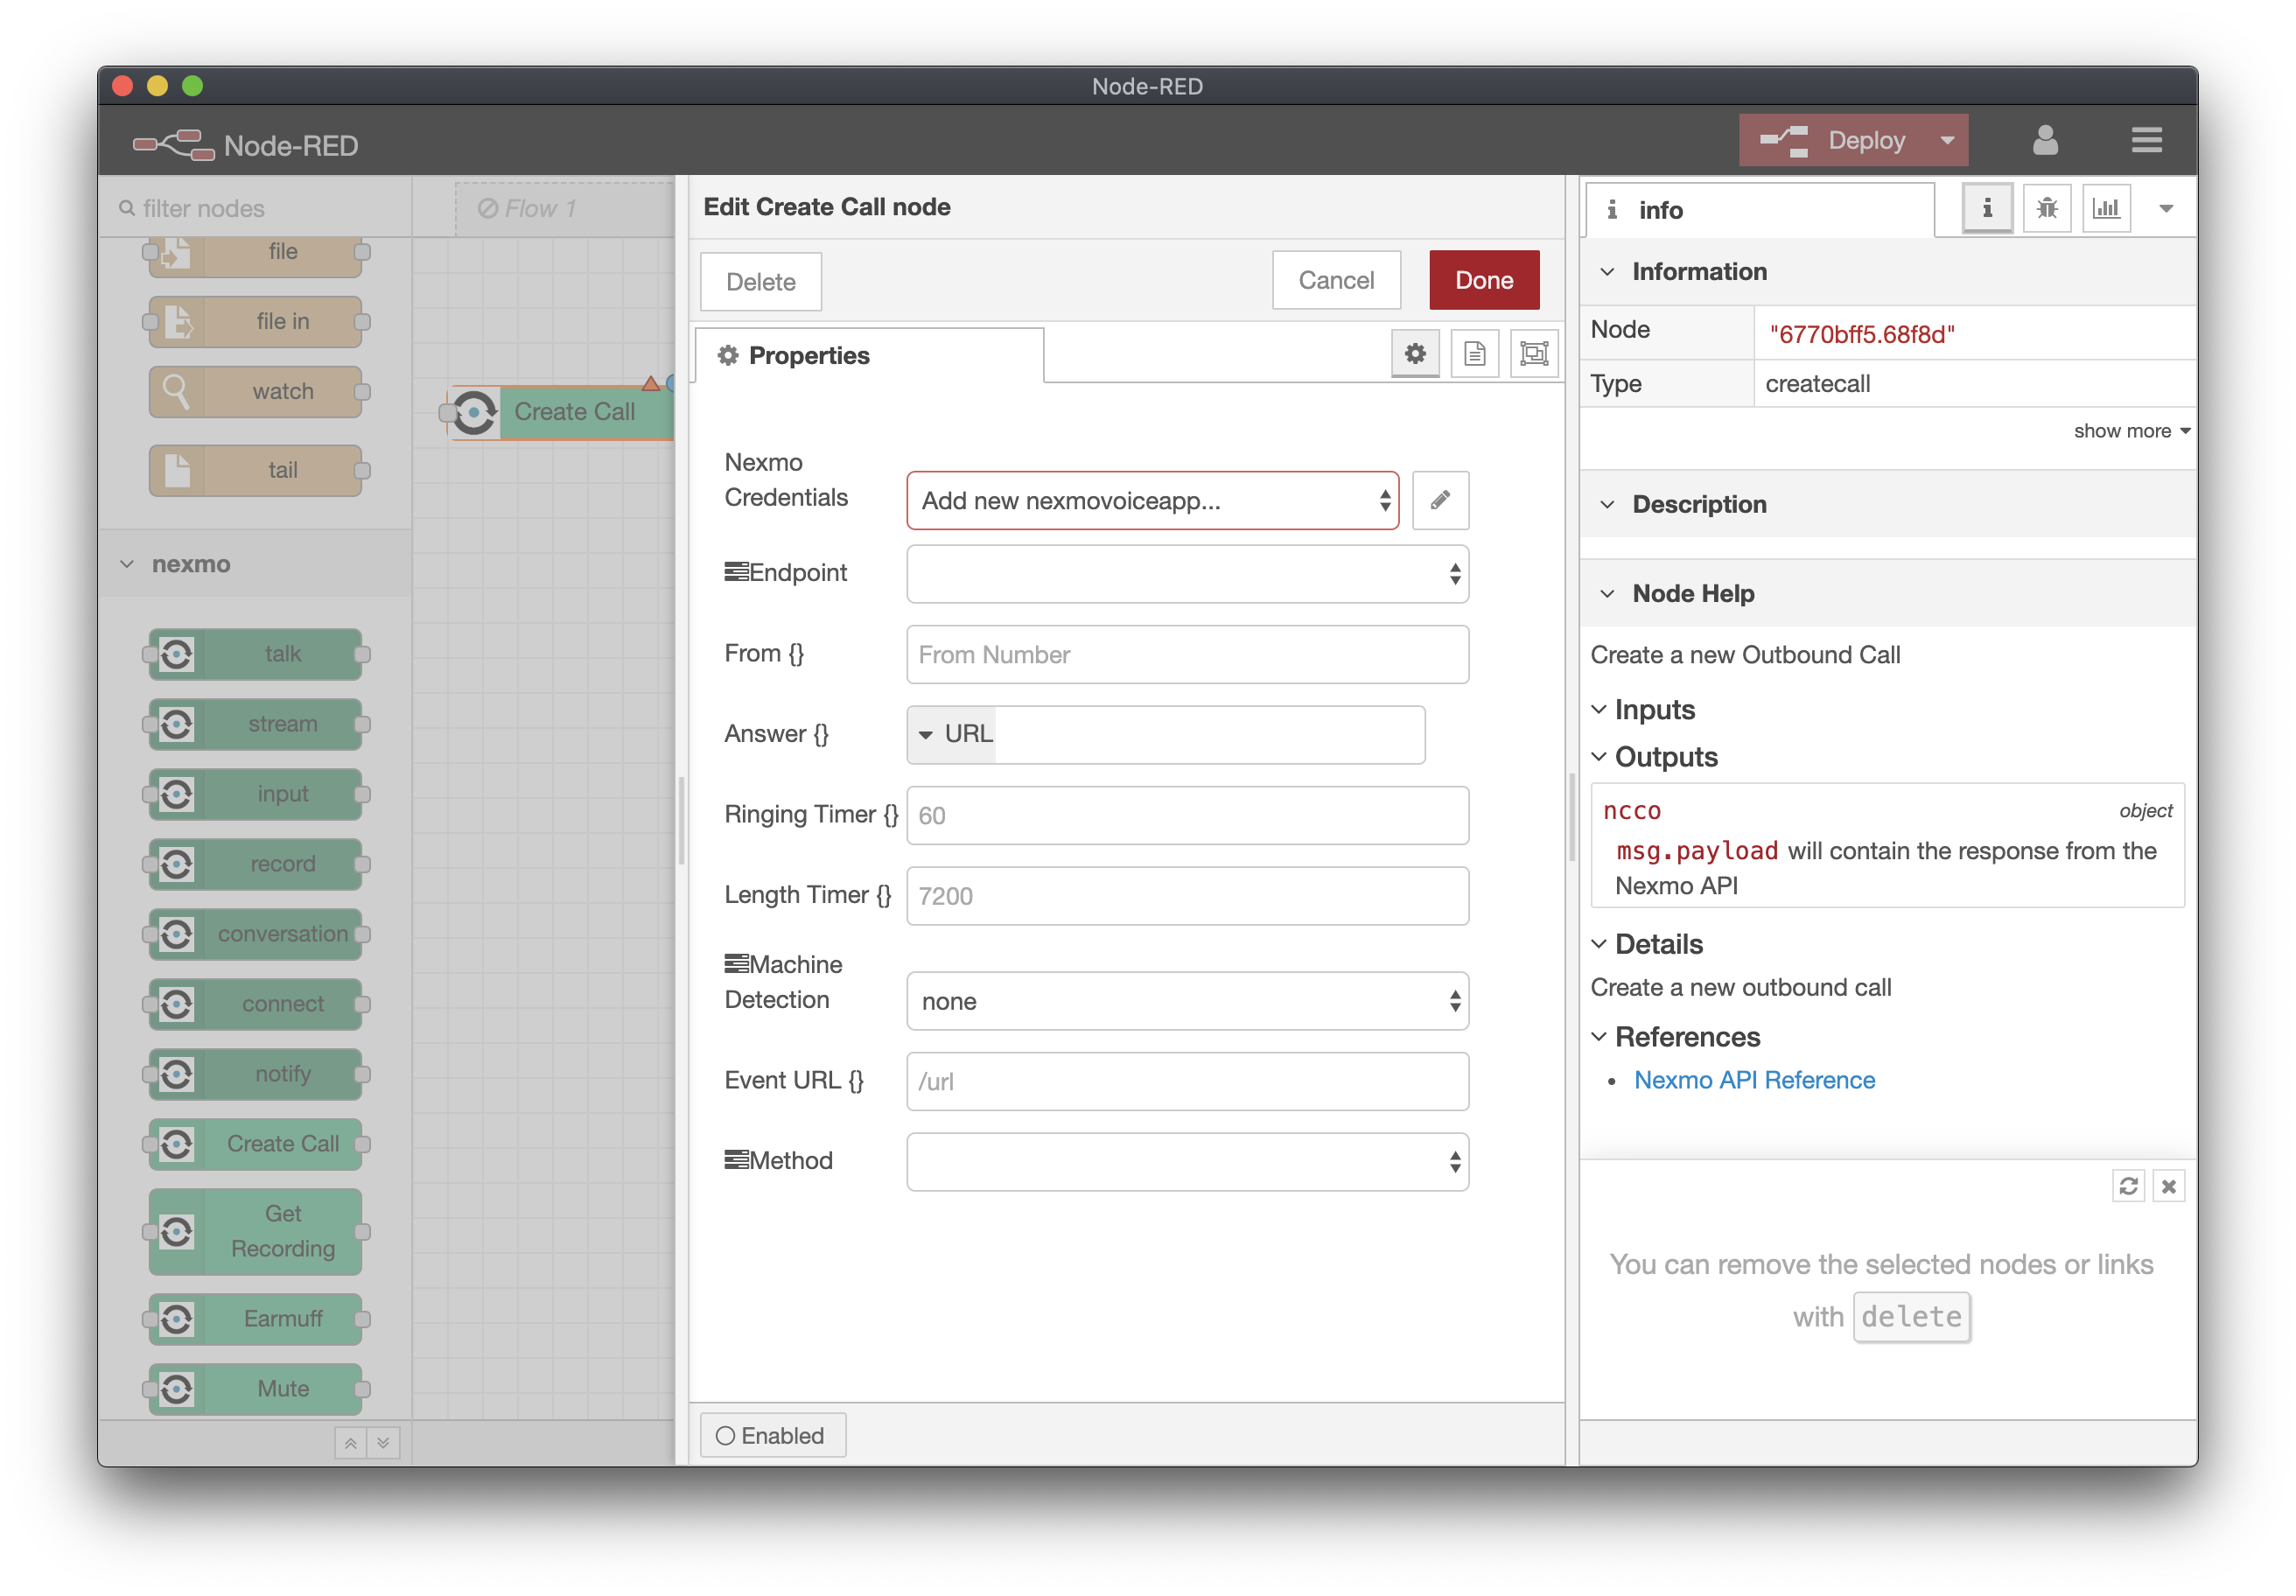
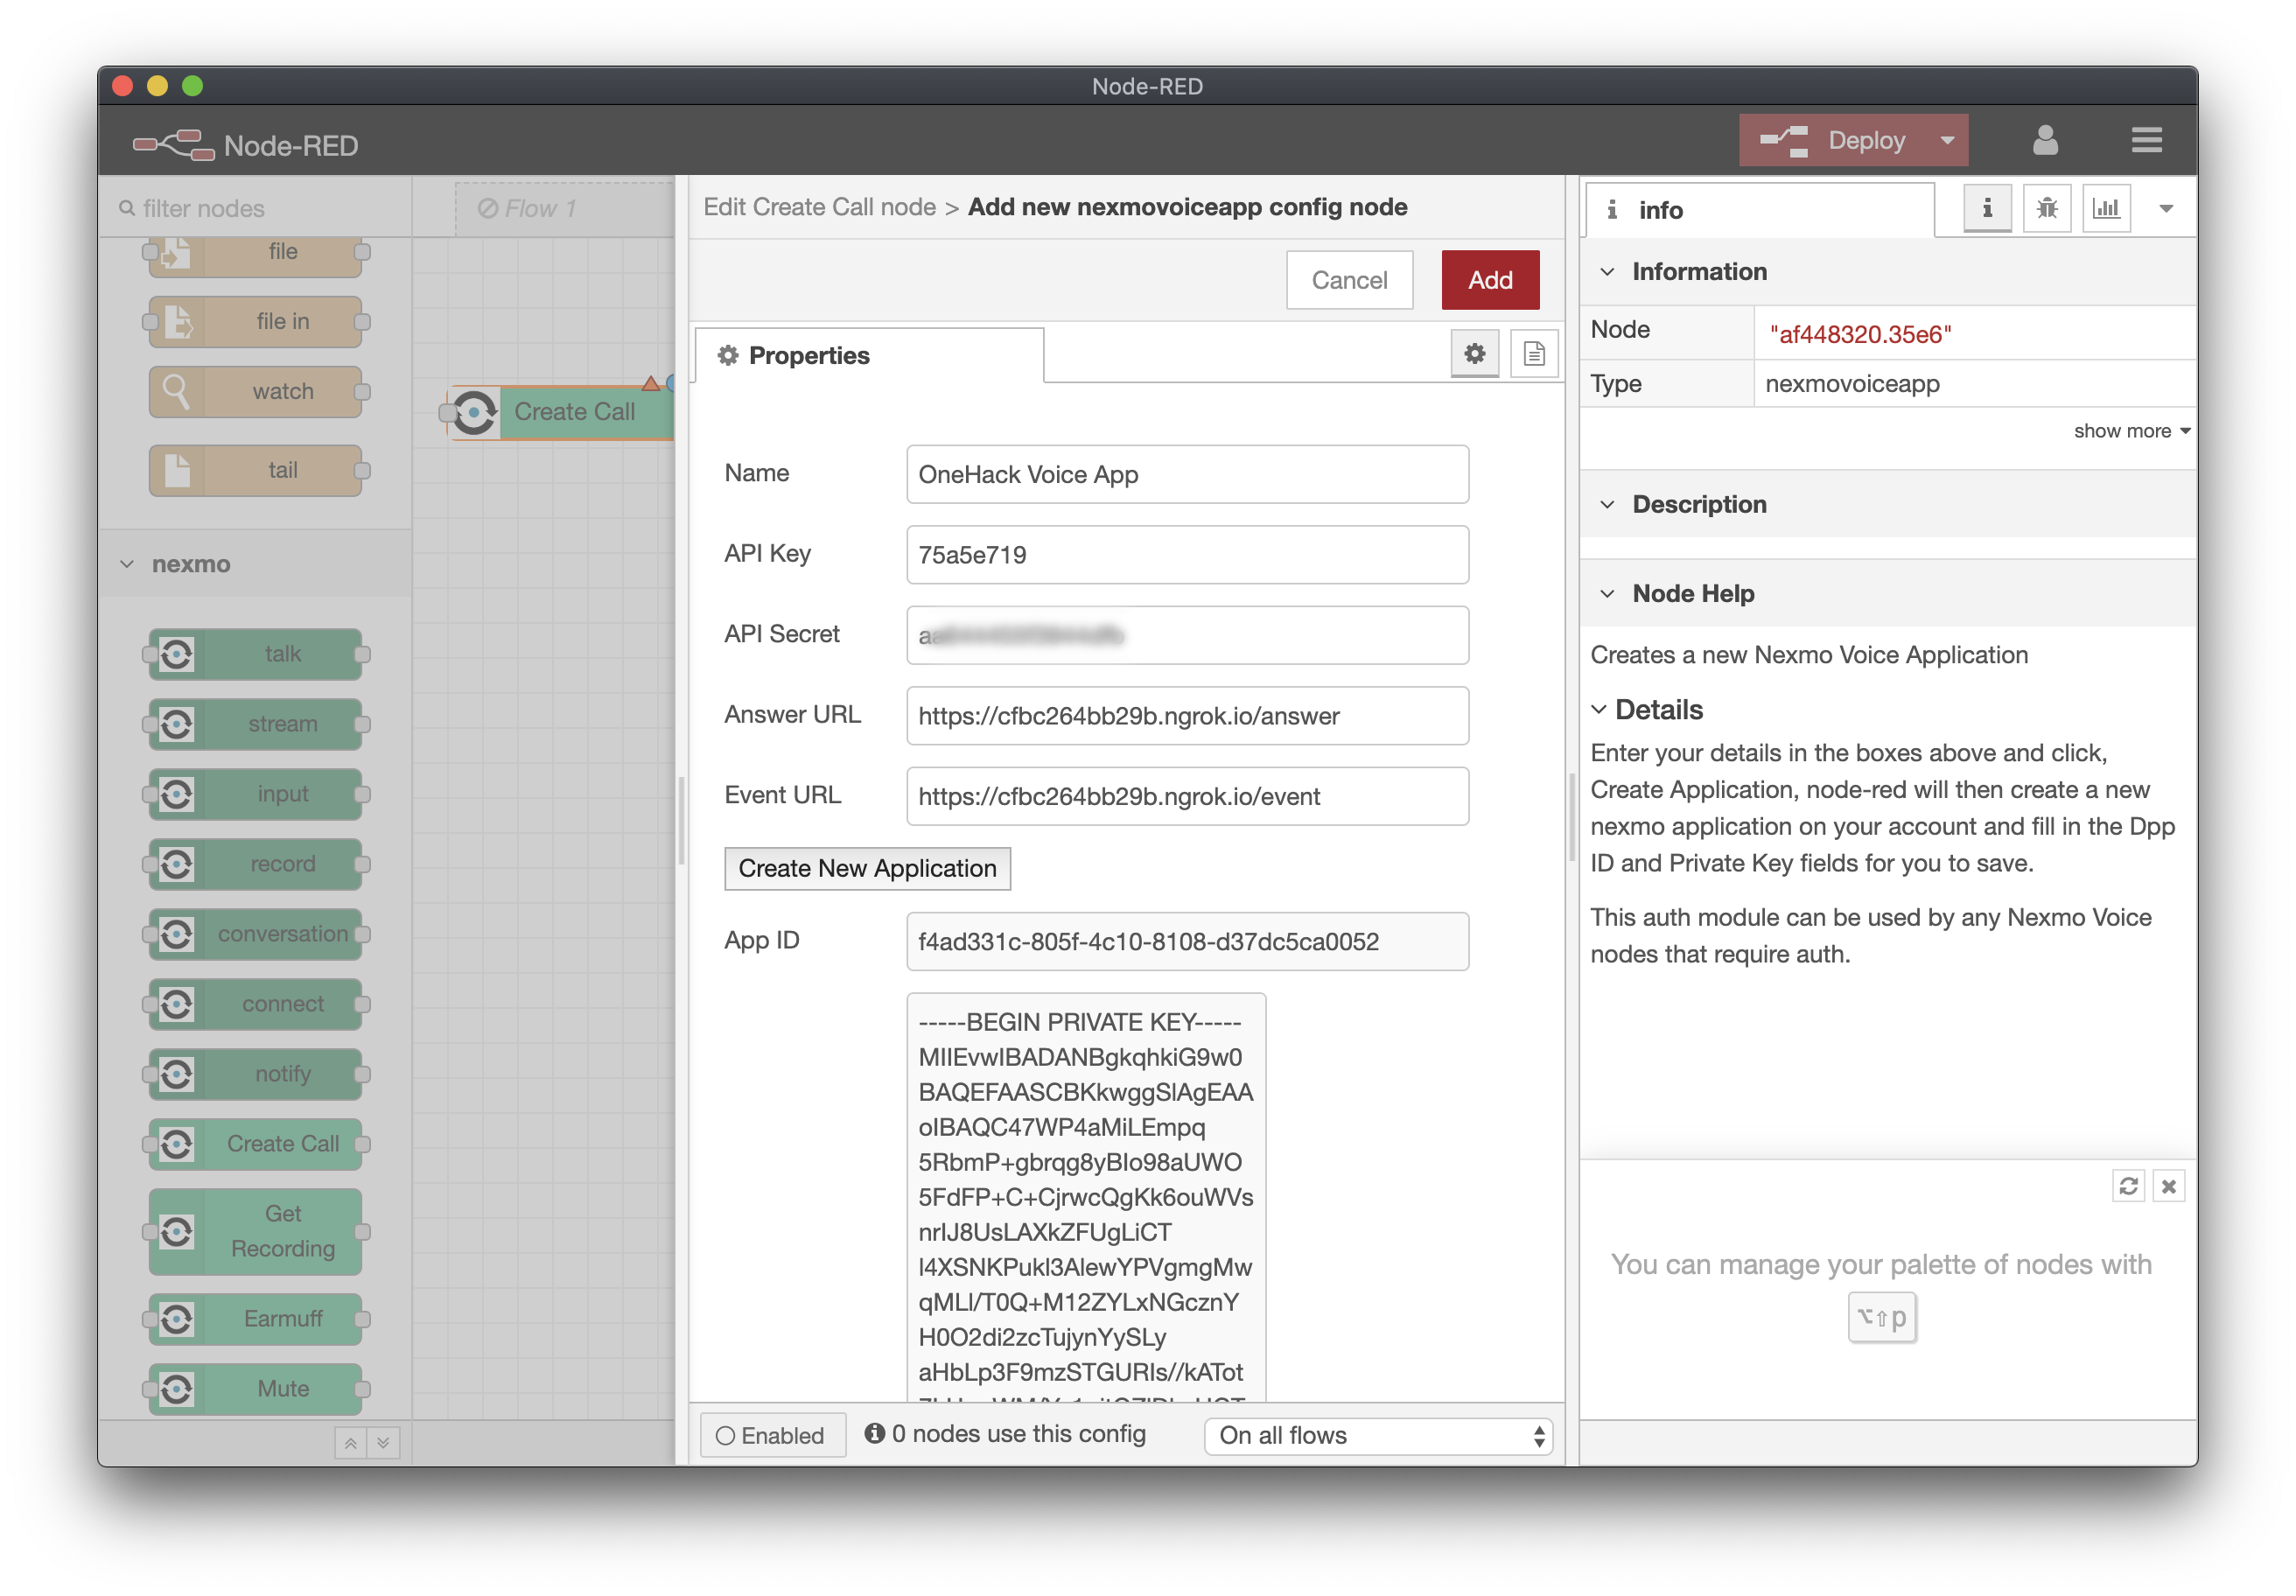
We need to enter a few more details this time:
- Name - This is what the application will be called in your Nexmo Dashboard, we recommend something like “NodeRED - [Name of your Instance]”
- API Key and Secret - Same as before
- AnswerURL - This is the URL that will be called for incoming calls to numbers linked to the application, you need to enter the web address of your NodeRED instance followed by /answer e.g. https://cfbc264bb29b.ngrok.io/answer
- EventURL - Like the AnswerURL this is where call events are sent to, we will use /event for this, eg https://cfbc264bb29b.ngrok.io/event
Now click on Create New Application, after a few seconds the 2 grey boxes will be filled with an APP ID and Private Key, this means the application has been created on the Nexmo platform. Click the Done button to save this config. You now have a Nexmo Voice Application created on your account and the credentials stored within NodeRED.
Link Phone Number
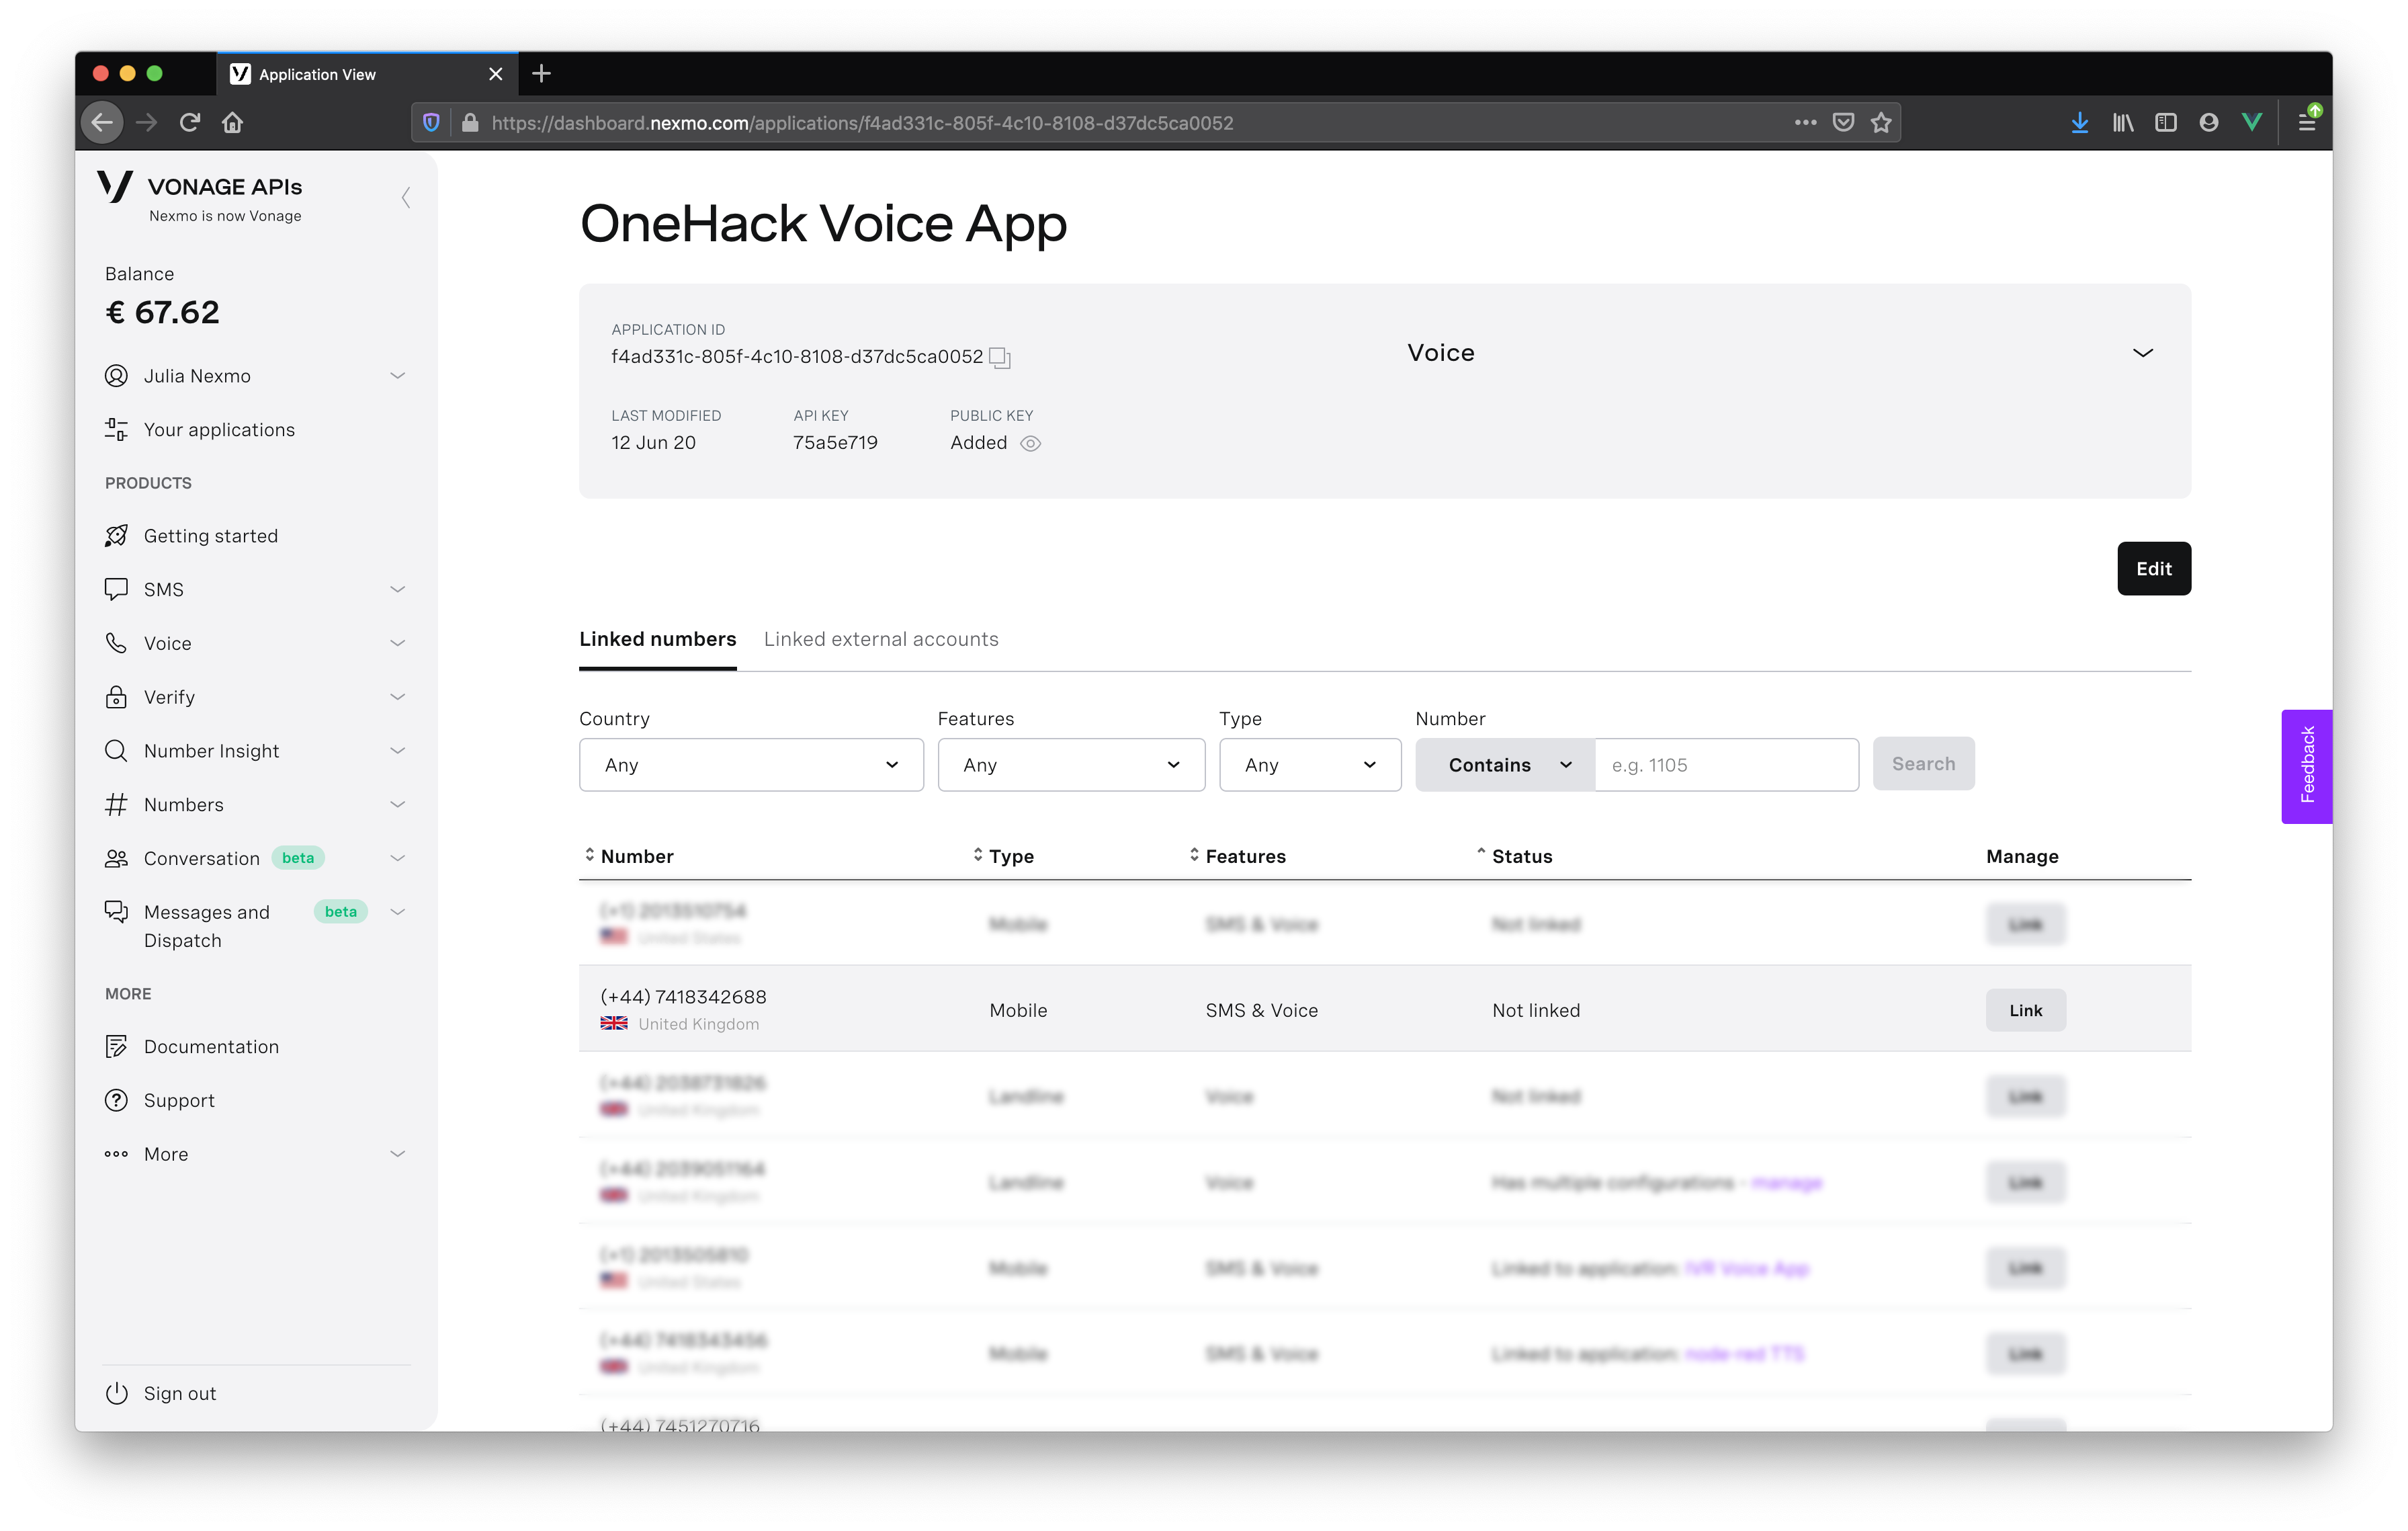
In the Vonage Dashboard we can now link the number you earlier purchased for SMS to your Voice application, goto https://dashboard.nexmo.com/applications and click on the name of the application you just created.
You will then see a screen with that application details and at the bottom it will list all the numbers on your account, you should see a Link button next to the number you just purchased, Click this and your number will be linked to your NodeRED application for incoming voice calls.
Incoming Calls
For our first flow we will create a simple incoming call handler. We can leave the SMS nodes as they are and create a new flow tab on the editor using the + button on the right.
First we need to receive the incoming call voice webhook so add a voice webhook node from the “input” section to your canvas. This node is very similar to the HTTP input node we used in the SMS flow - with a few extras for working with Nexmo Voice Webhooks.
Configure the voice webhook node with a method of GET and a URL of
/answer. This URL matches with the value we configured in the dashboard when creating the application.Now we can start to build the NCCO that we will return to the incoming call. An NCCO is a series of actions, each action is available as a darker green node in the Nexmo section of the palette. For our first call we will use a talk action to read some text followed by a stream action to play a sound file. You can connect as many actions together as you need to for your call, and you can have multiple actions of the same type eg talk -> stream -> talk.
You can find more information about NCCOs in the developer documentation.
Drag the talk node onto the canvas and open up the properties. The two fields we are going to set are the Text and the Voice Name and again you will notice the {} against the text field as this supports templating. When we receive a call we will greet the caller and then read them the caller ID of the number they are calling from - this is the msg.call.from property from the webhook we receive when the calls come in. So in our text field we can put this value:
Hello, thanks for calling from {{msg.call.from}}We can also set the voice name. Nexmo supports many different named voices to allow text to speech in multiple languages, the default voice is Kimberly which is a US English Female voice, we will change our node to use Emma.
Next we will create a stream node. This node takes a URL to a WAV or MP3 file hosted on the internet somewhere, (you could host this within NodeRED for example) and plays that to the caller. Drag your stream node onto your canvas and open up the properties; the only thing we need to set is the URL to the wav file, for this test you can enter
https://s3.sammachin.com/fanfare.wavFinally we need to close off our webhook in order to return the NCCO we have built up, in the output section you will find a return ncco node, add this to the end of your flow.
Make sure that you have wired up your nodes as shown in the diagram then click deploy.
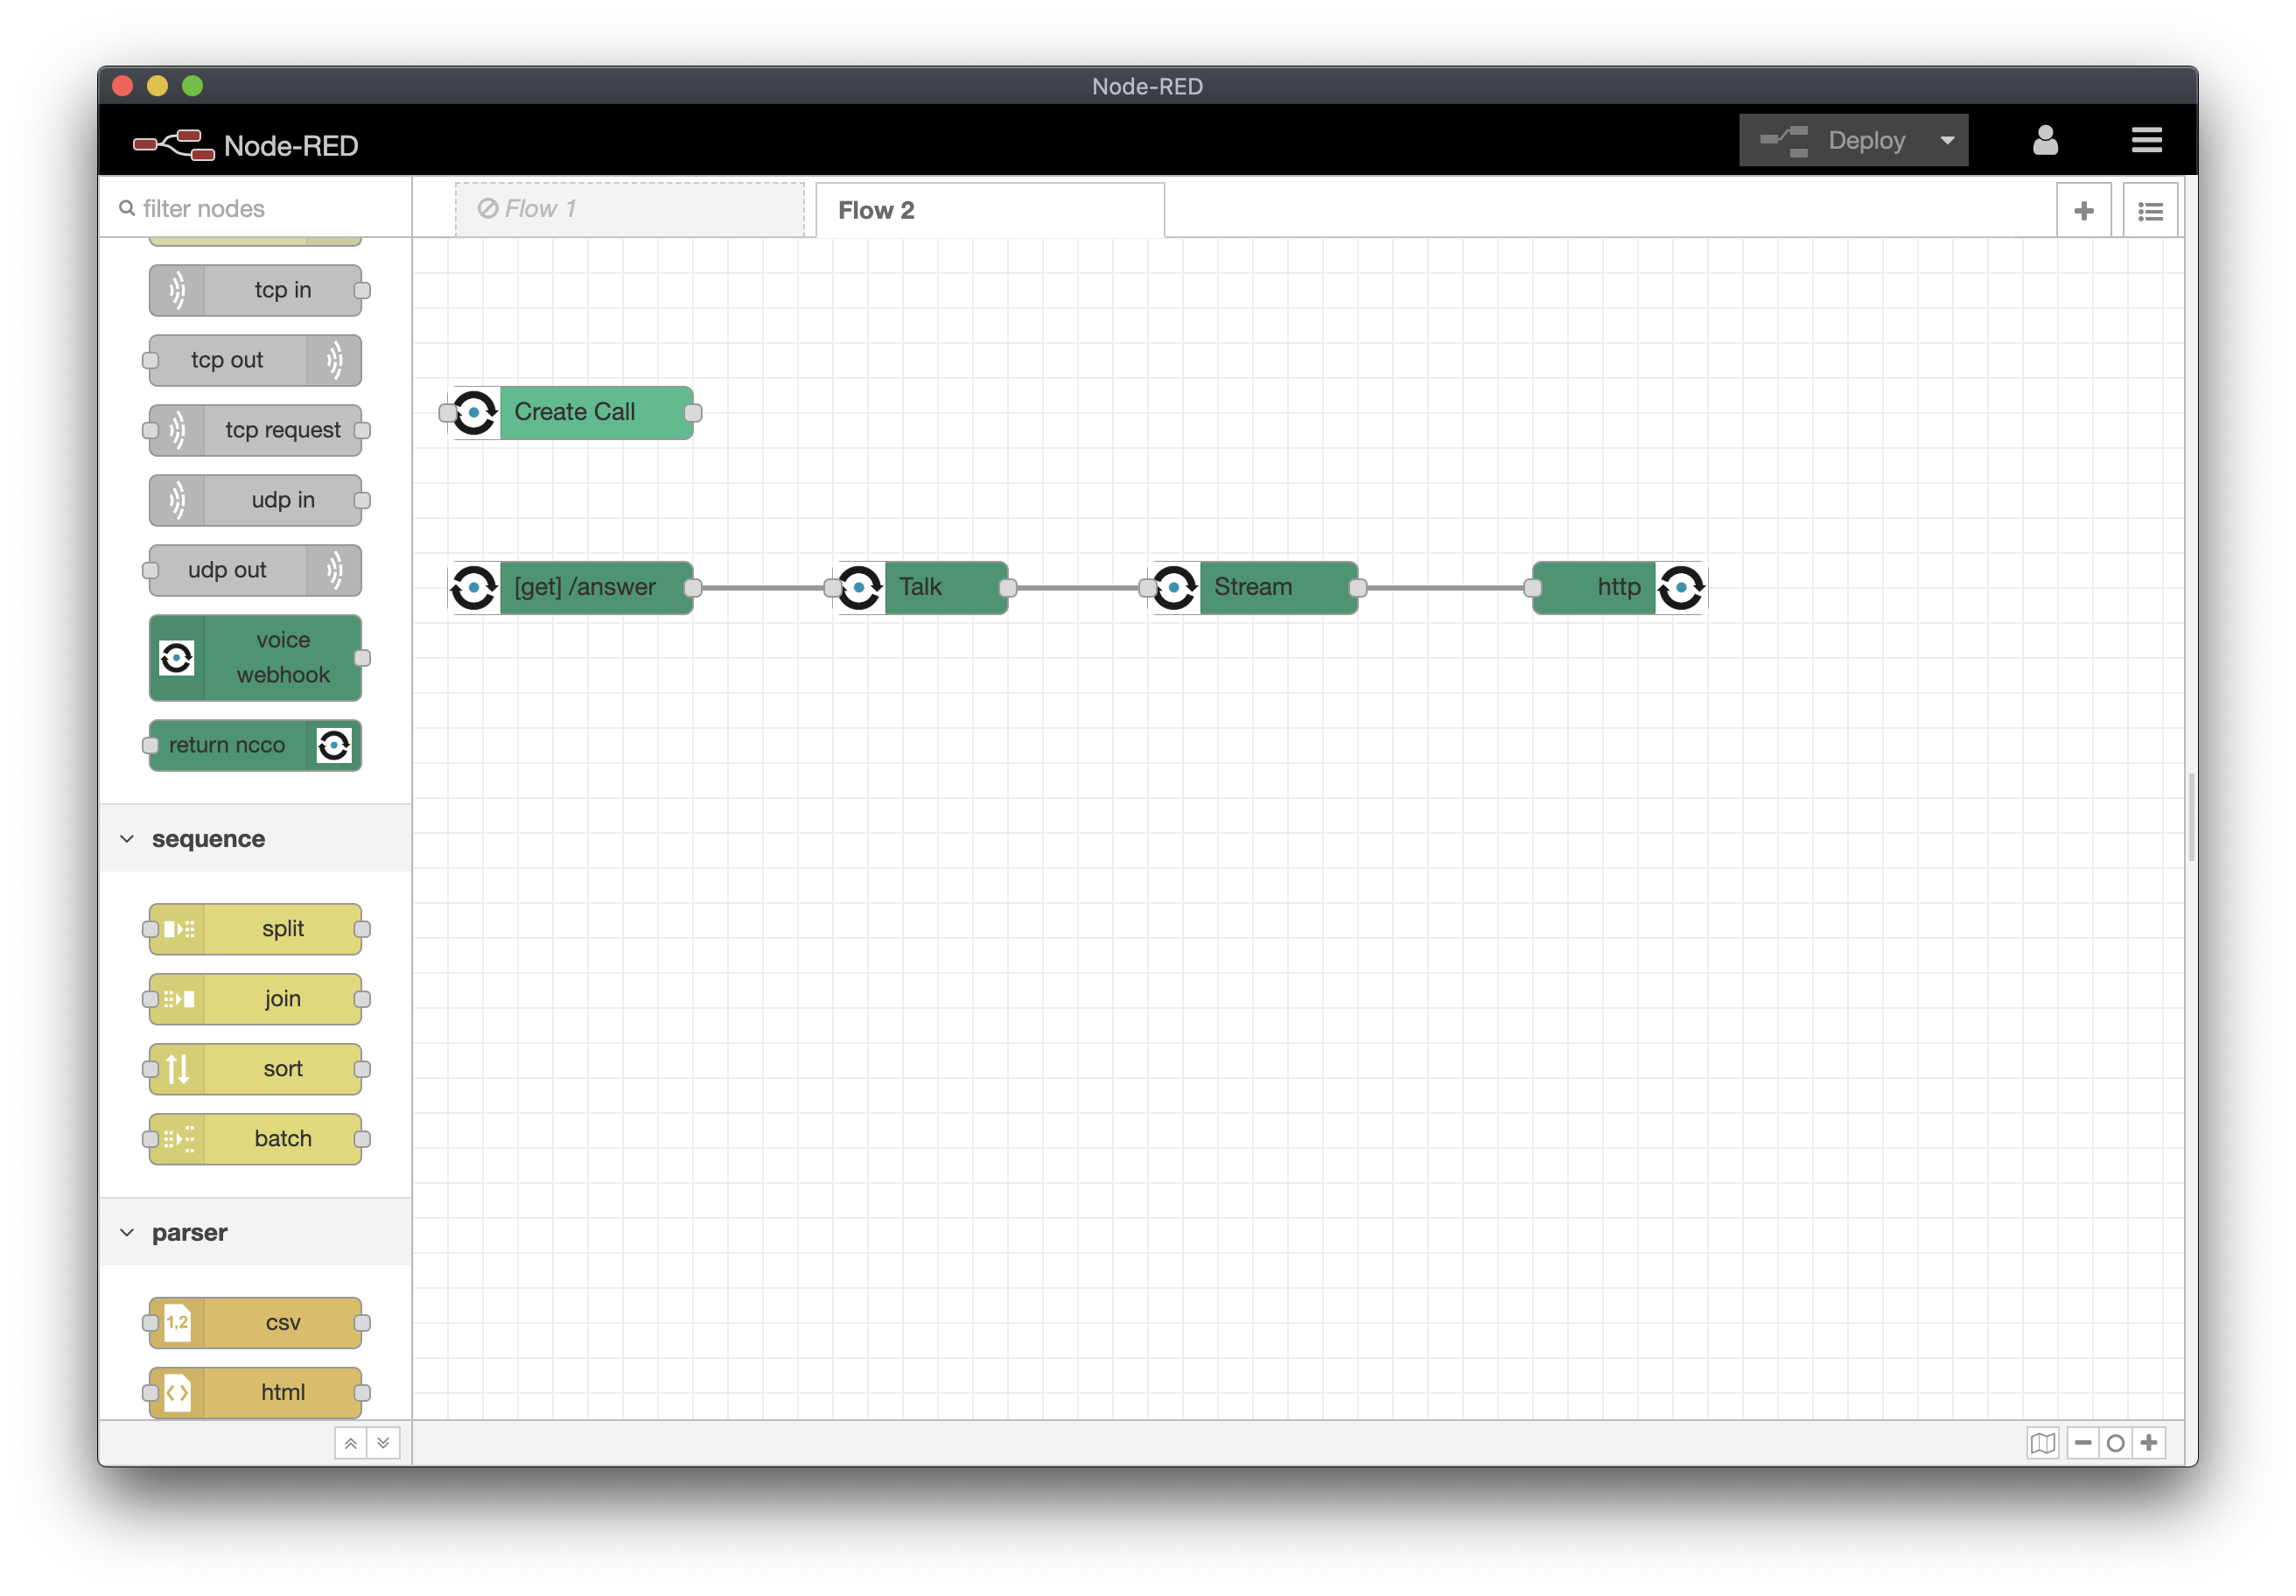
Now call your Nexmo number and you should hear your message.
Try rearranging the nodes so that the stream is played befoe the talk.
Don’t forget to click deploy after you make a change!
Call Events
The Nexmo platform also sends events related to voice calls to a separate Webhook endpoint, we can set up NodeRED to receive and log those events. This can help us observe the call flow, and to debug any problems that occur.
We use a simple http in input node and connect it to an http response output node to ensure that we send a response to Nexmo. Your input node should be configured to accept a POST on
/eventas we configured earlier in the dashboard.Add a debug node so we can see what’s happening. See the picture below for what this should now look like:
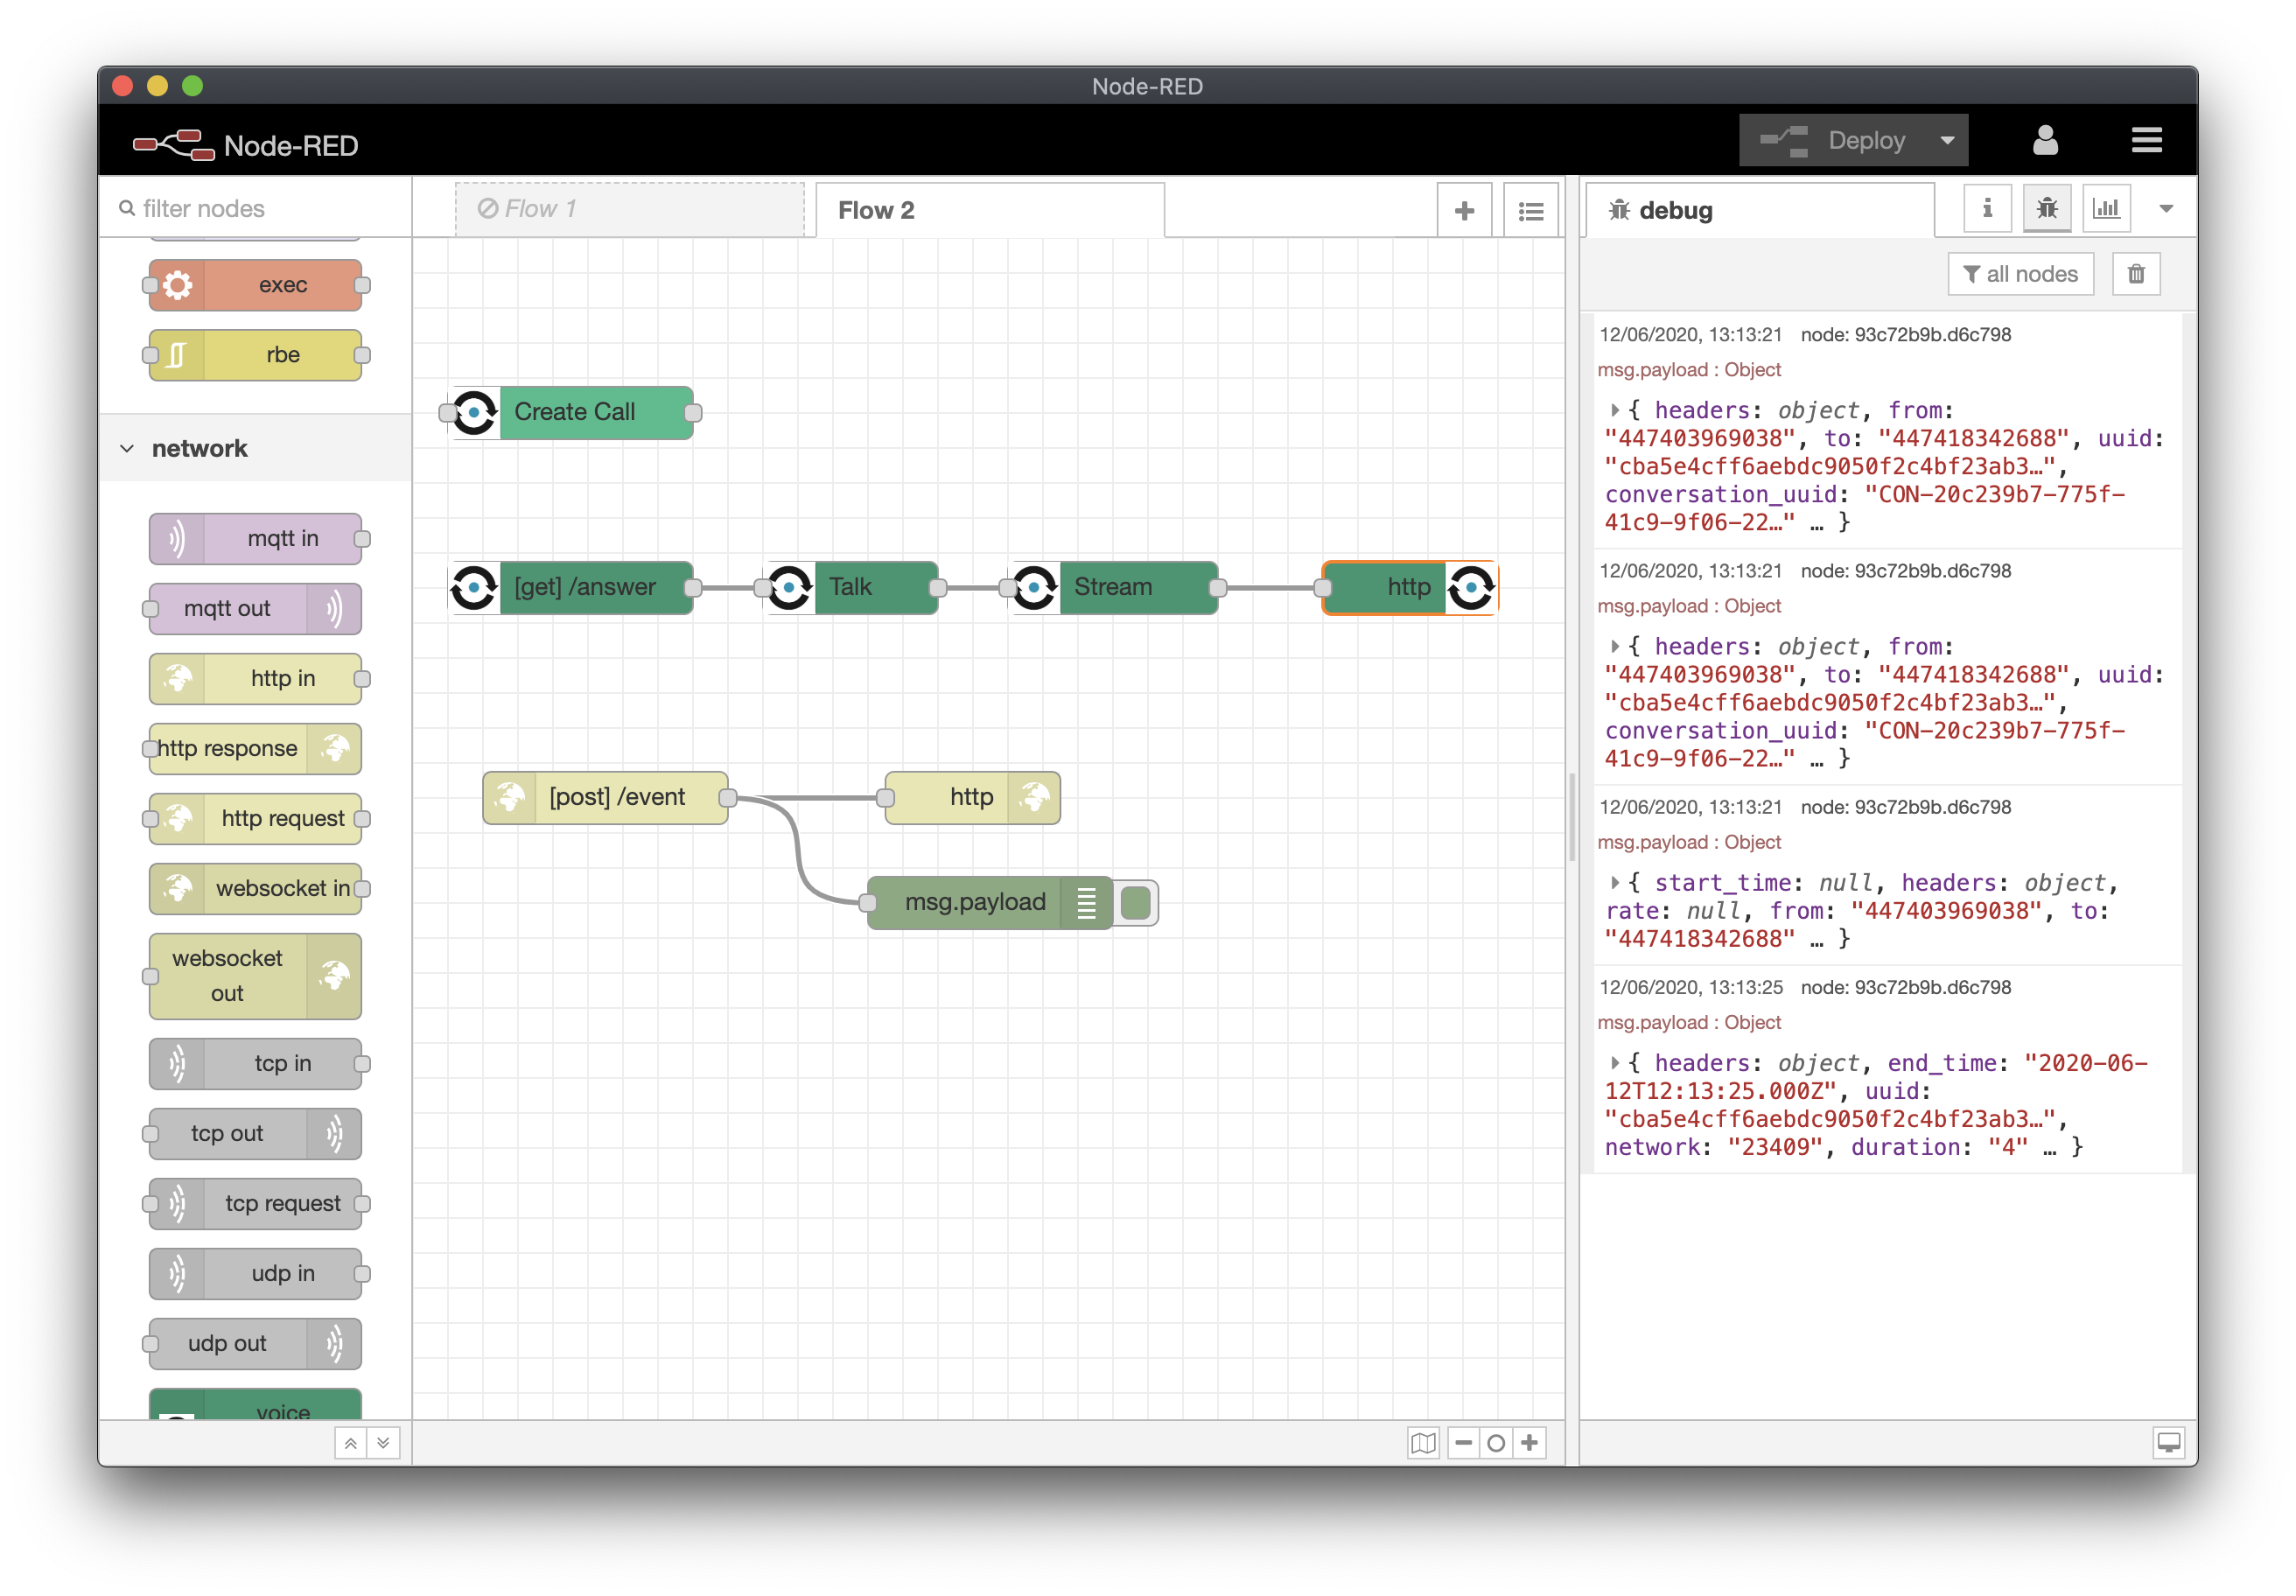
Once you make a call to your Vonage number, the call events will be logged into the debug window. This is also how Vonage sends error messages about your application to you.
Outgoing Calls
We can tell Nexmo to place a call to a number and when the call is answered execute an NCCO in much the same way as an incomming call
There are two main approaches:
- You can either supply an AnswerURL with the request to create the call much like an incoming call
- Or you can build the NCCO and pass that directly in the create call request
We will use the latter as it’s a bit simpler.
Start a new flow for this example to keep things tidy. Click the + at the end of the tabs to add a new tab.
We will need something to act as a trigger for the flow. This could be an external service, a webhook, the NodeRED dashboard or even an incoming SMS. Initially we will just use the inject node; this allows us to start a flow by clicking on the button next to the node.
Build out some NCCO nodes in the same way as we did for an incoming call remember that we don’t have values like msg.call.from to use for templating in this scenario because we’re starting the call. Try a stream node followed by a talk node.
Once you have your inject node and your NCCO action(s), add a “createCall” node from the Nexmo section of the palette. Open up the Properties of the node and set the following:
- Nexmo Credentials - should be the application you created at setup
- Endpoint - Select Phone
- Number - Enter your mobile number in international format without the + for example (212) 555-1212 becomes 12125551212
- Leave dtmfAnswer empty
- From should be your Nexmo number, again in international format.
- Answer select msg.ncco to use the NCCO built in the preceding nodes.
Leave the other fields as default and click Done
Finally we will add a debug node to the end of the flow so that we can see the response sent back from Nexmo when we create the call.
Your flow should look something like this:
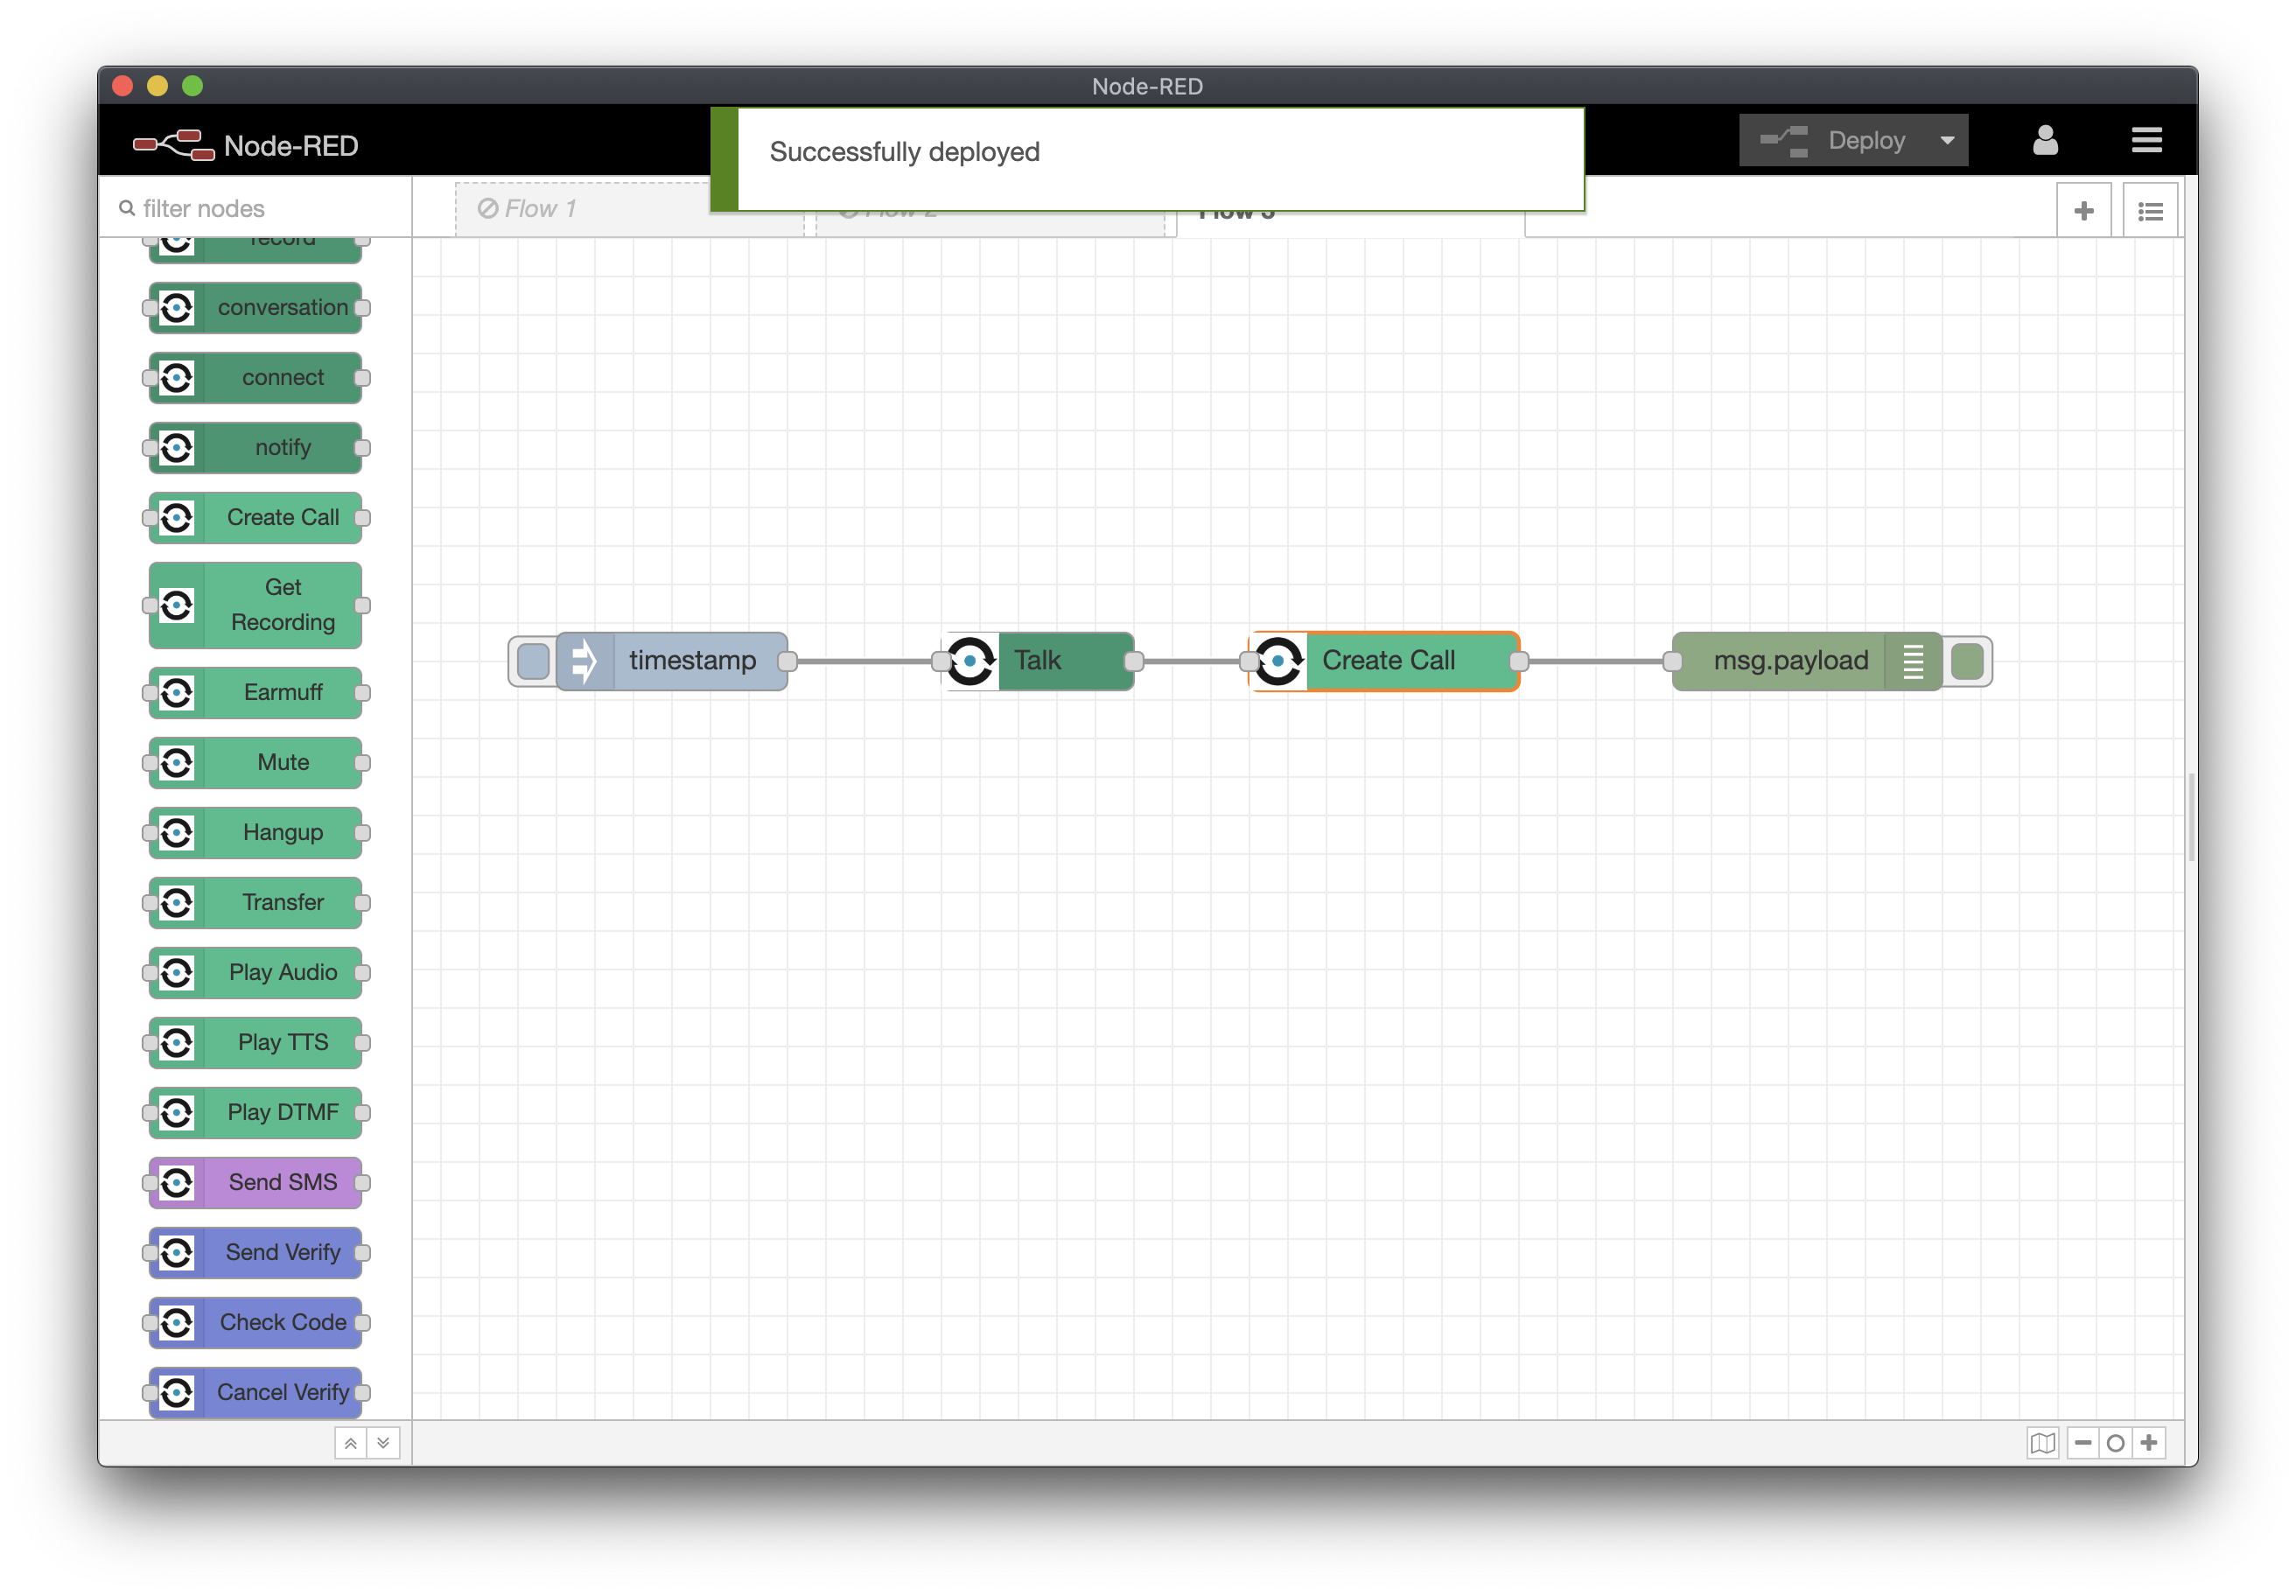
Click the grey button on the timestamp node to trigger the flow, your phone will ring and play a message.