Sending and Receiving SMS
Setup Basic Auth
To set up basic auth drag a ‘Send SMS’ node from the palette on the left onto the canvas, double click the node to open the properties, and then click on the pencil icon where it says Add new nexmobasic…
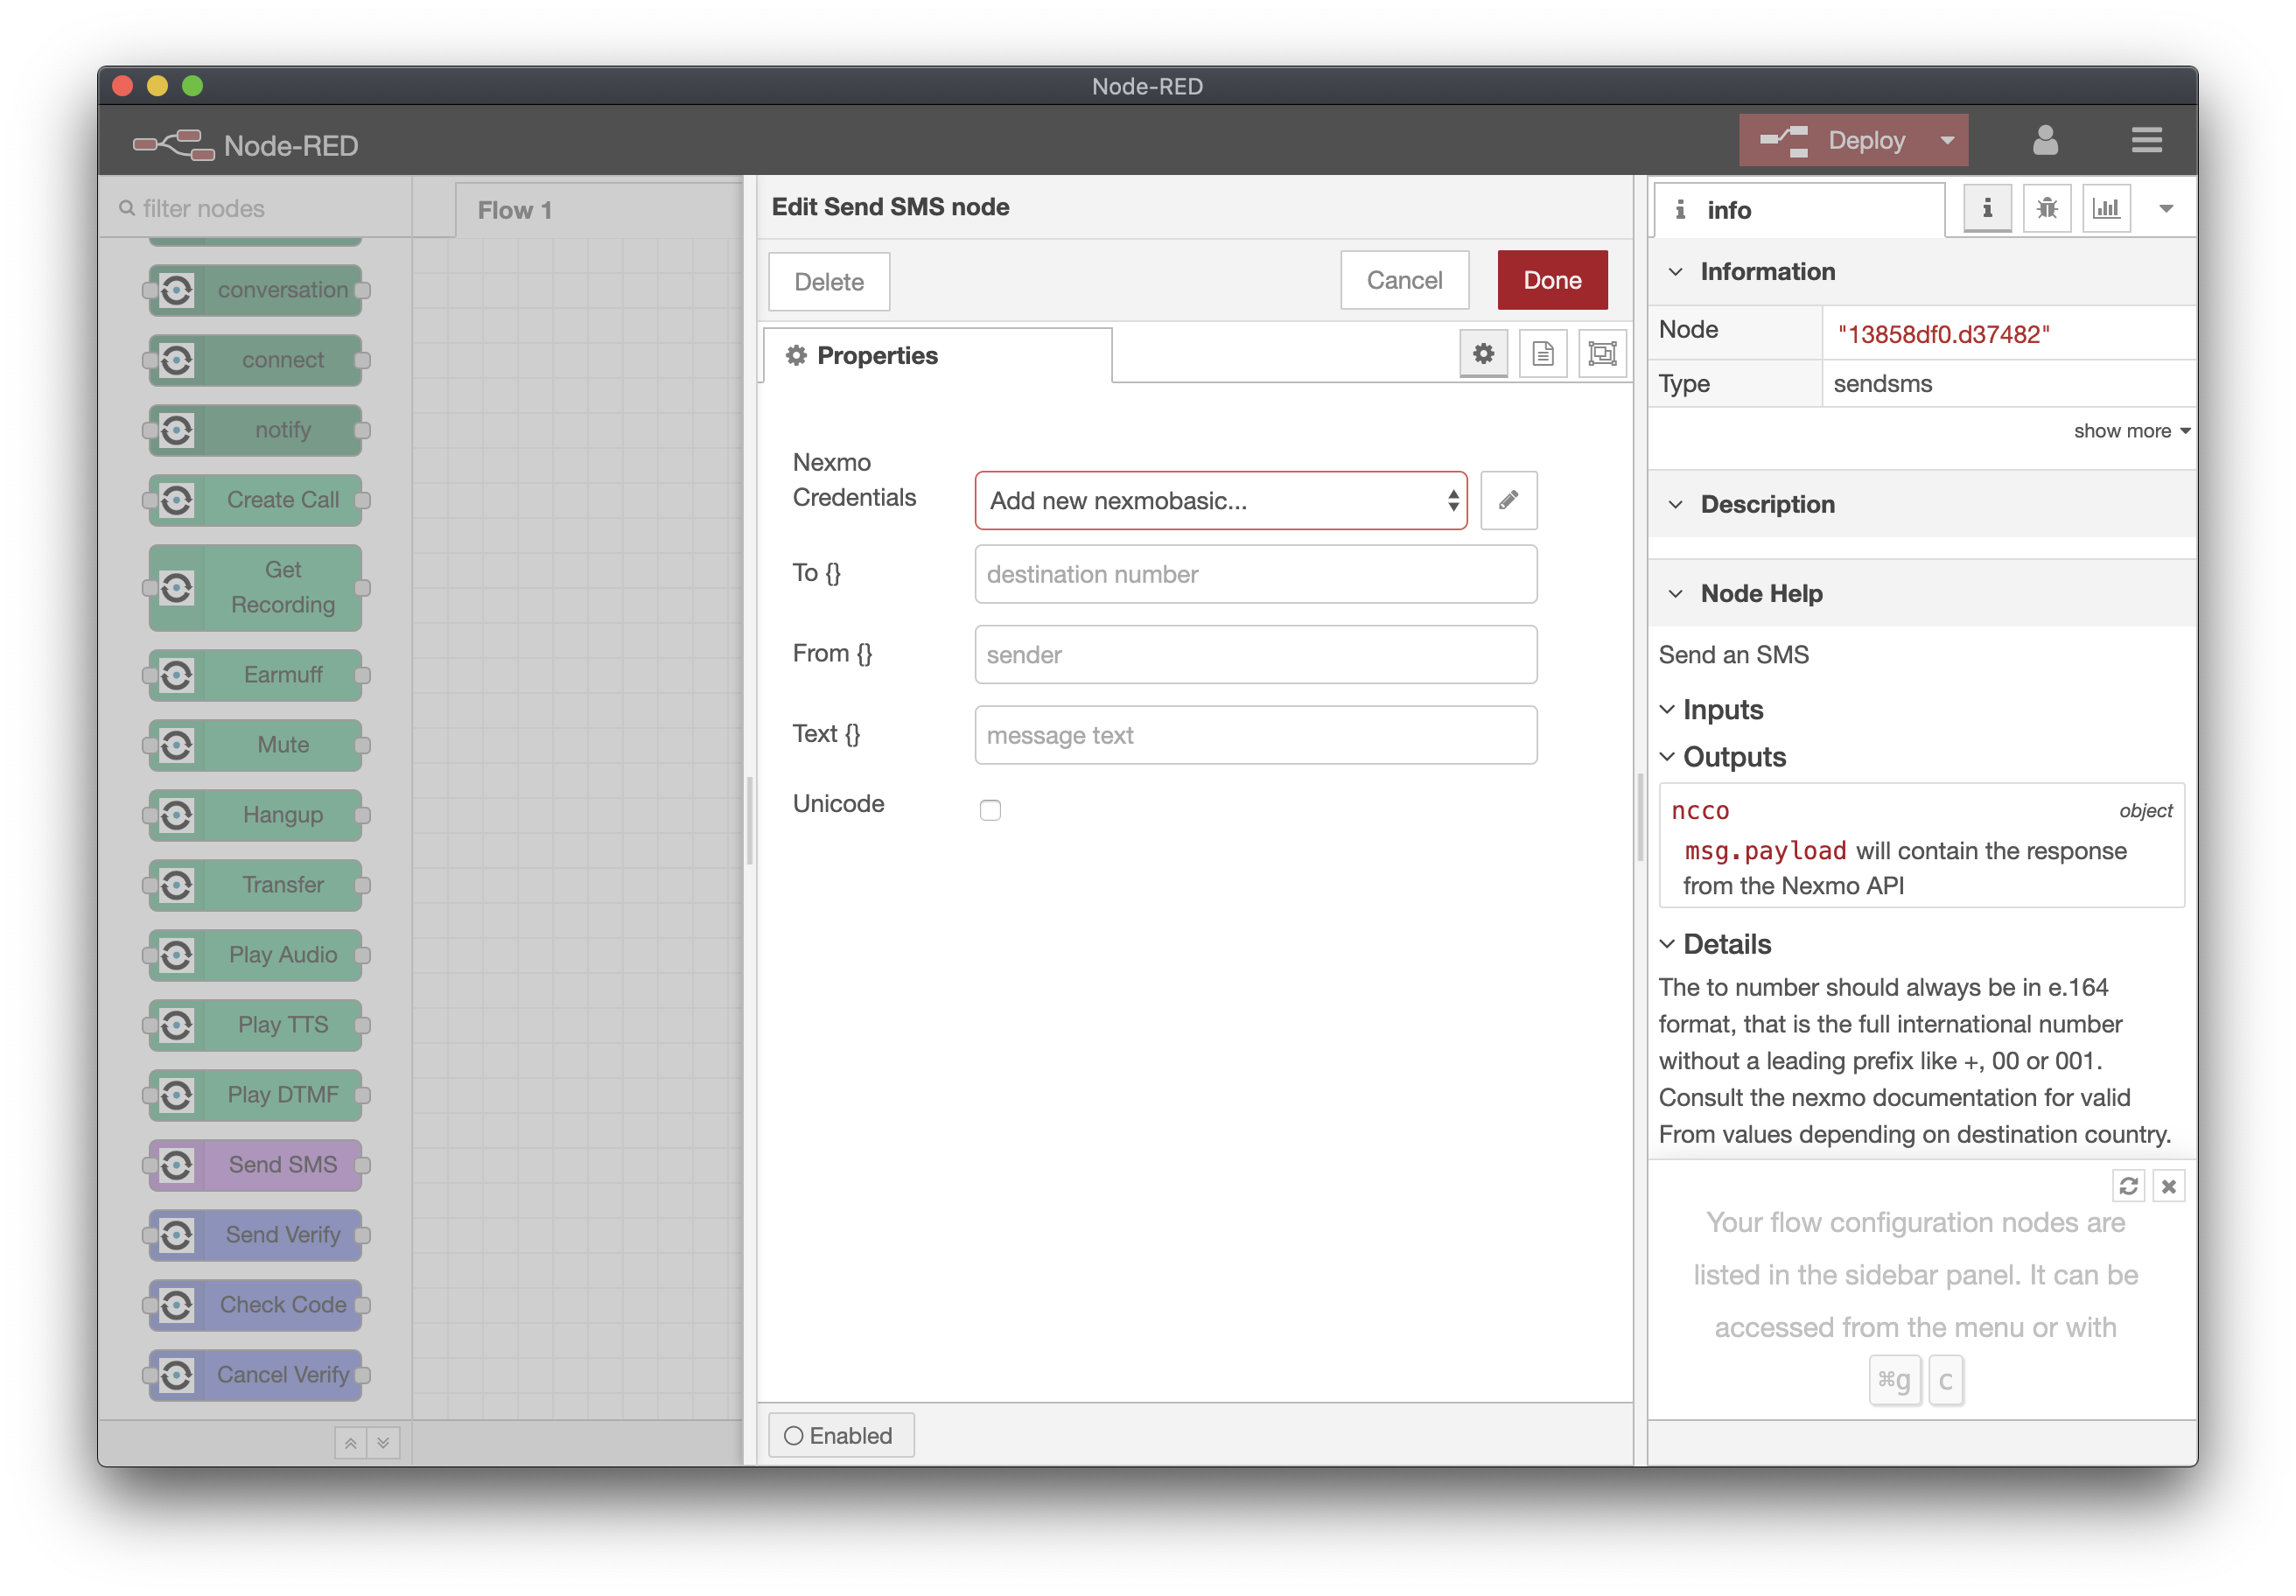
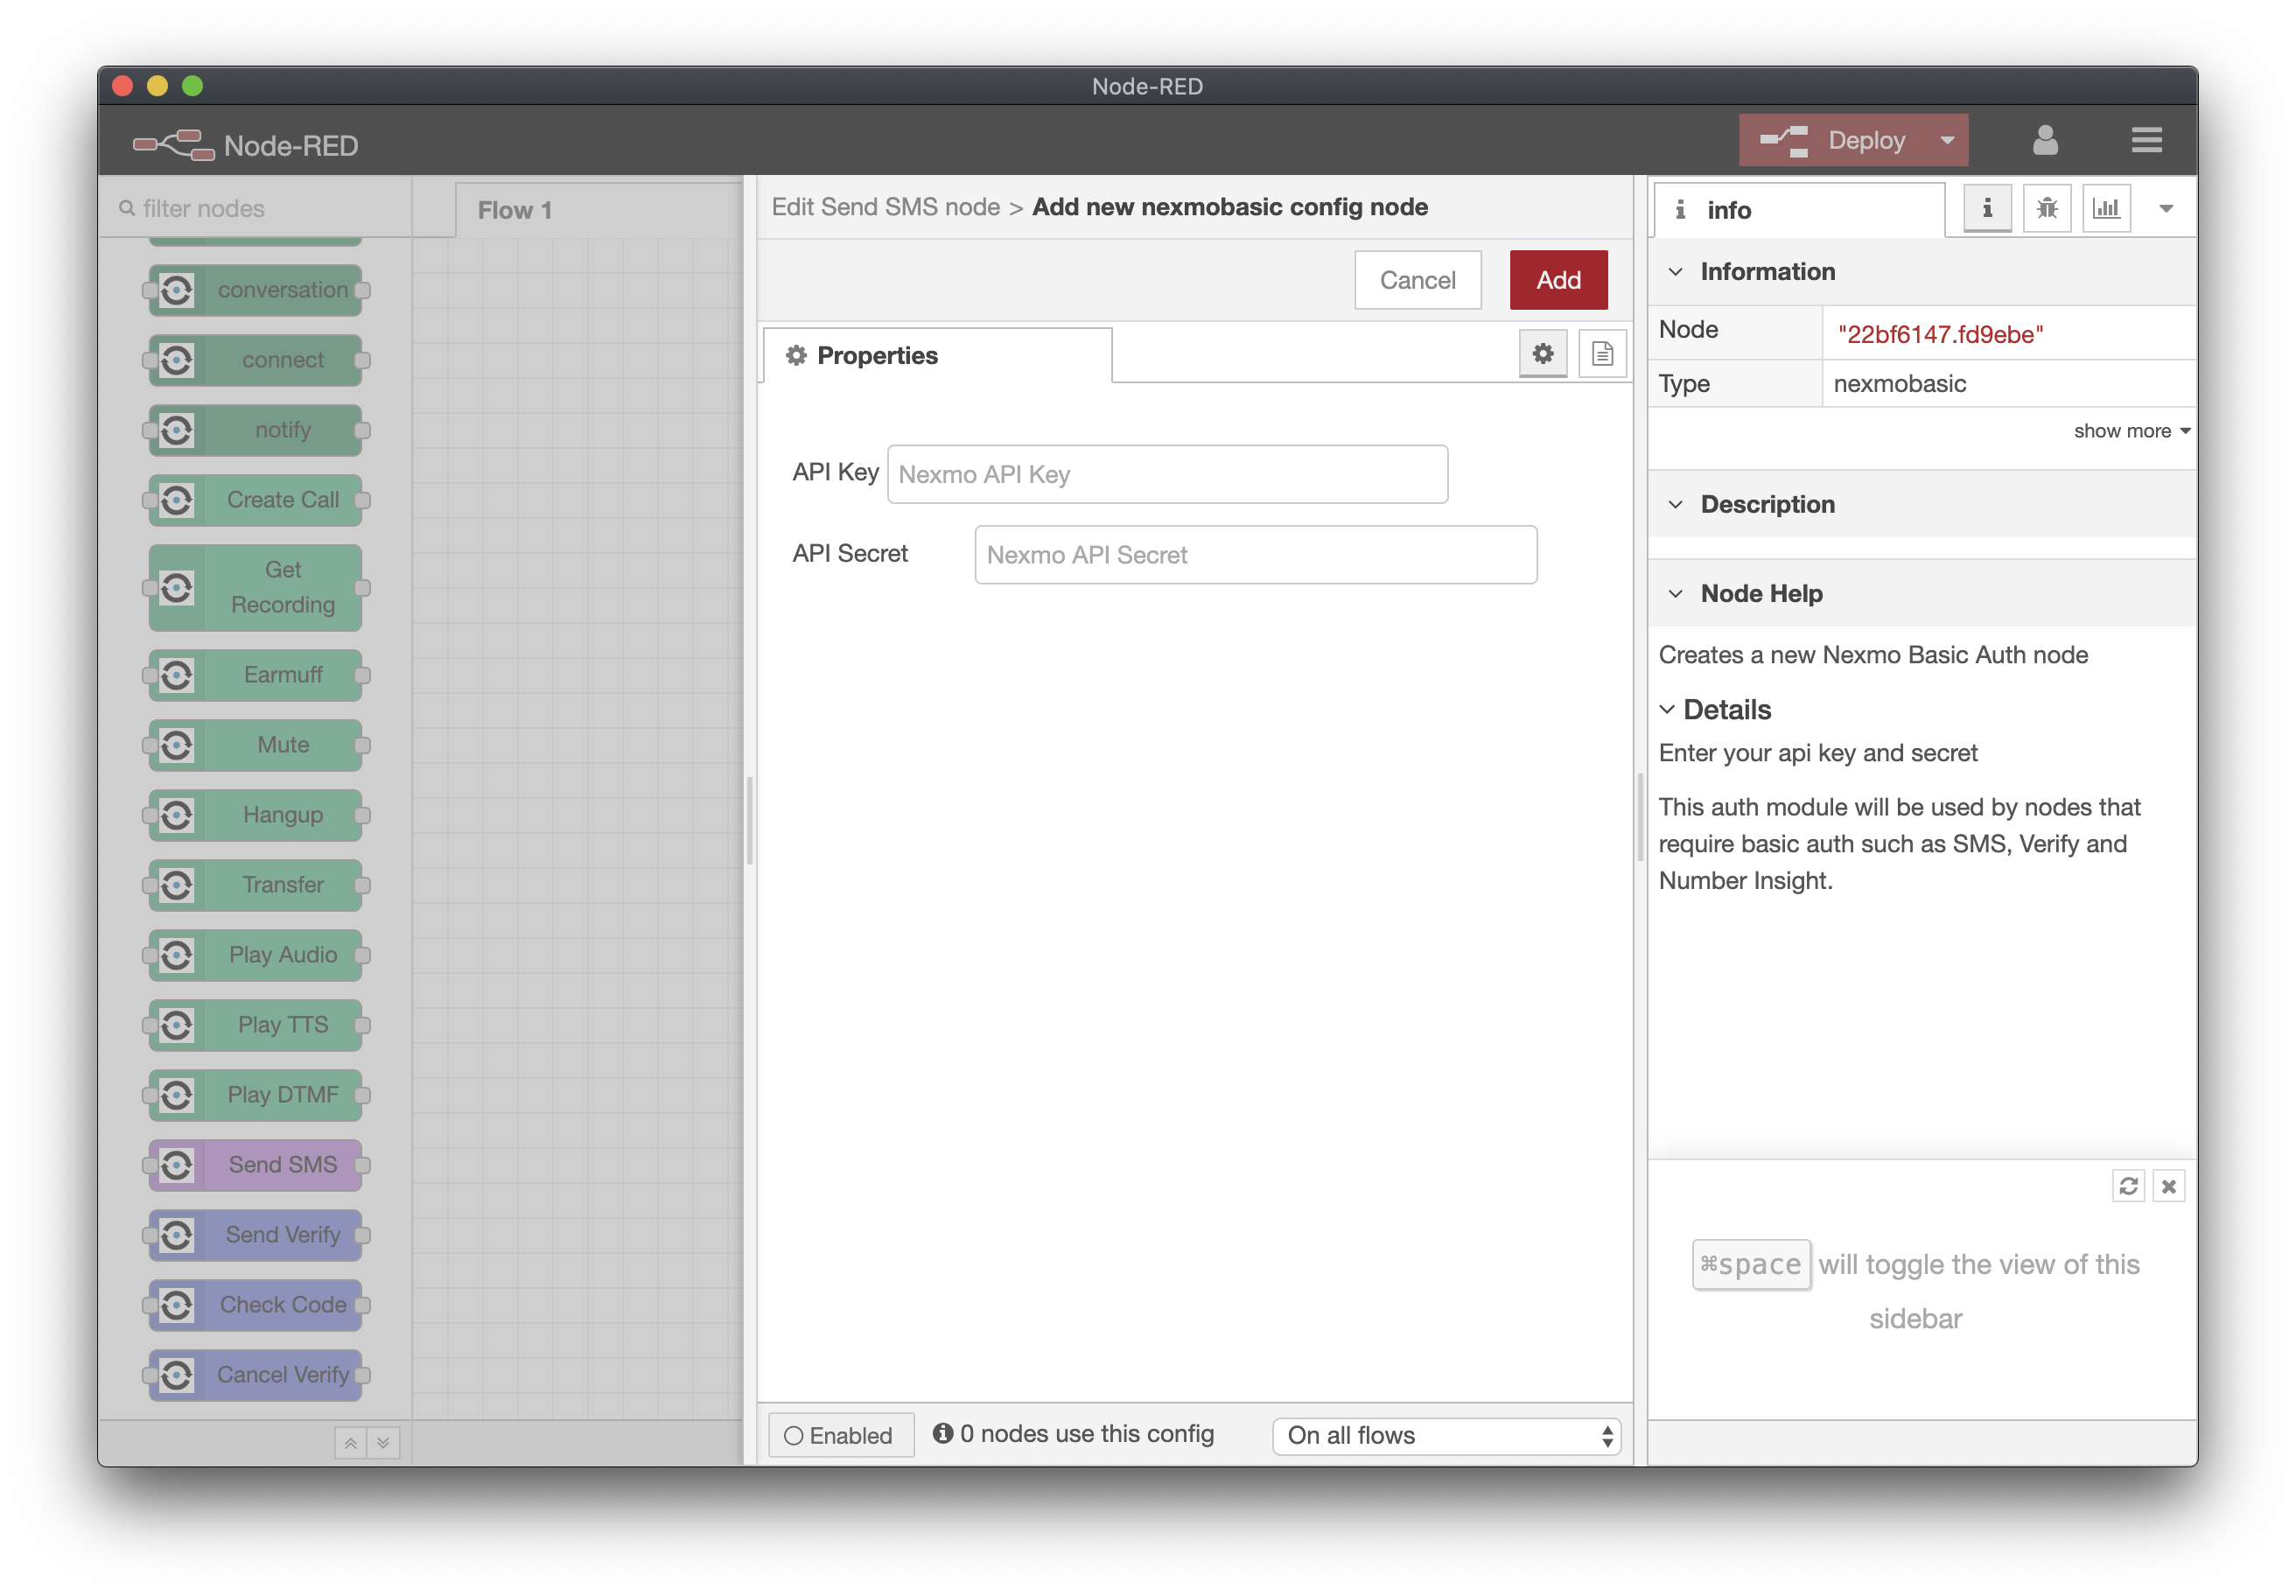
In the window that opens enter your API Key and API Secret, Then Click Add
Phone Number Setup
Next we will purchase a number and configure a webhook for SMS.
First, log in to your Nexmo account at https://dashboard.nexmo.com
From the right-hand menu select Numbers then Buy Numbers
In the Dropdown lists select your country, Then under Features select SMS & Voice and Type Mobile, Then click Search
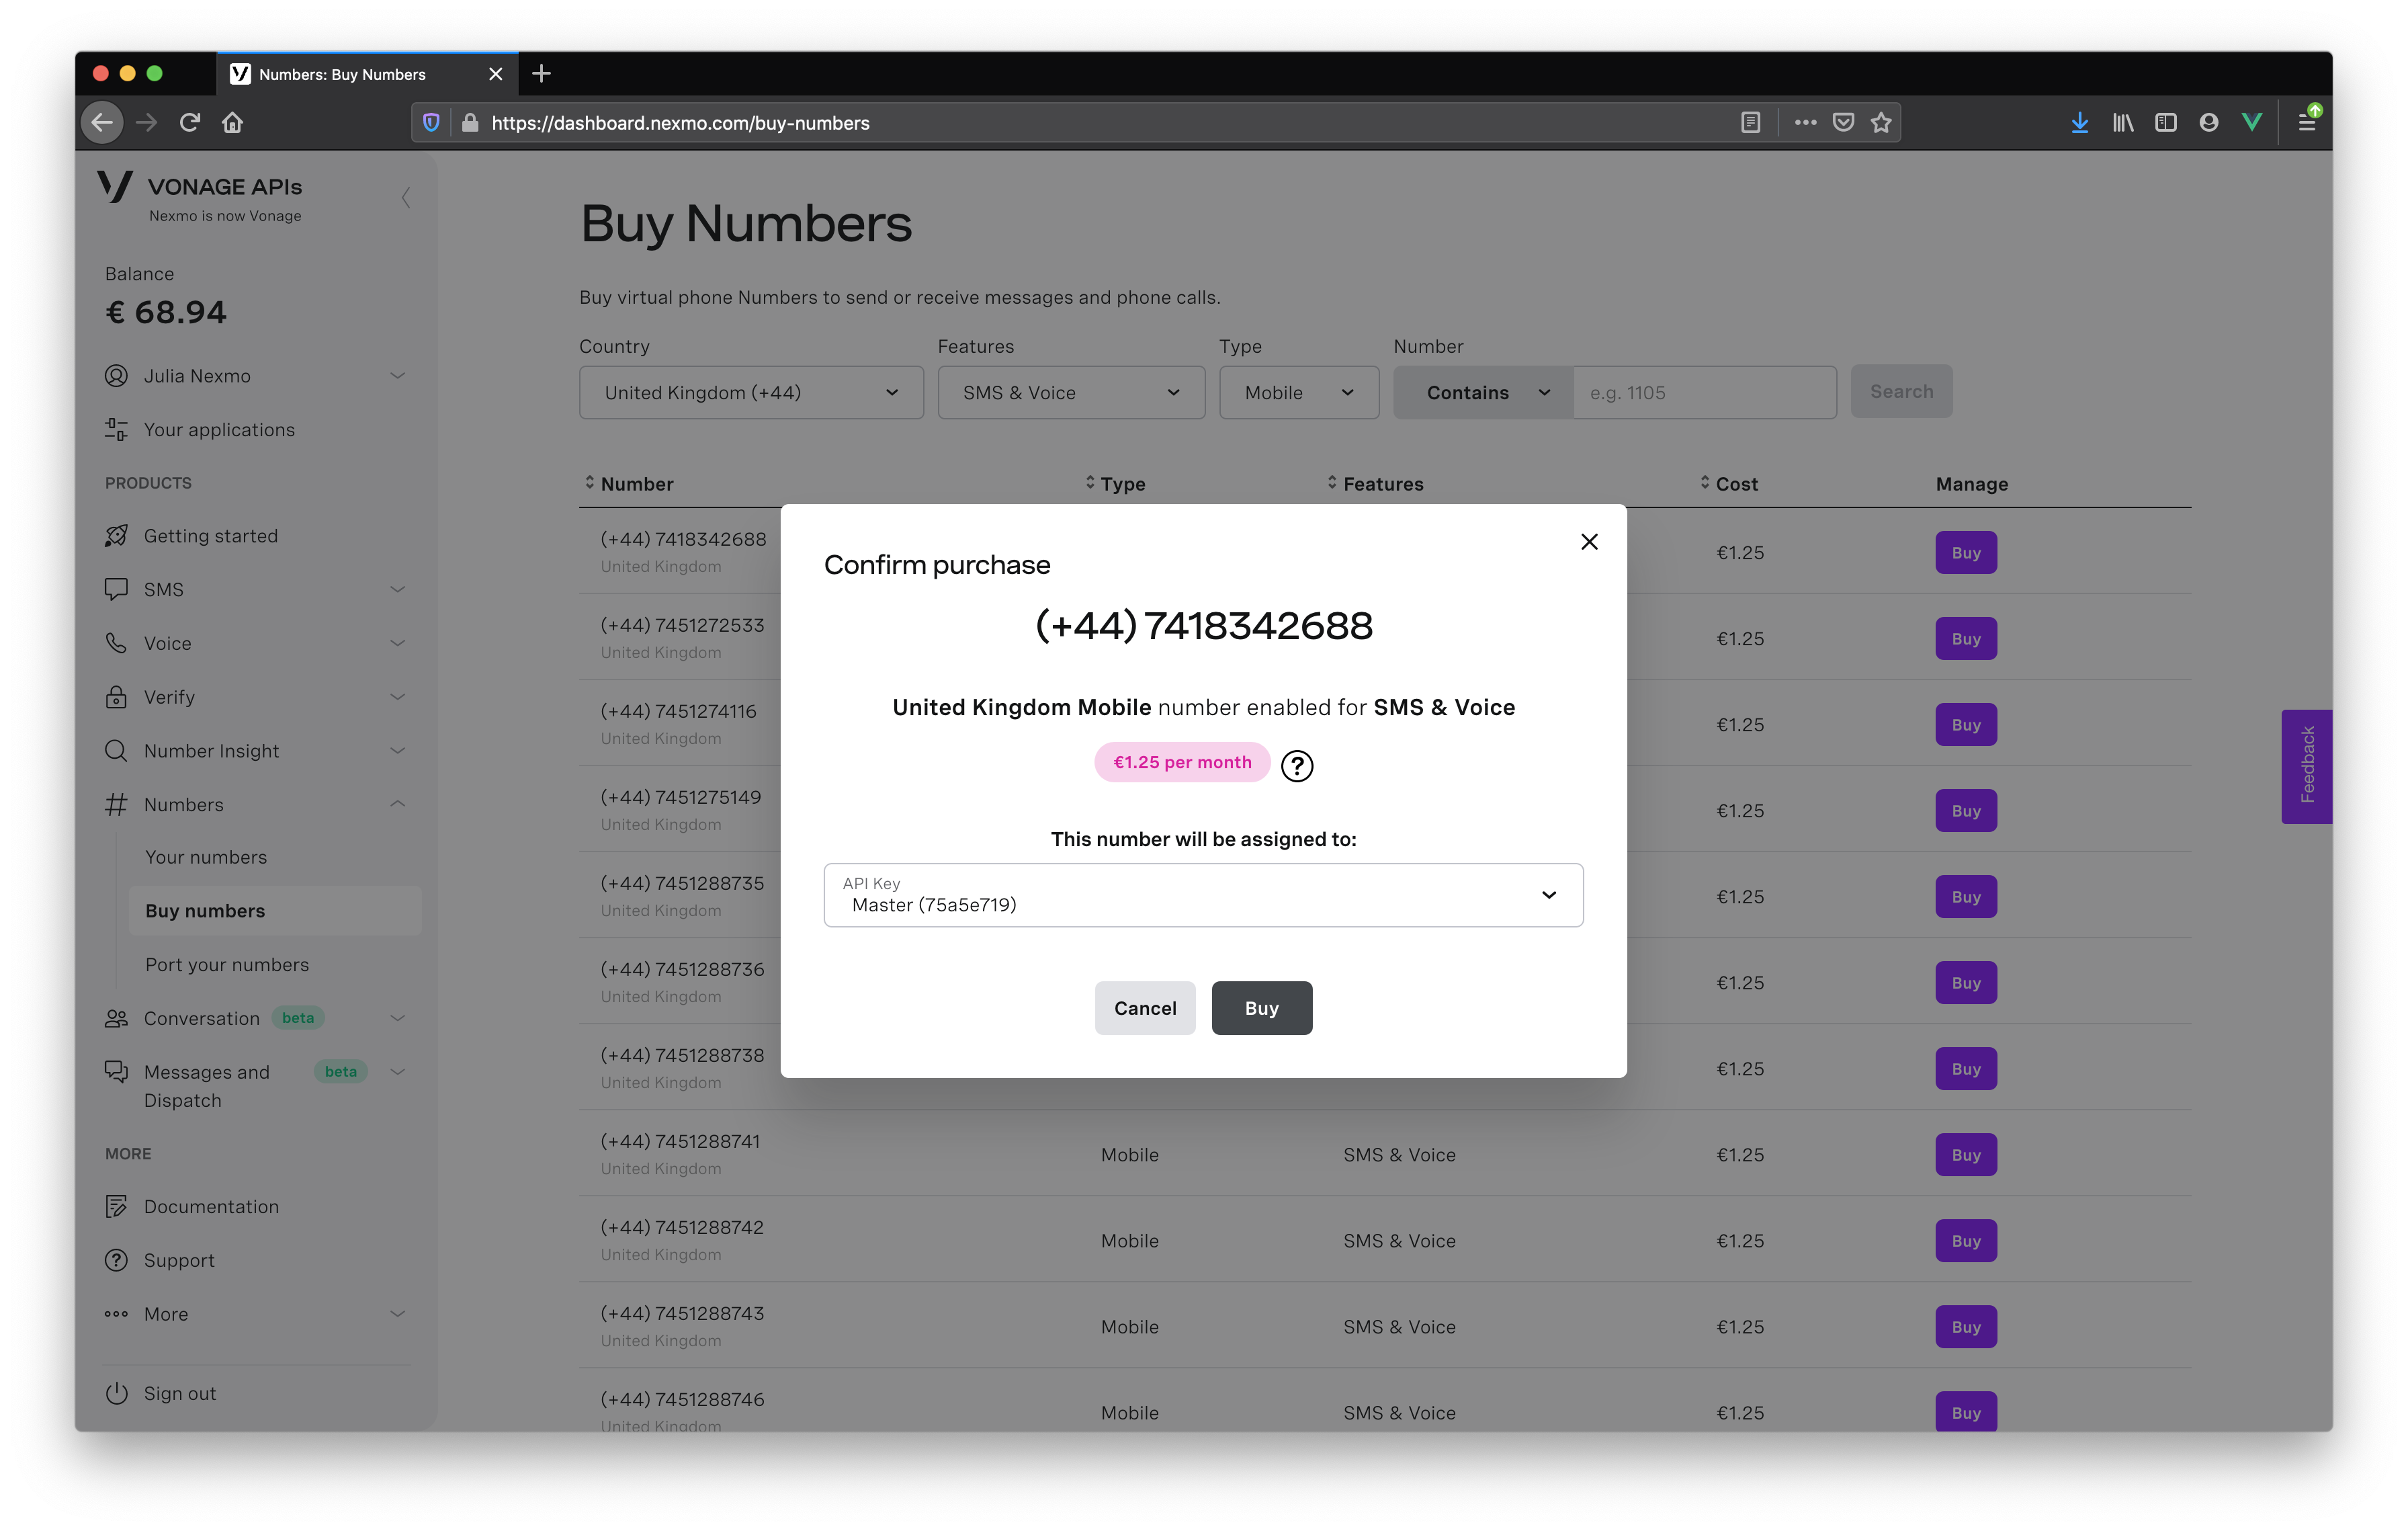
Choose a number and click the Buy button. After a few seconds you will see a popup confirming the number has been assigned to your account.
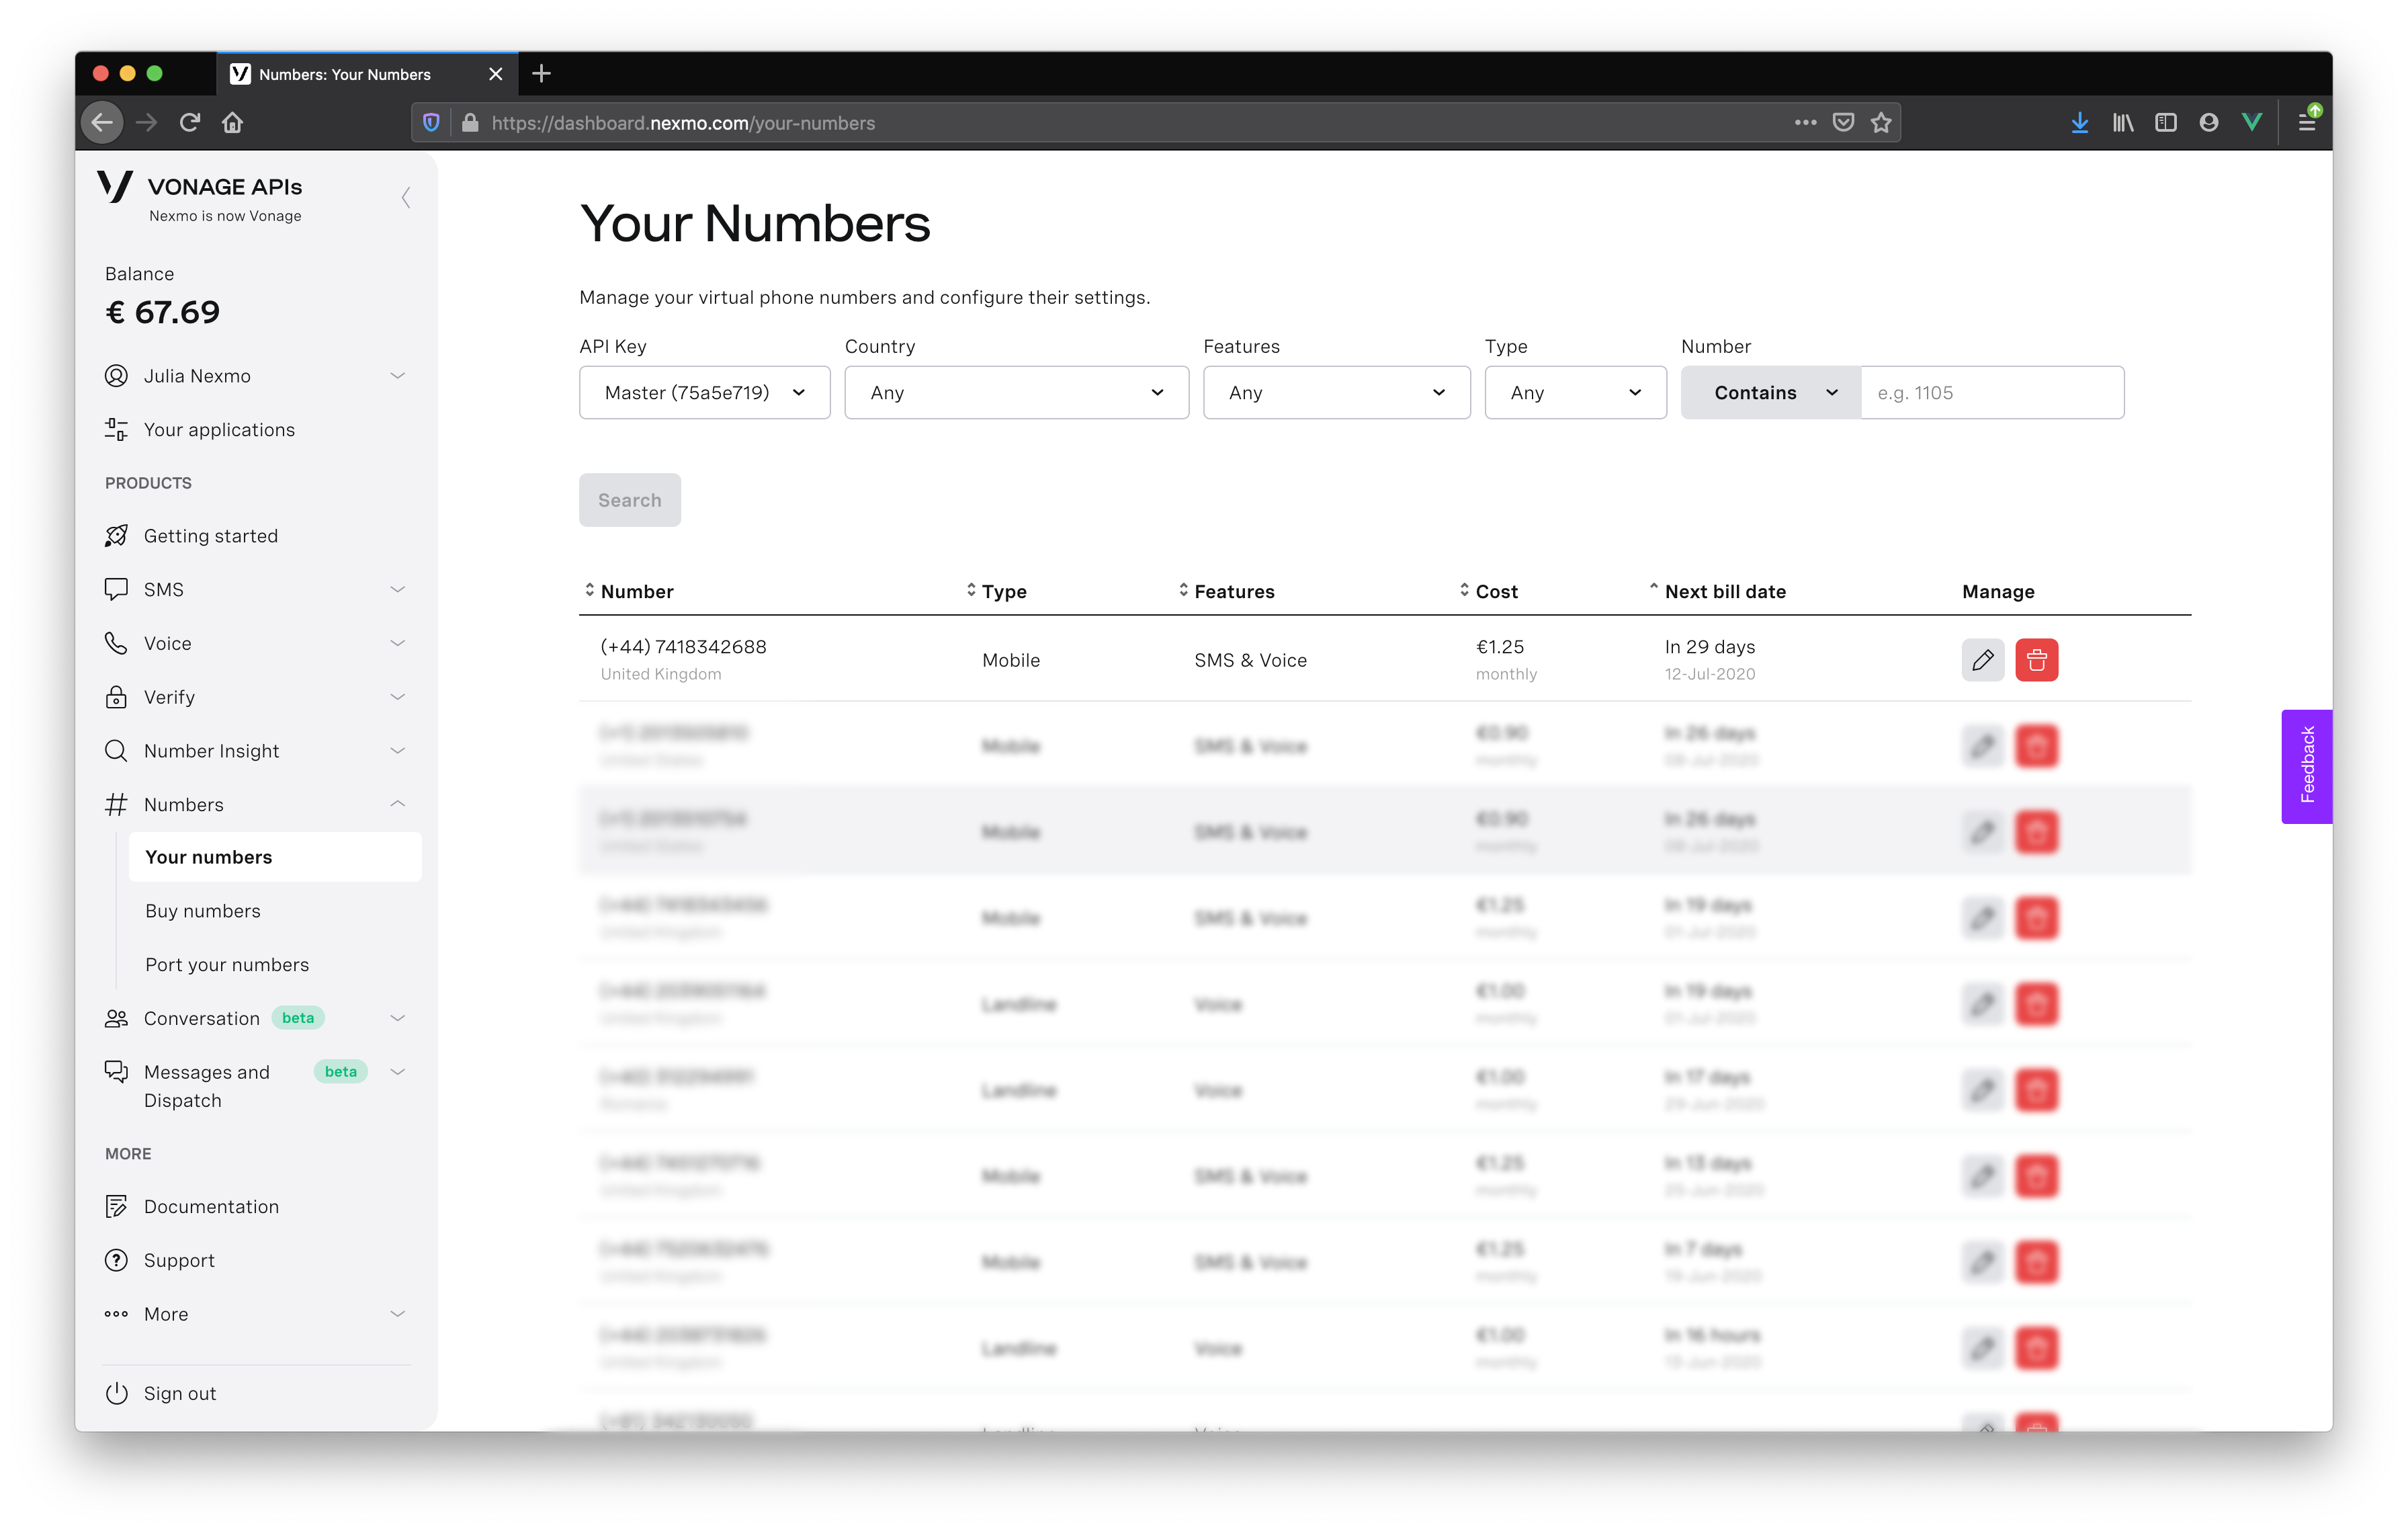
From the right-hand menu select Your Numbers You should then see the number you purchased listed. Click on the pencil icon under Manage
Now we will be presented with an interface to configure where SMSes to this number should be sent.
For SMS we configure the Webhook URL directly, the Nexmo platform will make an HTTP request to this address for each SMS, enter your ngrok URL followed by
/sms. e.g.https://cfbc264bb29b.ngrok.io/sms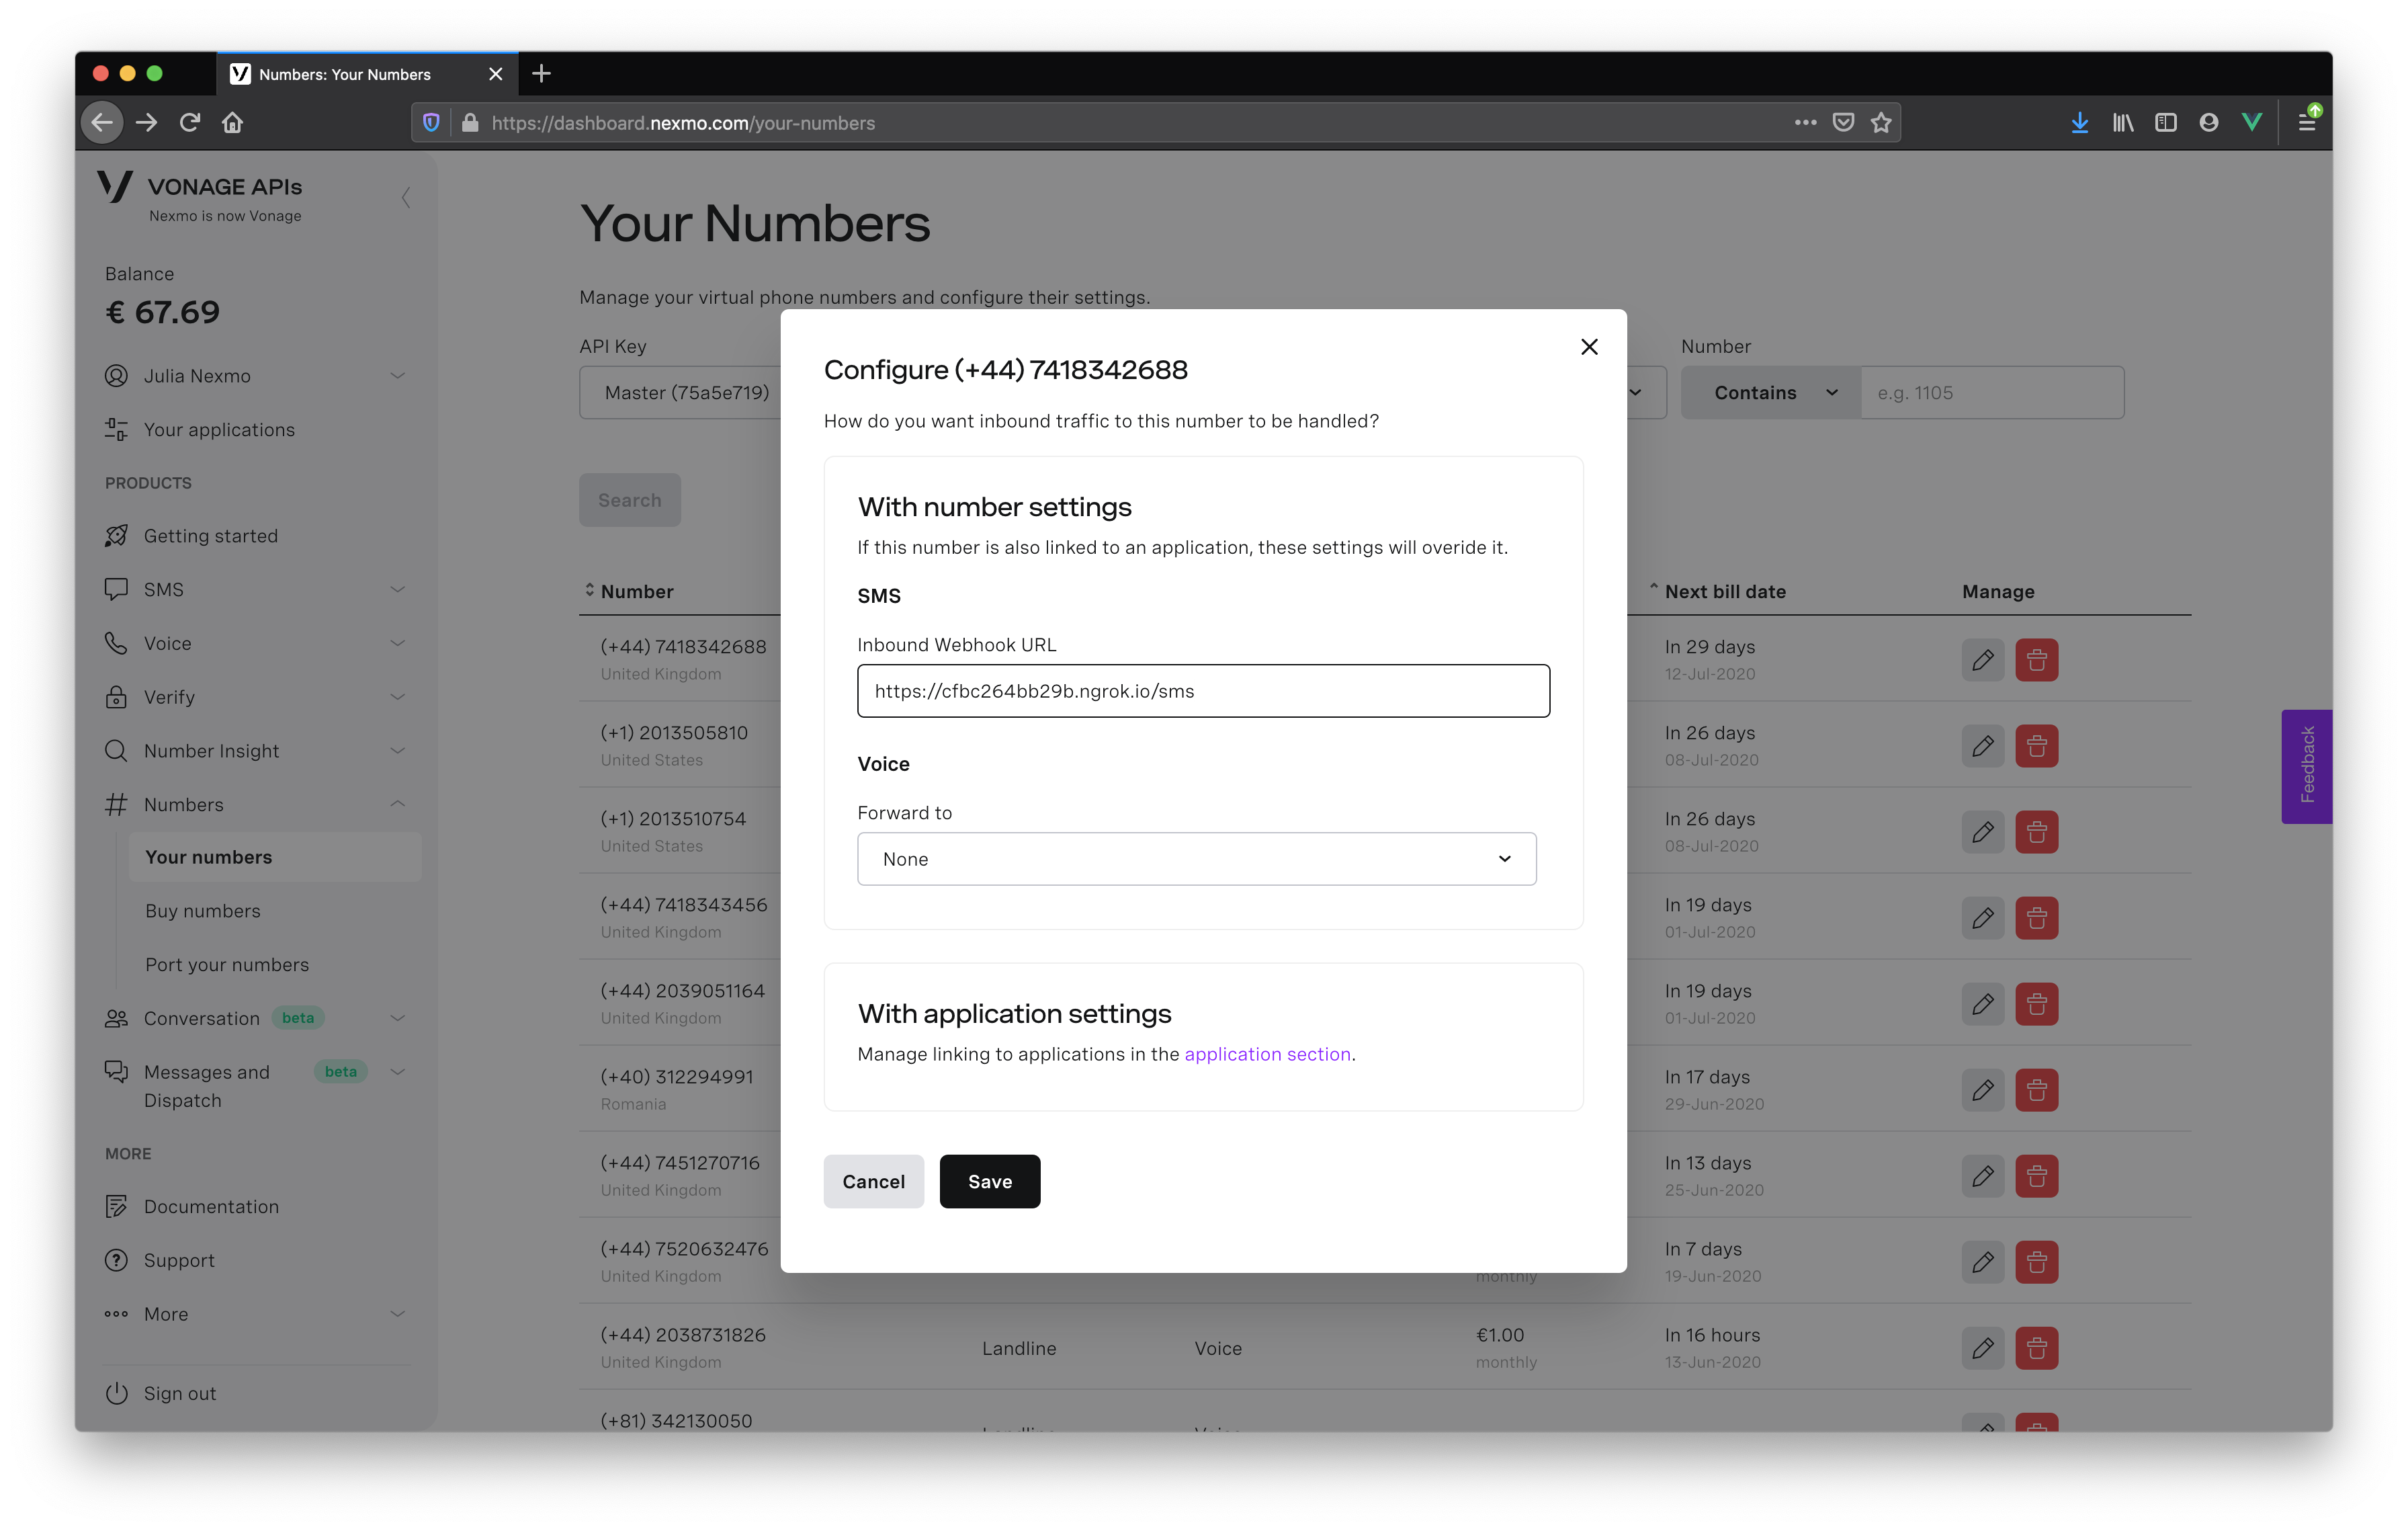
Send an SMS
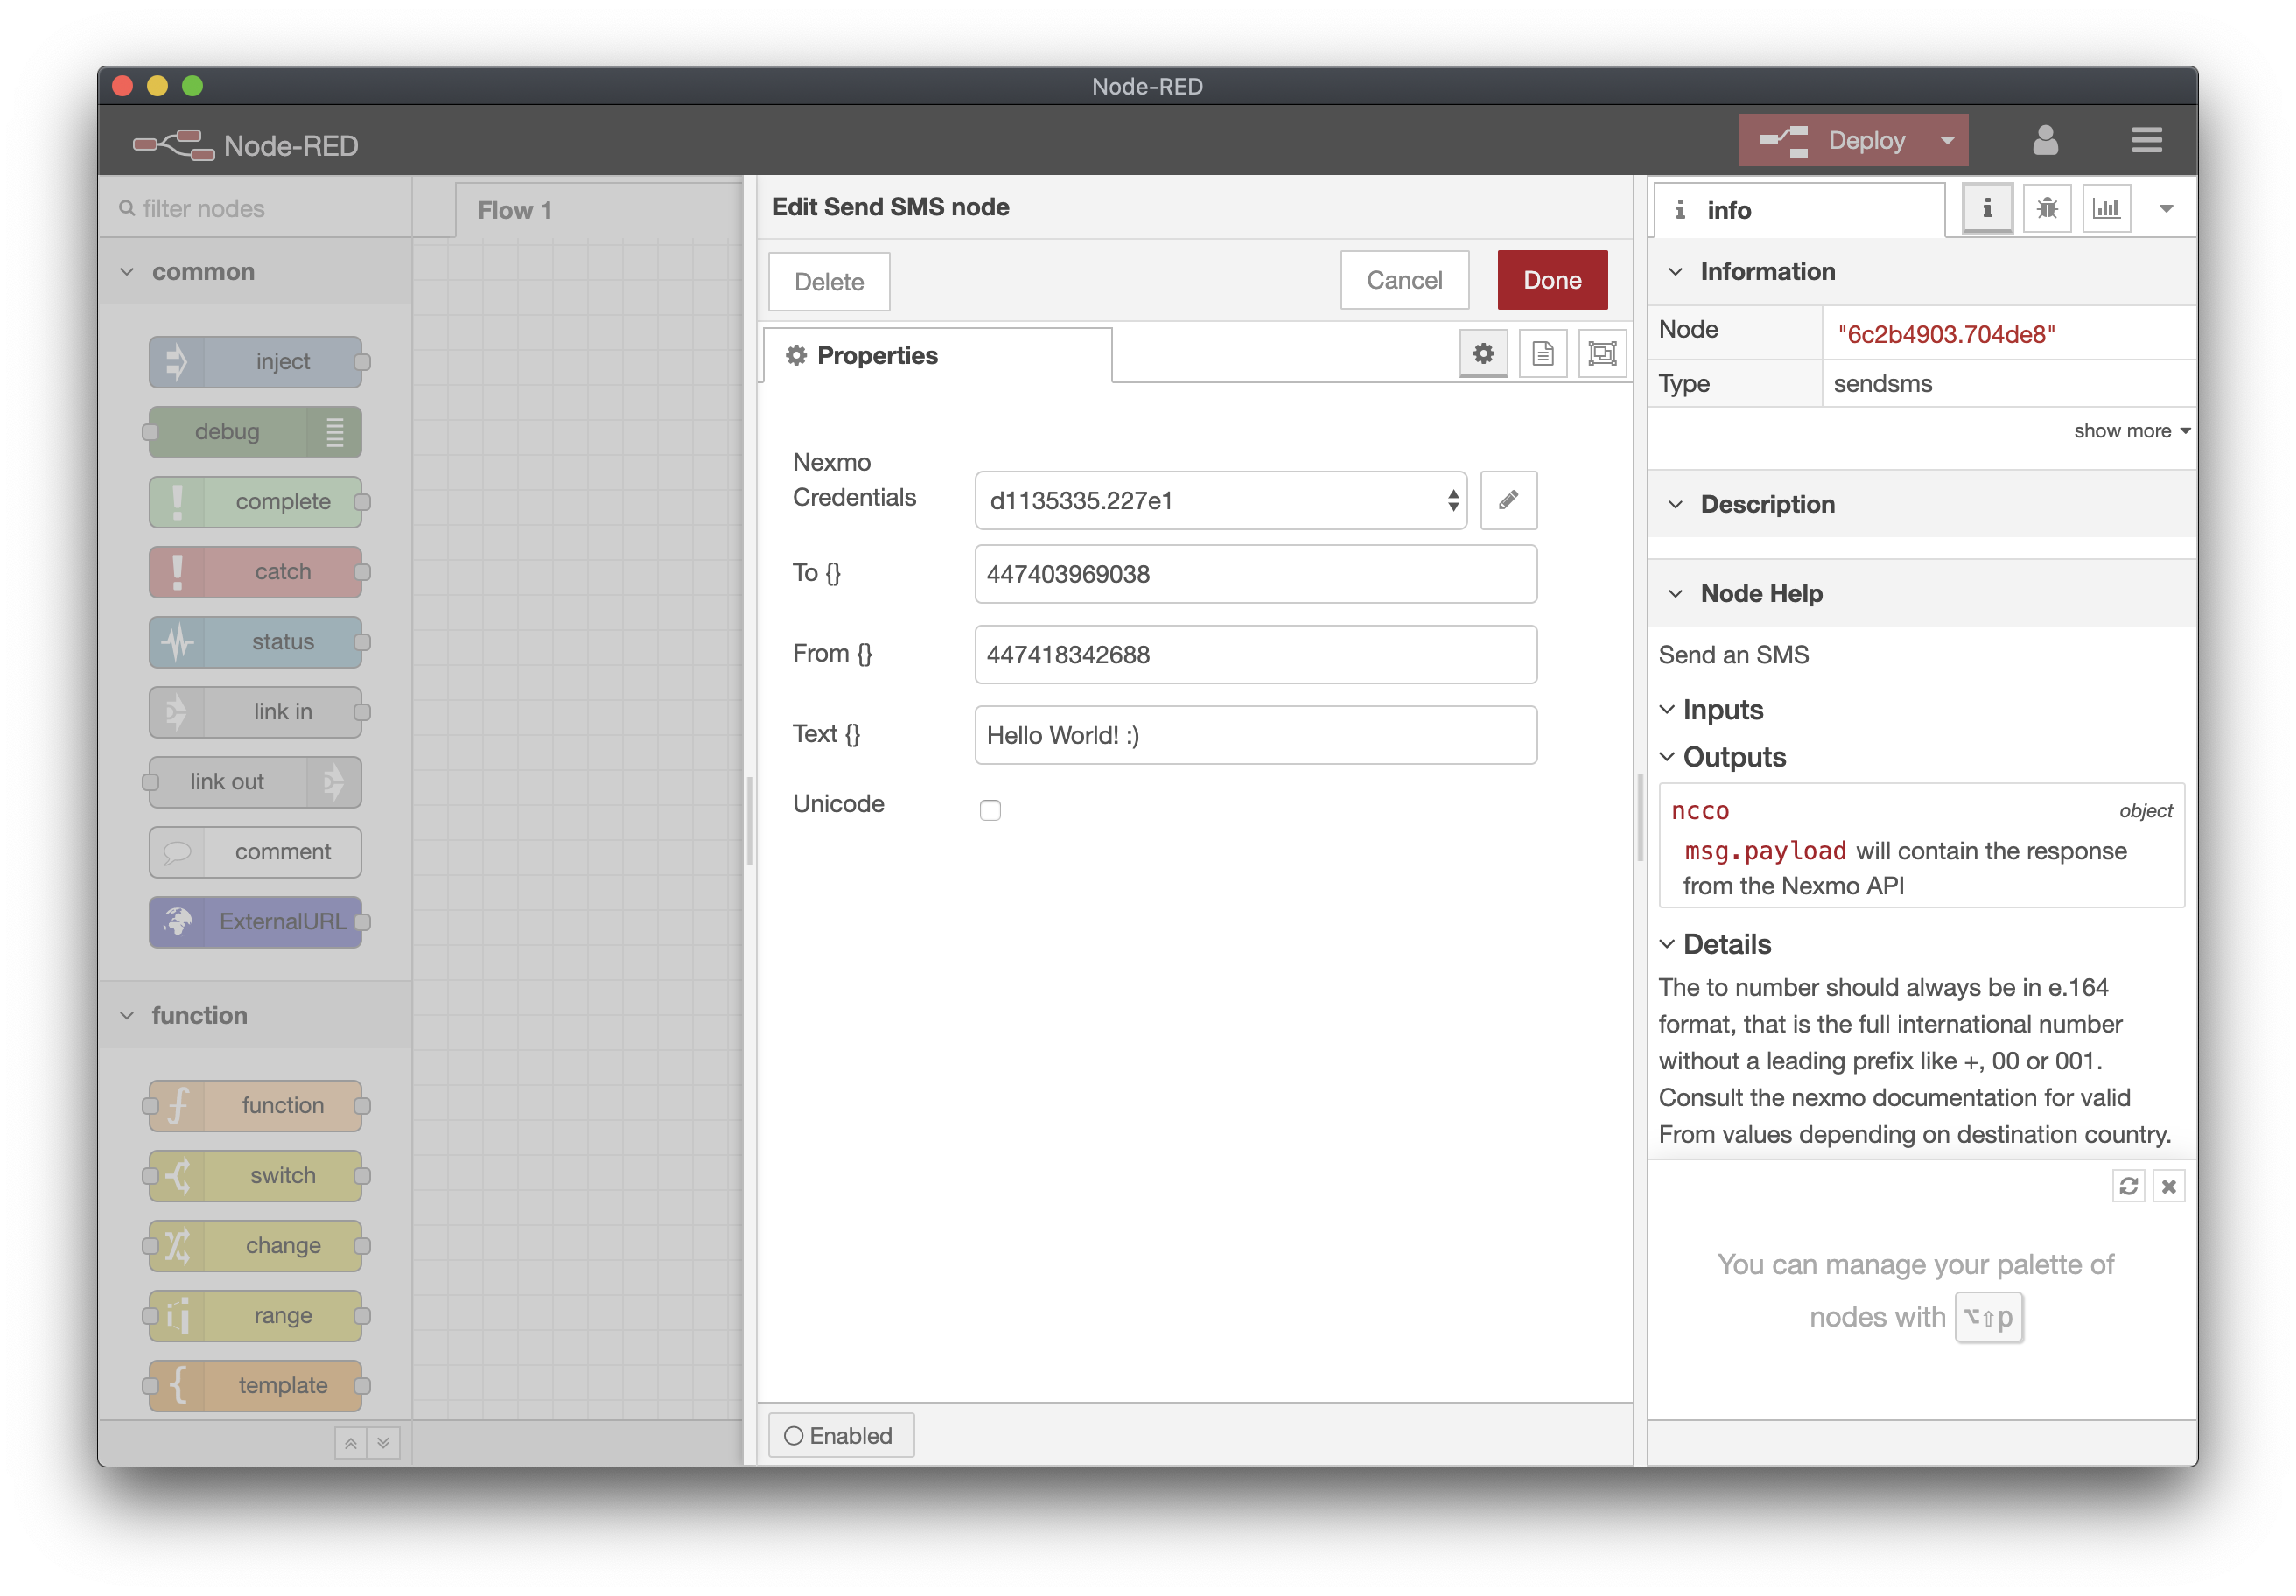
Back in our SMS Node, we can now set some parameters for the outgoing SMS.
There are 3 values to set:
| KEY | DESCRIPTION |
|---|---|
TO |
The number you are sending the SMS to, in e.164 format. |
FROM |
The number or text shown on a handset when it displays your message. You can also set a custom alphanumeric FROM value if this feature is supported in your country. |
TEXT |
The content of your message, maybe Hello World. |
In Vonage context, every phone number should be used in e.164 format: with the country code, but without any other characters or spaces.
For example, the US number (212) 555-1212 should become 12125551212, and the UK number 07000 900 123 would become 447000900123
Now we need something to trigger our Send SMS node and start the flow. The simplest way to do this in NodeRED is to use an Inject node, this will send whatever payload you configure whenever you click the grey button on the left of the node.
For the Send SMS node we don’t really mind what the payload is so just leave that as the default (timestamp).
We also want to log the response from the SMS API to our SendSMS request, for this we will use the Debug node which will log the msg.payload to the debug panel on the right of the editor.
You flow should now look like this, remember to click Deploy to save your flow.
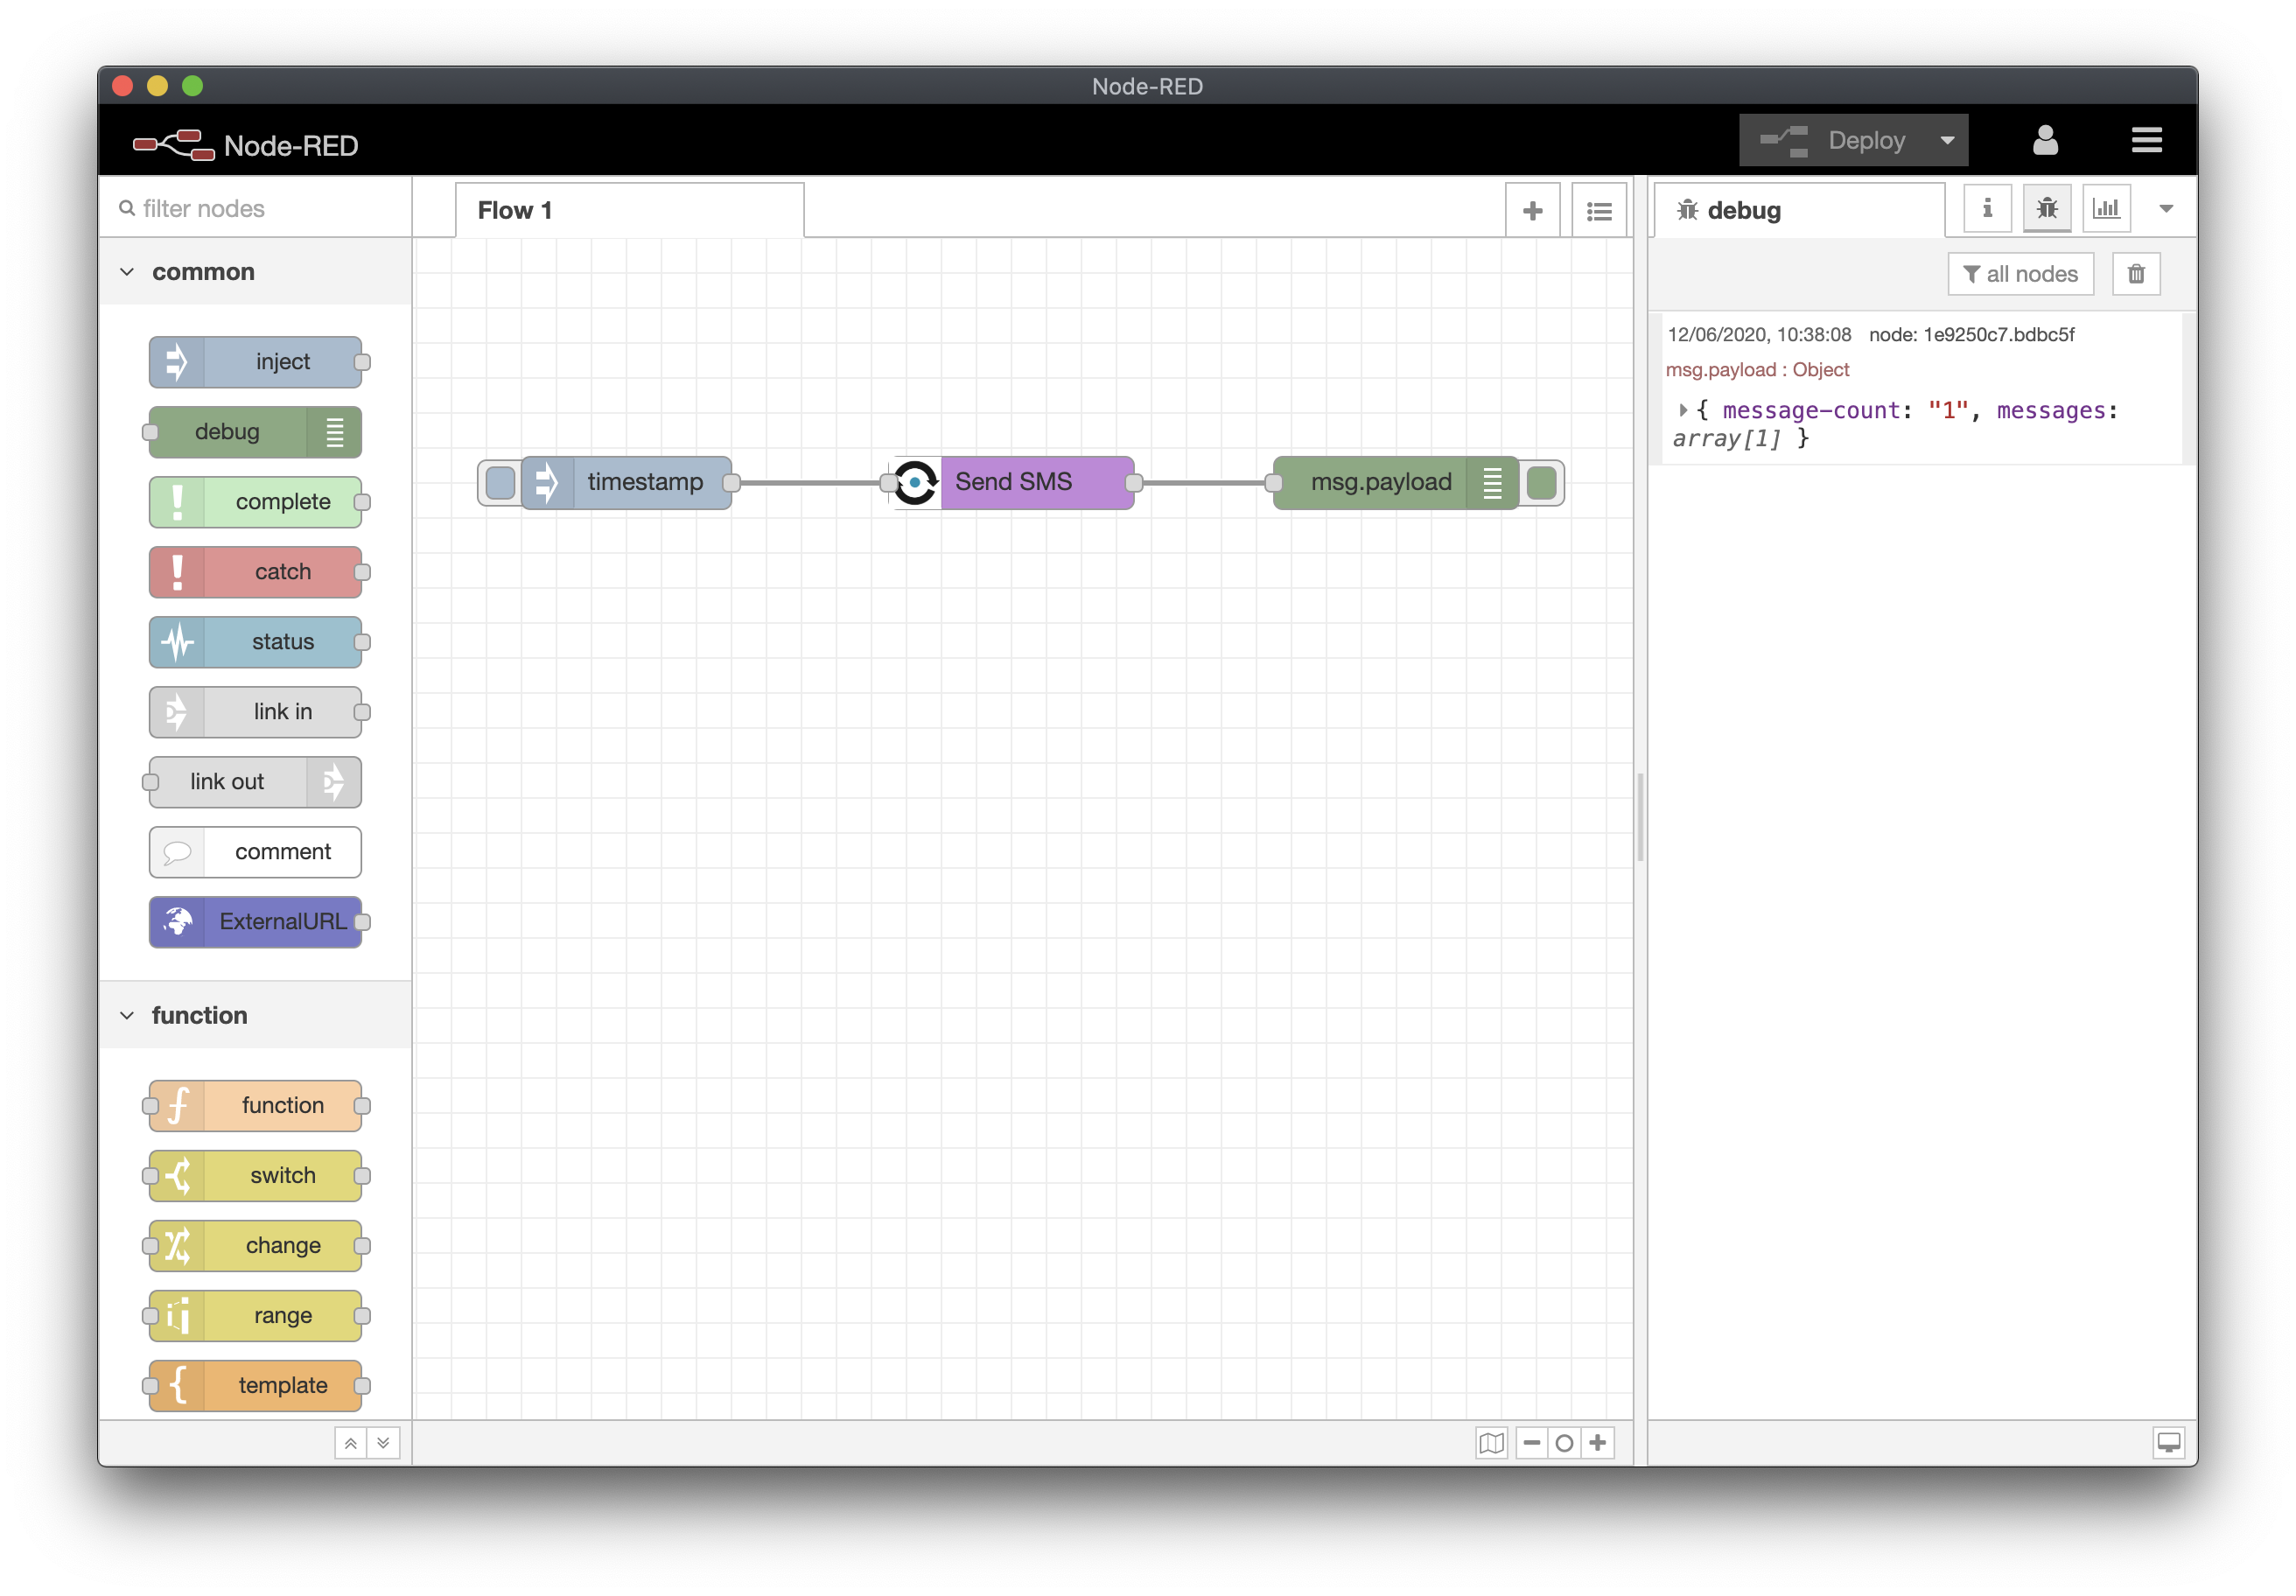
You can now click the grey button on the inject node to send yourself an SMS 🙌
Handling an Incoming SMS
SMS messages sent to your virtual number are delivered to your webhook as a HTTP GET requests (you can change to POST in the dashboard), To handle this we are going to create a simple NodeRED Flow.
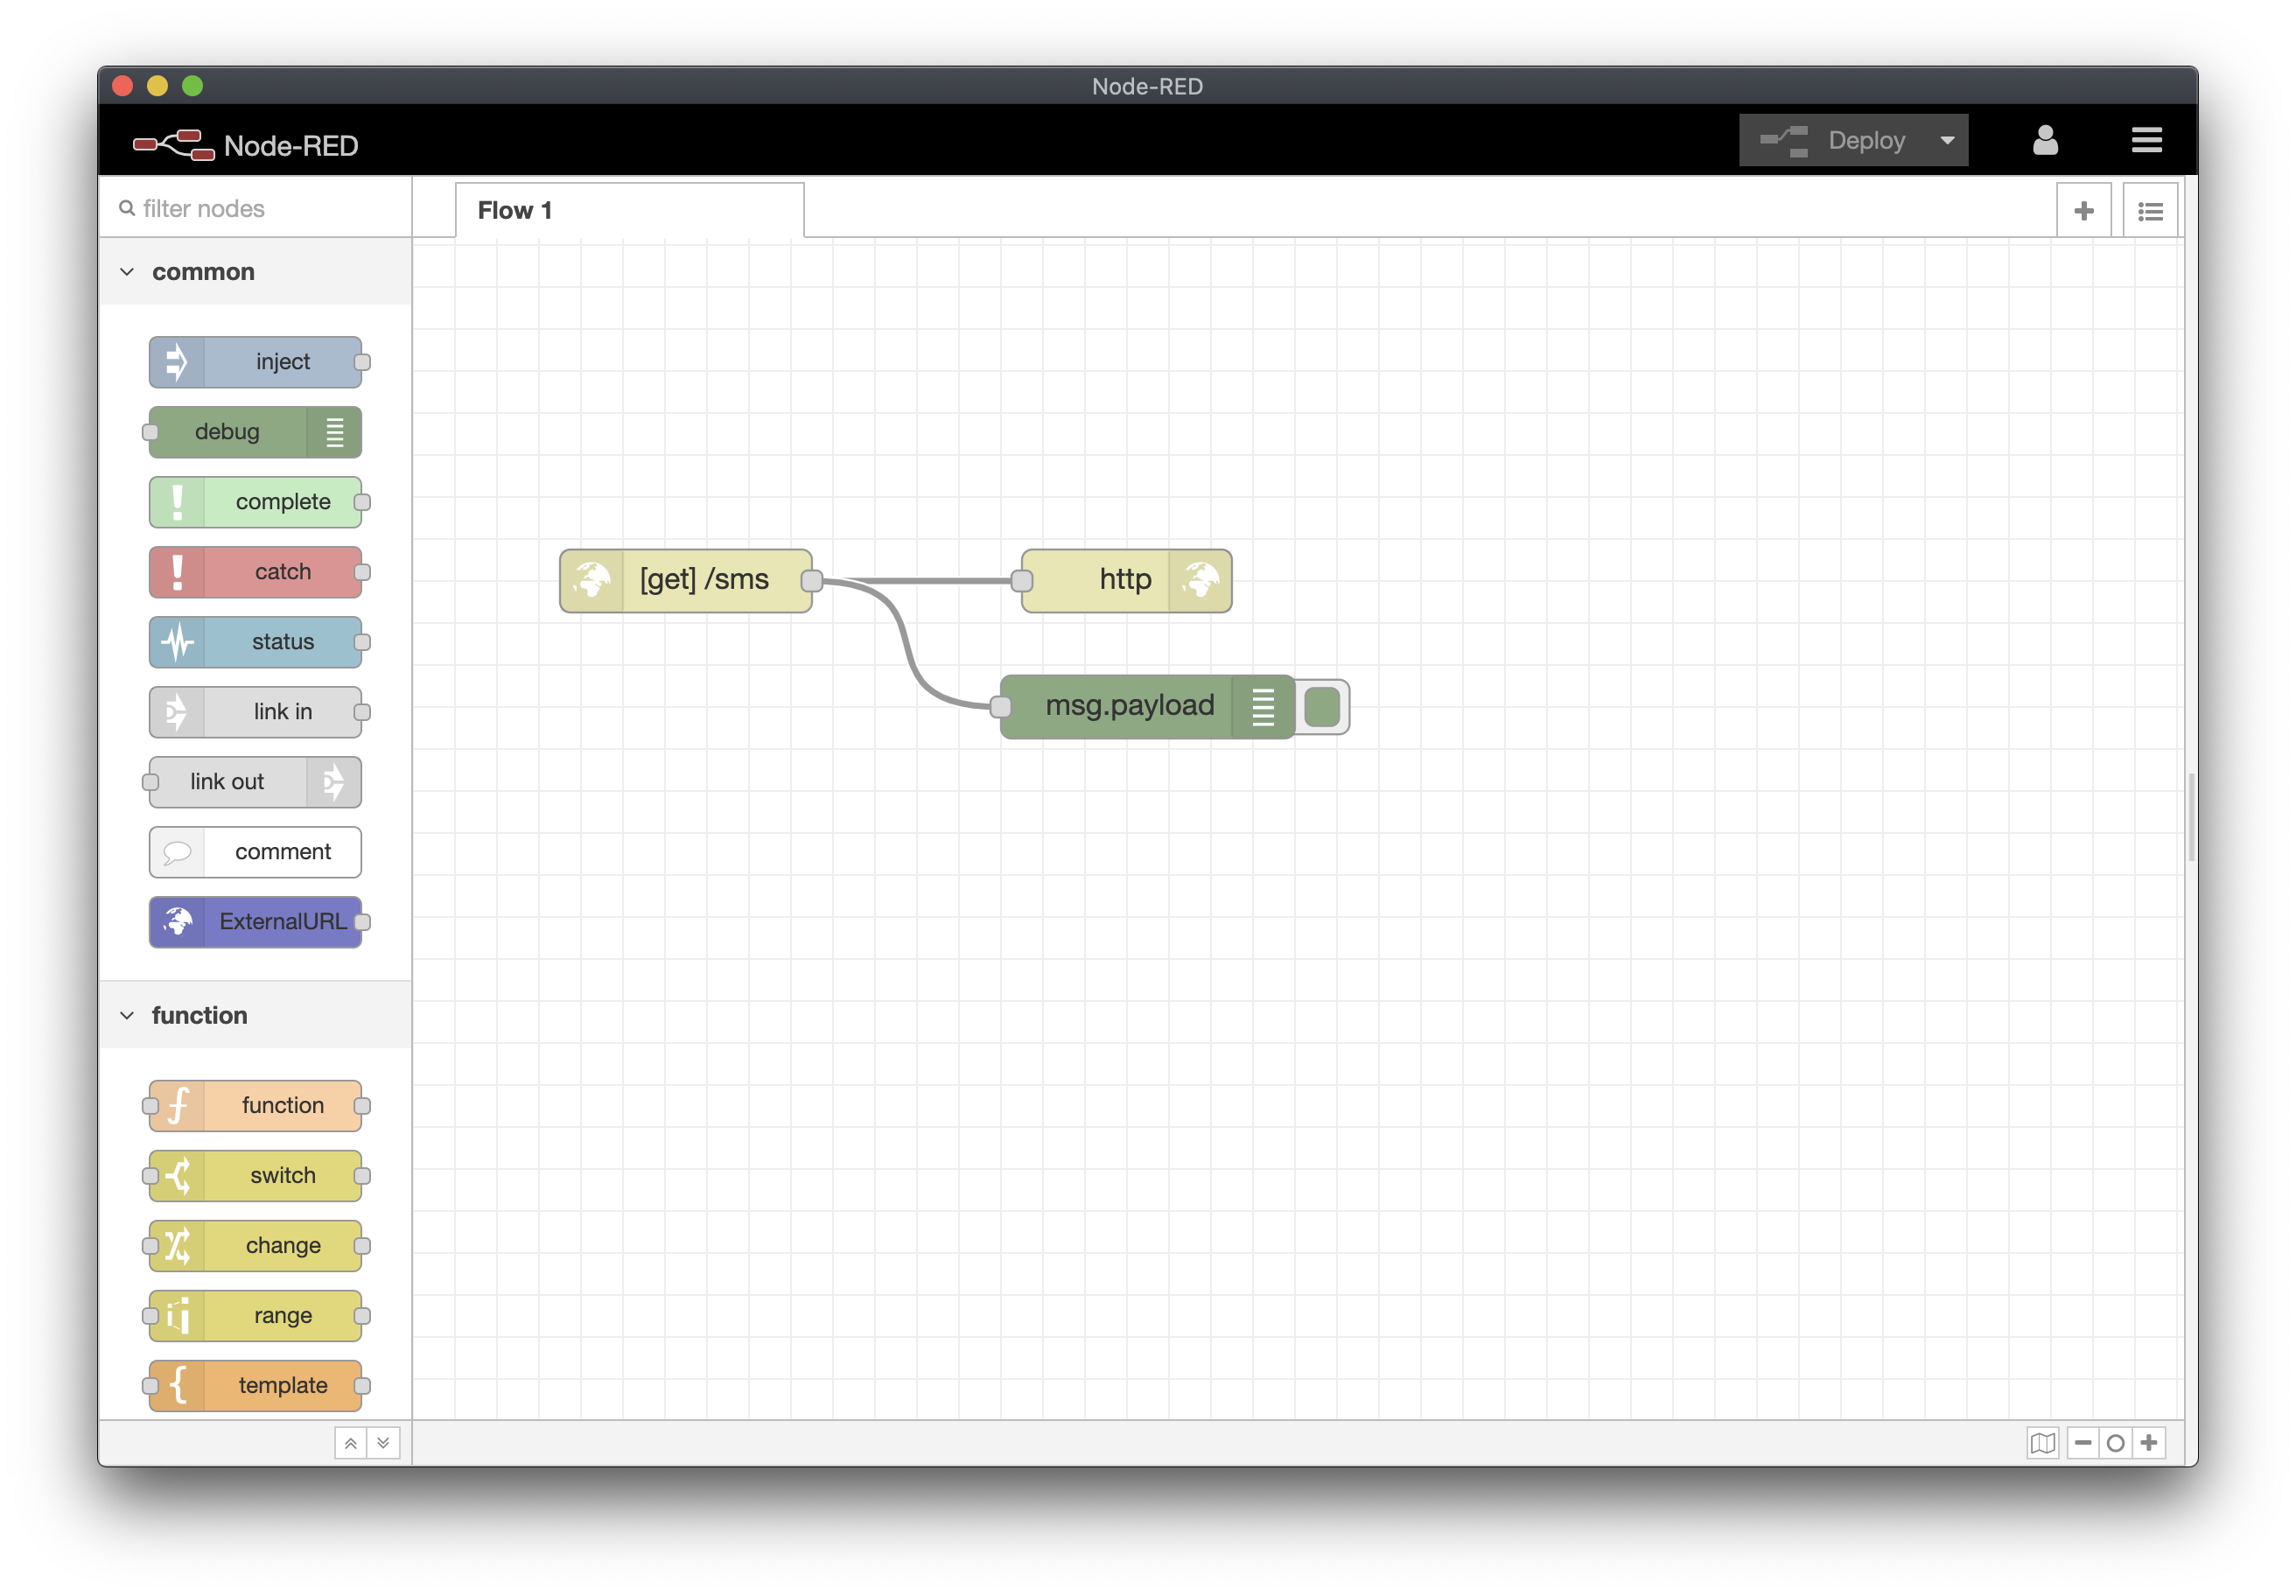
From the network section of the palette drag an http in node onto your canvas. Double click to open the properties, then make sure that the Method is set to GET.
In the URL box enter
/smsthis corresponds to the address we configured in the dashboard for your phone number earlier.Connect an http response node from the network section of the palette to your original http in input node.
HTTP Input nodes need a corresponding output node, otherwise the HTTP request won’t receive a response. For SMS Webhooks Nexmo doesn’t particularly care about the content of the response so long as it returns a success code.
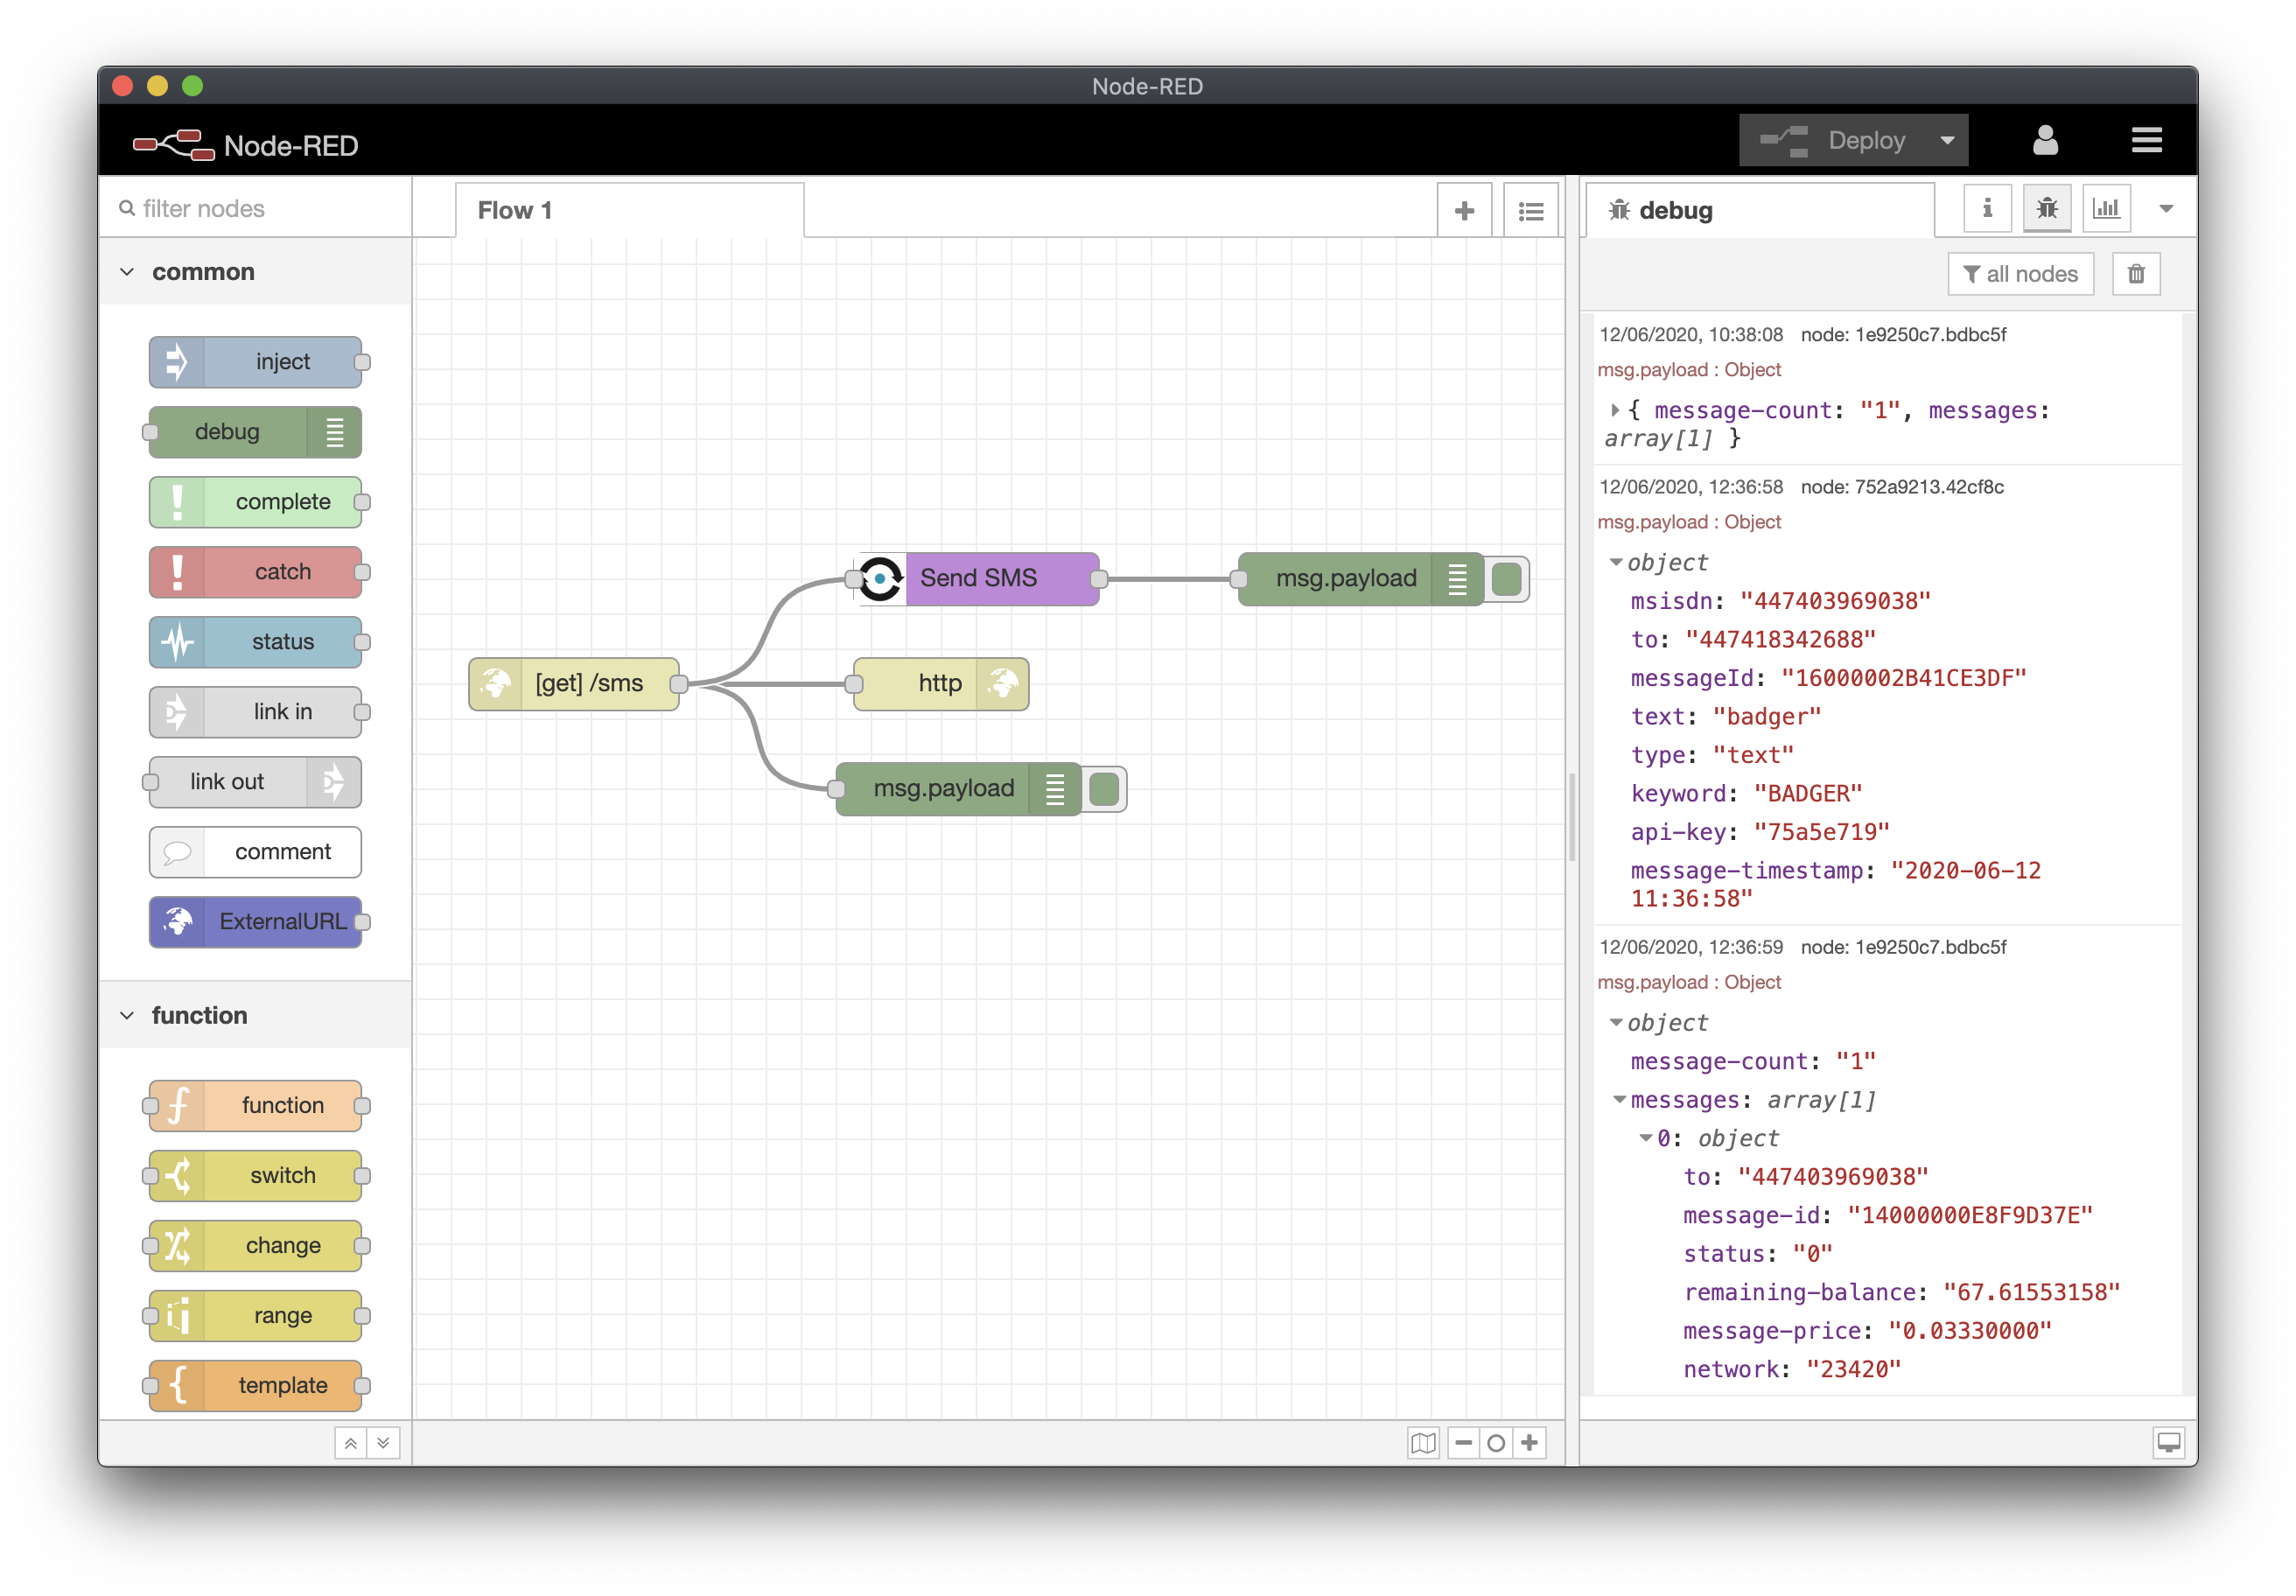
Add a debug node from the common section and connect it to the http in. This enables us to inspect the contents of the webhook, such as the SMS message and the sender details. Your flow should look like this:
Click the red Deploy button in the top left to make this flow live. The deploy button makes your canvas changes take effect so you’ll need to do this often as you work through these flows.
Now send an SMS to your virtual number from your phone. In a few seconds you should see the details of the message in the debug window on the right. You may need to click the Bug icon to display this.
Sending an SMS in Response
SMS doesn’t really have the concept of replies, however we can send a new SMS in response to an incoming message, using the sender details.
From the nexmo section of the pallette drag a Send SMS node onto your canvas and connect the http input node to the Send SMS one.
Open the properties for the Send SMS node, select your API key as the Nexmo Credentials.
You will notice that next to the To, From and Text fields there are {} symbols, this is to indicate that these fields support templating. You can either enter static values in these fields or use dynamic values from previous messages or other parts of your NodeRED flow.
In the previous section you viewed the details of the incoming SMS in your debug window, this contained the msg.payload object with its own properties. We will use these to setup our response message:
- msisdn was the number that sent the message to your application
- to is your virtual number
- text contains the contents of the message.
In the To field for Send SMS enter
{{msg.payload.msisdn}}so that we use the sender of the original message as our recipient in the response.In the From field enter
{{msg.payload.to}}so that the response appears to come from the same number that the first message was sent to.In Text enter
You said {{msg.payload.text}}. You will see here that we are using a combination of our own static text and the contents of the original message for our response, this is the concept of templating.Click the Done button, then Deploy.
If you now send another message to your Vonage number you should get back a message in response.
That`s the basics of SMS messaging with Vonage and NodeRED